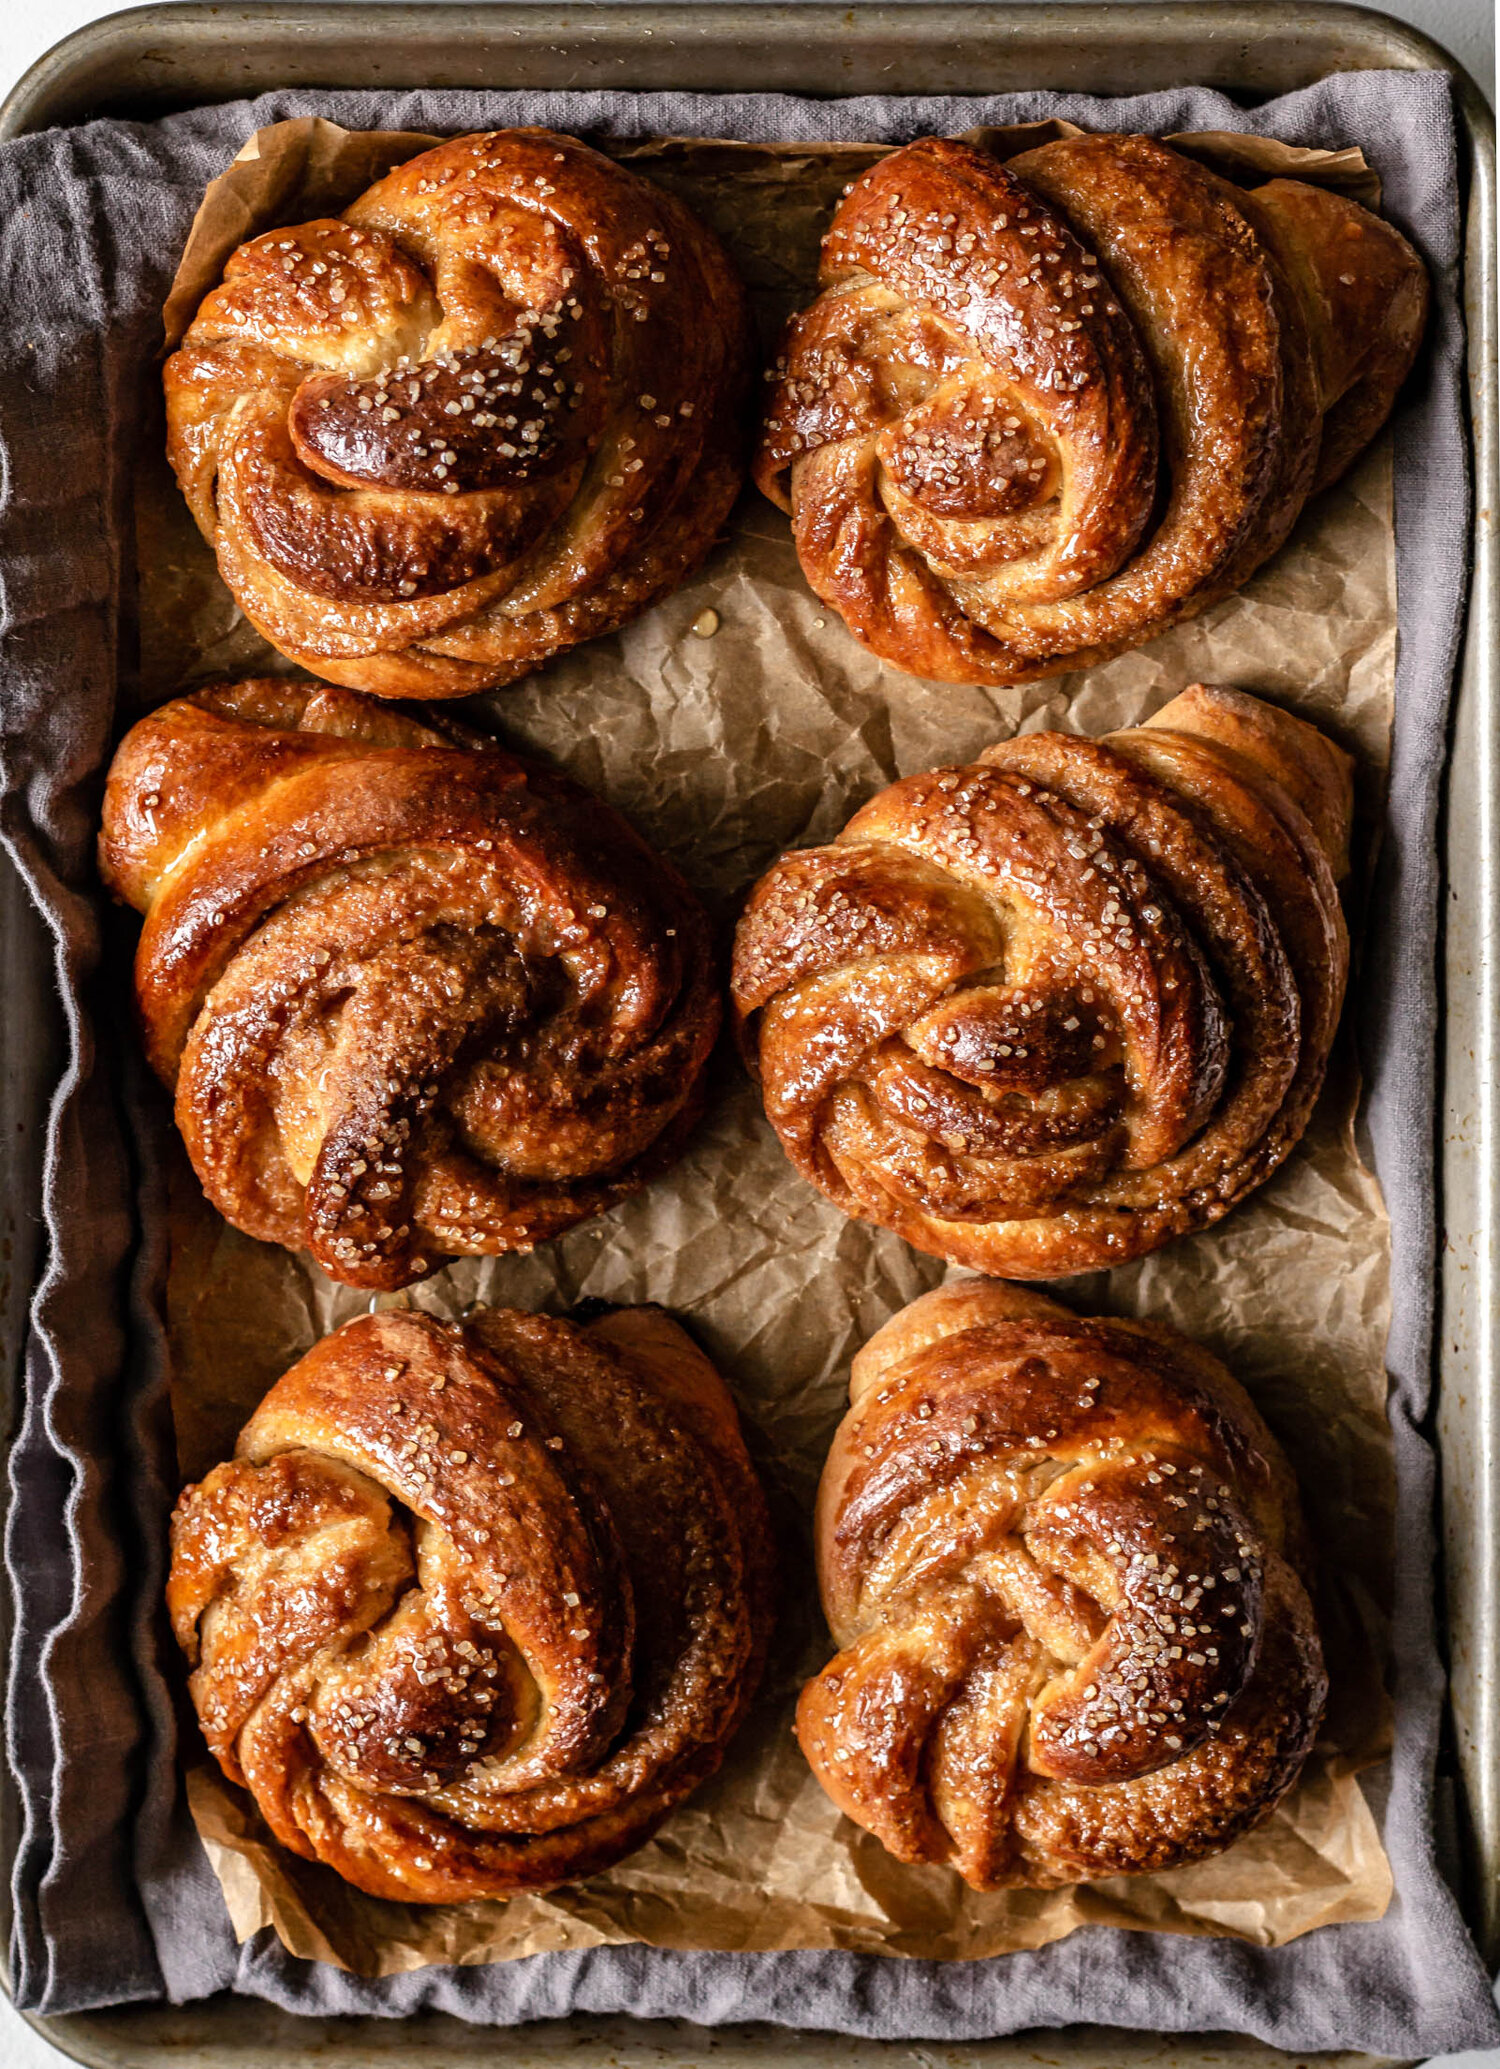
Pumpkin Brioche Swirls

The last few weeks have been a little heavy content wise here on the blog. Lots of multi-step recipes, doughs that need hours of proofing, cakes that need layering. And sometimes, I wonder to myself if it’s all too much-if maybe I will get more Instagram likes or more blog traffic if I simplify my work, make it easier or quicker. But the more I think about it, the more I realize that sort of work doesn’t bring me joy. I was a ballerina for 16 years, spending countless hours, multiple evenings a week taking class after class and it was where I felt the most my self. For me, both pastry and ballet fall into a sweet spot, where extreme technicality and precision sync up with the creative. Where feelings and art are expressed by piecing together something beautiful out of nothing. So on days when I ask myself what I want this blog to be, that’s it. The food media industry is saturated with everything quick and easy. Our Instagram and Pinterest feeds are bursting with brightly lit, minute-long videos aimed to help you get dinner on the table as quickly as possible. And don’t get me wrong, those resources are wonderful and helpful, but I don’t think we need another one and that’s not where I most feel myself. I want this blog to be a place where creativity and exactitude collide to create something new and satisfying to the body and the soul. I want a space that provides careful instruction and guidance, but that encourages you to step out of your comfort zone and challenge yourself. For me, those are the moments worth celebrating and food worth investing in.

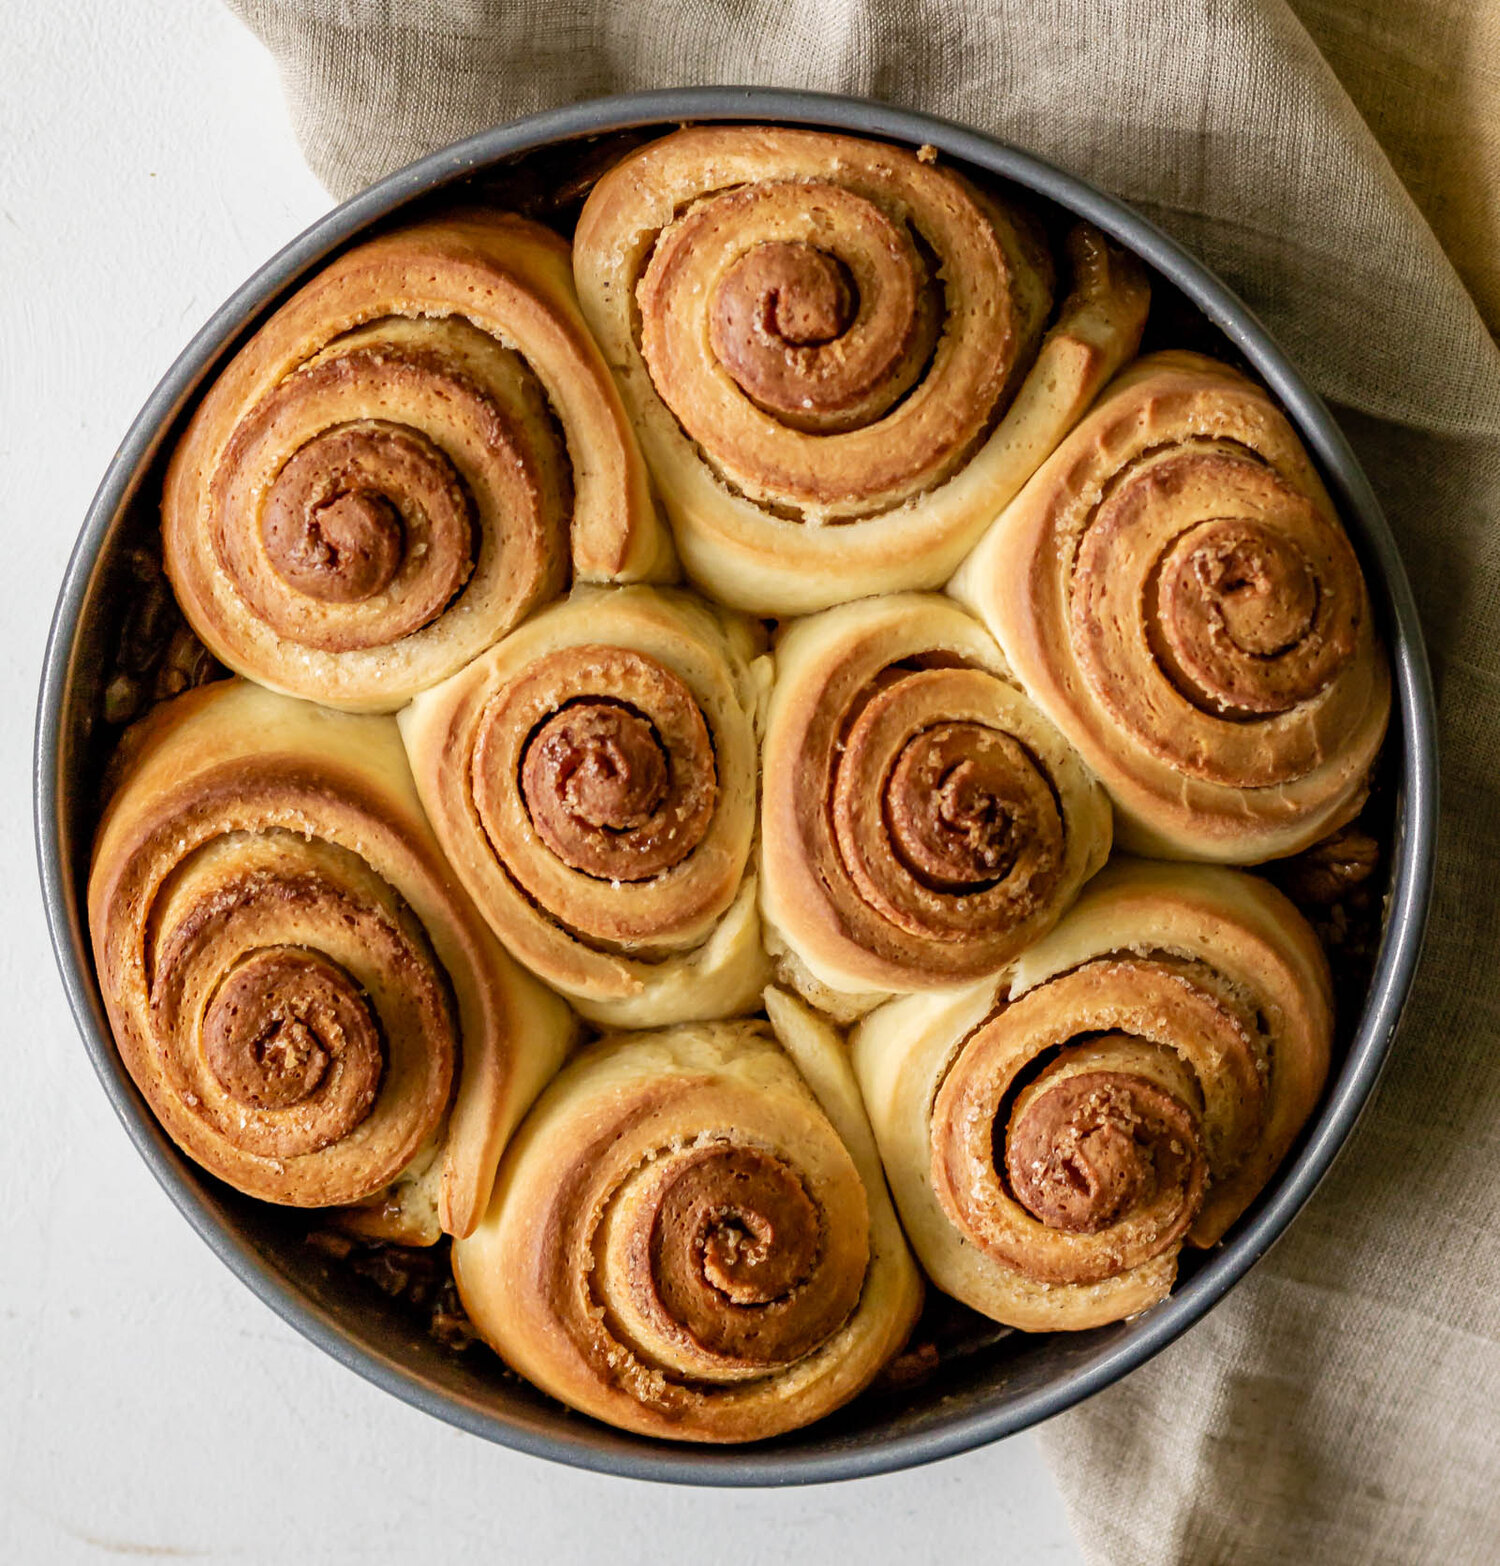
A couple weeks back, I shared a Chocolate Tahini Brioche Babka and some brioche basics. This recipe is meant to go hand in hand with that recipe and it uses the same brioche recipe. If you’re looking for a weekend project, these are your go-to’s. Making one batch of the brioche will give you enough dough for one babka and 12 pumpkin swirls. Or you can use the entire batch and make 24 swirls…or two babkas…or a baby babka and 18 swirls…really, anything goes. This twist technique is loosely based on the show-stopping cinnamon roll beauties coming out of Circus Bakery in Paris and I’ve included an article with step-by-step shaping photos in the recipe itself.

So maybe long rise times and lots of dough shaping isn’t necessarily your thing, that’s okay. But I hope that after stopping by my blog, you feel a little bit challenged and empowered to try something a little out of your comfort zone and who knows, you may find that you love it as much as I do. At the very least, I hope that you will be left with a sense of accomplishment and a few very delicious pumpkin swirls.

PumpkinSwirls3.jpg

Pumpkin Brioche Swirls

Yield: 12 knots 

Ingredients: 

750 brioche dough

1/2 cup (150 g) canned pumpkin

50 g brown sugar

1 T cinnamon

1/2 tsp pumpkin pie spice 

For the egg wash: 

1 egg yolk

1 egg

1-2 T water

For the glaze: 

1 cup powdered sugar

1 tsp vanilla extract

Pinch of salt

About 1/4 cup heavy cream

Procedure:

  1. Remove dough from the refrigerator and allow to come to room temperature slightly. It should be cool, but not cold.

  2. In a small bowl, stir together pumpkin, brown sugar, cinnamon, and pumpkin pie spice. Set aside.

  3. On a floured surface, roll dough into a 12x16” rectangle. Use an offset spatula to spread the pumpkin mixture onto 2/3 of the dough. Fold the third of dough without pumpkin spread up and over onto the pumpkin dough. Fold the remaining third over the top, like you are folding a letter. (If you are confused about the folding/shaping process, these are inspired by the world-renown cinnamon rolls at Circus Bakery in Paris. You can find step by step shaping pictures here.)

  4. Lightly roll your dough envelope to 1/4” thickness. Use a sharp knife or a pastry wheel to slice into 12 equal strips.

  5. Working quickly, roll the ends of each strip to create spiral. Wrap the spiraled dough strip around your hand twice and tuck the end through the center to form a knot-shape. Place on a parchment-lined baking sheet.

  6. When all of your rolls are formed and spread out on the baking sheet, cover with plastic wrap or a kitchen towel and let proof until doubled in size, about 45 minutes.

  7. When you are ready to bake, preheat the oven to 350 degrees. Combine egg, egg yolk, and water in a small bowl to make egg wash. When the rolls have risen, use a pastry brush to lightly coat with egg wash. Bake for 20-25 minutes, until golden brown. Let cool for 5-10 minutes on the pan, then transfer to a wire cooling rack.

  8. To make the glaze, whisk together powdered sugar, vanilla extract, and 2 tablespoons of heavy cream. Add the last 2 tablespoons heavy cream, a little at a time, until you reach your desired consistency. You may not use all of the cream.

  9. Drizzle warm pastries with glaze and enjoy immediately.

Chocolate Tahini Brioche Babka

You’ve probably heard about Marie Antoinette and her infamous “let them eat cake” phrase. As the story goes, Marie Antoinette, who was the Queen of France during the French Revolution, was informed that her poorer subjects were starving and had no bread to eat and she callously replied with the French phrase “Qu’ils mangent de la brioche!” which is more correctly translated to “Let them eat brioche!” This response didn’t work out so well for Marie, as it was used to illustrate her lack of understanding of the plight of the everyday man and she wasn’t very well-liked by her constituents. Turns out, historians haven’t actually been able to confirm that Marie Antoinette actually spoke those words (you can read more here if you’re a history nerd like me), but regardless, the phrase stuck.

But what exactly is brioche and how does it differ from other types of breads? Brioche falls into the “enriched dough” category because in addition to the basics (flour, water, yeast, salt) it contains a much higher fat content through the use of eggs, milk, and lots of butter (traditionally about 60 percent of the weight of the flour). Brioche is typically baked in loaves or cute little rolls, but it’s also a great base dough and can be filled or twirled any way that you like. There are two important things to remember when making brioche. First, the temperature of the butter matters. Butter should be soft and pliable, and around the same temperature as the dough. When you add it piece by piece, it will work into the dough and if the butter is too cold you will be left with chunks flaked throughout your brioche. If the butter is too warm, though, it will begin to melt and seep out of the dough. Neither of these are great for your final product. Second, the high fat content gets in the way of gluten development and it will need to mix or knead for much longer than a dough lower in fat. The word “brioche” actually comes from the old Norman verb “broyer”, which means “to pound” and it refers to the exceptionally long kneading process. After you have added your butter, the dough will mix for a good long time. Since every mixer and baker is different, the exact mixing time will vary so it’s easier and more accurate to look for specific signs that the dough is ready. Once you add the butter, the dough will look very soft, more like a thick cake batter, and it will kind of stick to the bottom of the bowl. As you continue to knead it, the dough will eventually become more elastic and it will start to pull away from the sides of the bowl-this is what we want. When it’s done mixing, it will be smooth and almost velvety in texture. To test the gluten structure, you can pull off a small piece of dough, pinch it in your fingers and gently stretch it to make a small square. If the dough doesn’t break in the center, it means that the gluten is developed and you are good to go. If it rips immediately when you try to stretch it, it needs some more kneading time. (This is called the windowpane test and you can see pictures of what it should look like here.)

When you have your finished dough, it will proof for two hours, turning it a couple of times throughout, until it’s doubled in size. After proofing, you can either continue to shape and build your babka, or you can cover the dough and chill it overnight. This particular brioche recipe is from Tartine Bread and it uses a sourdough starter to create the overnight pre-ferment or leaven. If you don’t already have your own starter and you would like to try your hand at making one, you can find step by step instructions here. If you don’t have your own starter and have zero interest in making one, I have a brioche recipe that doesn’t use a sourdough starter here.

*Note: If you choose to follow the Tartine brioche recipe below, you will have enough dough for two babka loaves (or a babka and something else; spoiler: there’s a fall inspired recipe using more brioche coming in a few weeks). If you use my brioche recipe from the Cinnamon Swirl Brioche, you will only have enough for one babka.


Tartine Brioche

Babka1.jpg

Yield: 1600 g of dough, or 2 babka loaves


Ingredients: 

poolish: 

100 g water

100 g flour

Pinch of yeast


leaven: 

1 1/2 tsp starter

110 g flour

110 g water


for the dough: 

500 g bread flour

13 g salt

60 g sugar

5 g active dry yeast

250 g eggs (about 5), at room temperature 

120 g milk, at room temperature

150 g leaven 

200 g poolish

225 g butter, at room temperature


Procedure: 

  1. The night before baking, stir together poolish ingredients and place in a plastic container with lid. Store in the refrigerator overnight. Mix together the leaven ingredients and store in another plastic container. Leave on the countertop overnight.

  2. In the bowl of a stand mixer fitted with the dough hook, combine wet ingredients (milk, eggs, leaven, poolish). I like to stir these together with a rubber spatula to break up the leaven and poolish. On top of the wet ingredients, add the flour, salt, sugar, and yeast. Mix on low speed for 3-5 minutes until everything is combined and a dough begins to form. Cover the mixer with a kitchen towel and let the dough rest for 15-20 minutes.

  3. Scrape down the sides of the bowl and increase speed to medium-high. Mix for 6-8 minutes, adding the softened butter 1 tablespoon at a time, until all the butter is incorporated. Continue to mixing for about 15-20 more minutes. It is much easier to determine sufficient mixing by looking for specific qualities in the dough, rather than by using a mixing time. The dough is ready when it is smooth and elastic and pulls away from the sides of the bowl. When you pull a piece of the dough out, it will be soft, but you should be able to stretch the dough into a small square without it tearing. This is called the window pane test.

  4. Cover the bowl with a kitchen towel, place in a warm space in your kitchen, and proof for two hours. You will turn the dough three times during this time, at the 30-minute mark, the one hour mark, and the one and half hour mark. To complete a turn: grab the bottom of one side of the dough and stretch it up and over to the other side of the rest of the dough. Turn the dough 90 degrees and repeat until you have folded all four sides of the dough. This is considered one turn. Cover and continue to proof, repeating the turn every 30 minutes.

  5. After the bulk fermentation, cover the bowl with plastic wrap and place in the refrigerator for 30 minutes to an hour. This will make the dough much easier to shape and will prevent the butter from melting out while you are working. If you are not ready to shape right away, you can store dough in the refrigerator overnight.


Babka4.jpg

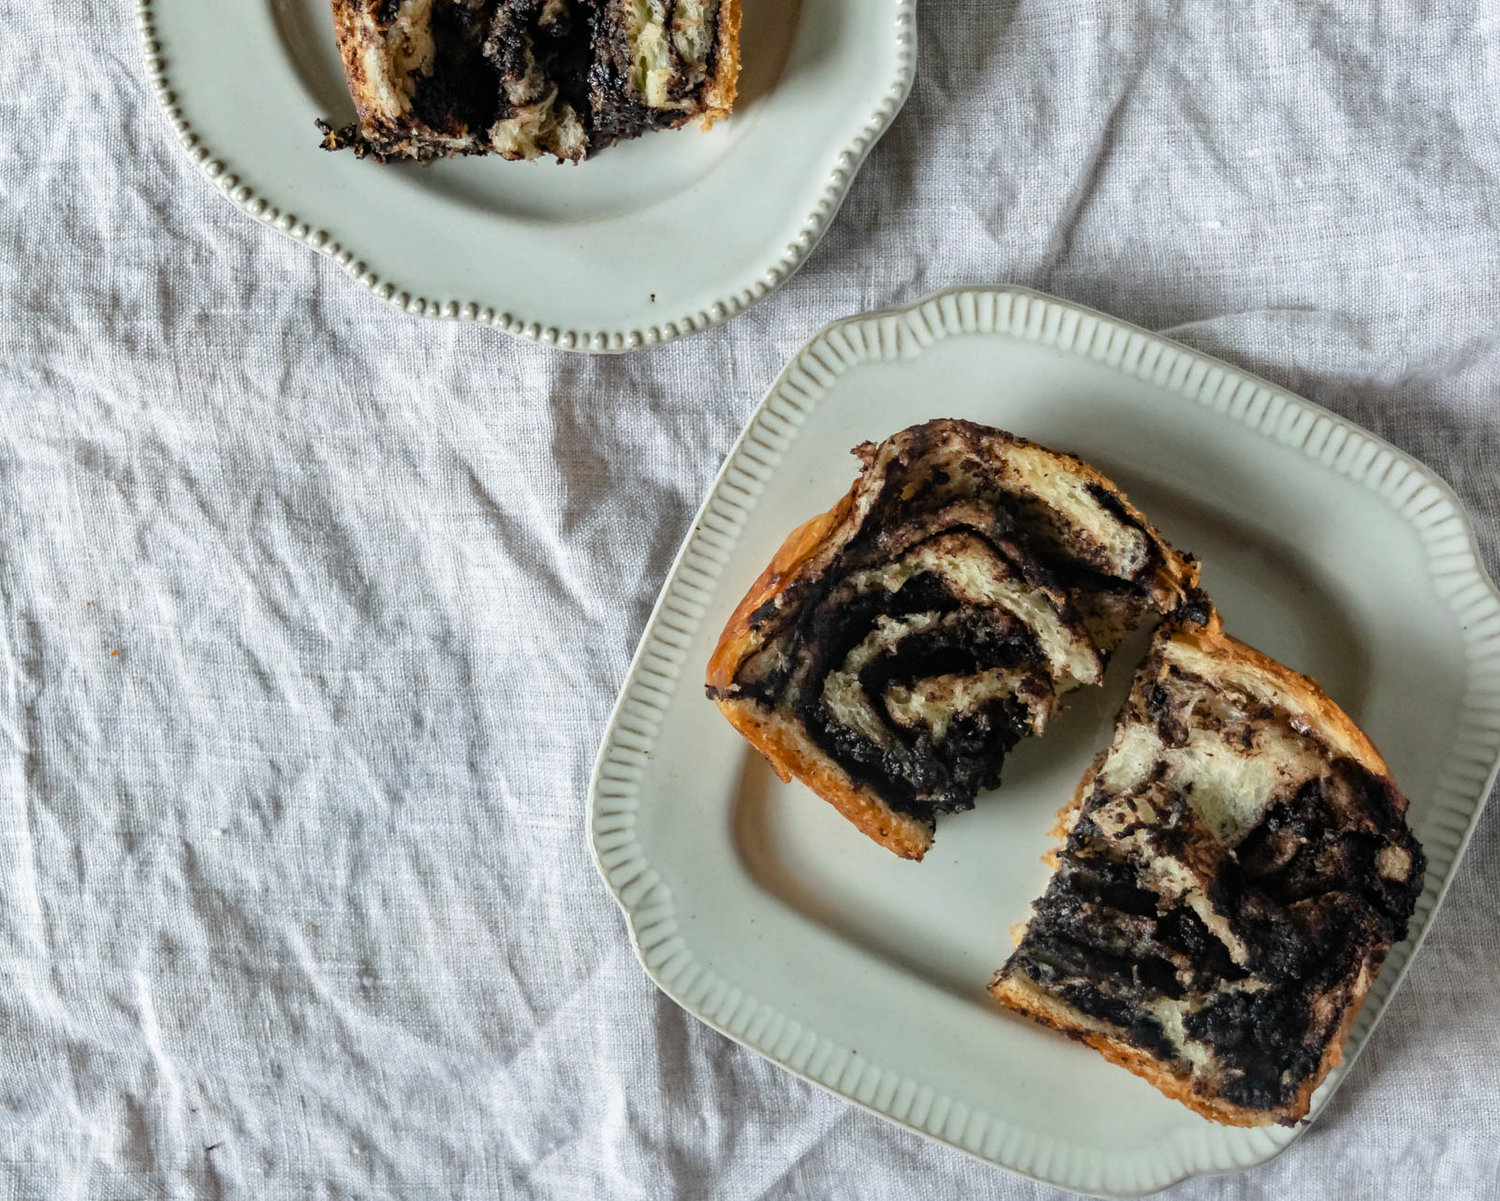
Chocolate Tahini Babka 

Ingredients: 

750 g brioche dough

1 stick (113g) unsalted butter, melted and cooled

110 g brown sugar

50 g dark chocolate cocoa powder

Pinch of salt 

1/3 cup tahini

for the egg wash: 

1 egg yolk

1 egg

1-2 T water

Procedure: 

  1. Stir together butter, brown sugar, cocoa powder and salt. You should have a thick, but spreadable paste. Set aside.

  2. Spray a 9x5 loaf pan with cooking spray and line with parchment paper. Set aside.

  3. On a floured surface, roll dough out to a 10x18” rectangle. If the dough is sticky, make sure that your are lifting it up and moving it around often in order to prevent it from adhering to your work surface.

  4. Use a small offset spatula to spread chocolate mixture in an even layer over the dough, leaving about 1/4” border on all four sides. Drizzle tahini over chocolate.

  5. Starting from a short end of the dough, roll dough tightly into a log and pinch the ends to seal. Starting about 1/2” from the top, use a sharp knife to slice the log lengthwise. You should have two strands, connected by a small dough portion at the top. Flip the strands so that the layers are facing up. Begin to braid the dough strands, crossing one over the the other, and pinch the bottoms to seal. Place your dough braid into your prepared loaf pan, cover with a kitchen towel, and let proof until almost doubled in size. This should take 1-1/2 hours, depending on the temperature of your dough.

  6. When you are ready to bake, preheat the oven to 350 degrees. Combine egg, egg yolk, and water in a small bowl to make egg wash.

  7. When the babka has risen, use a pastry brush to lightly coat with egg was. Bake for 30-35 minutes, until golden brown and a skewer or knife comes out clean when inserted. Remove from oven and let cool in the pan for about 20 minutes. Turn out onto a wire cooling rack and let cool completely before slicing and serving.

Bombolonis with Limoncello Cream

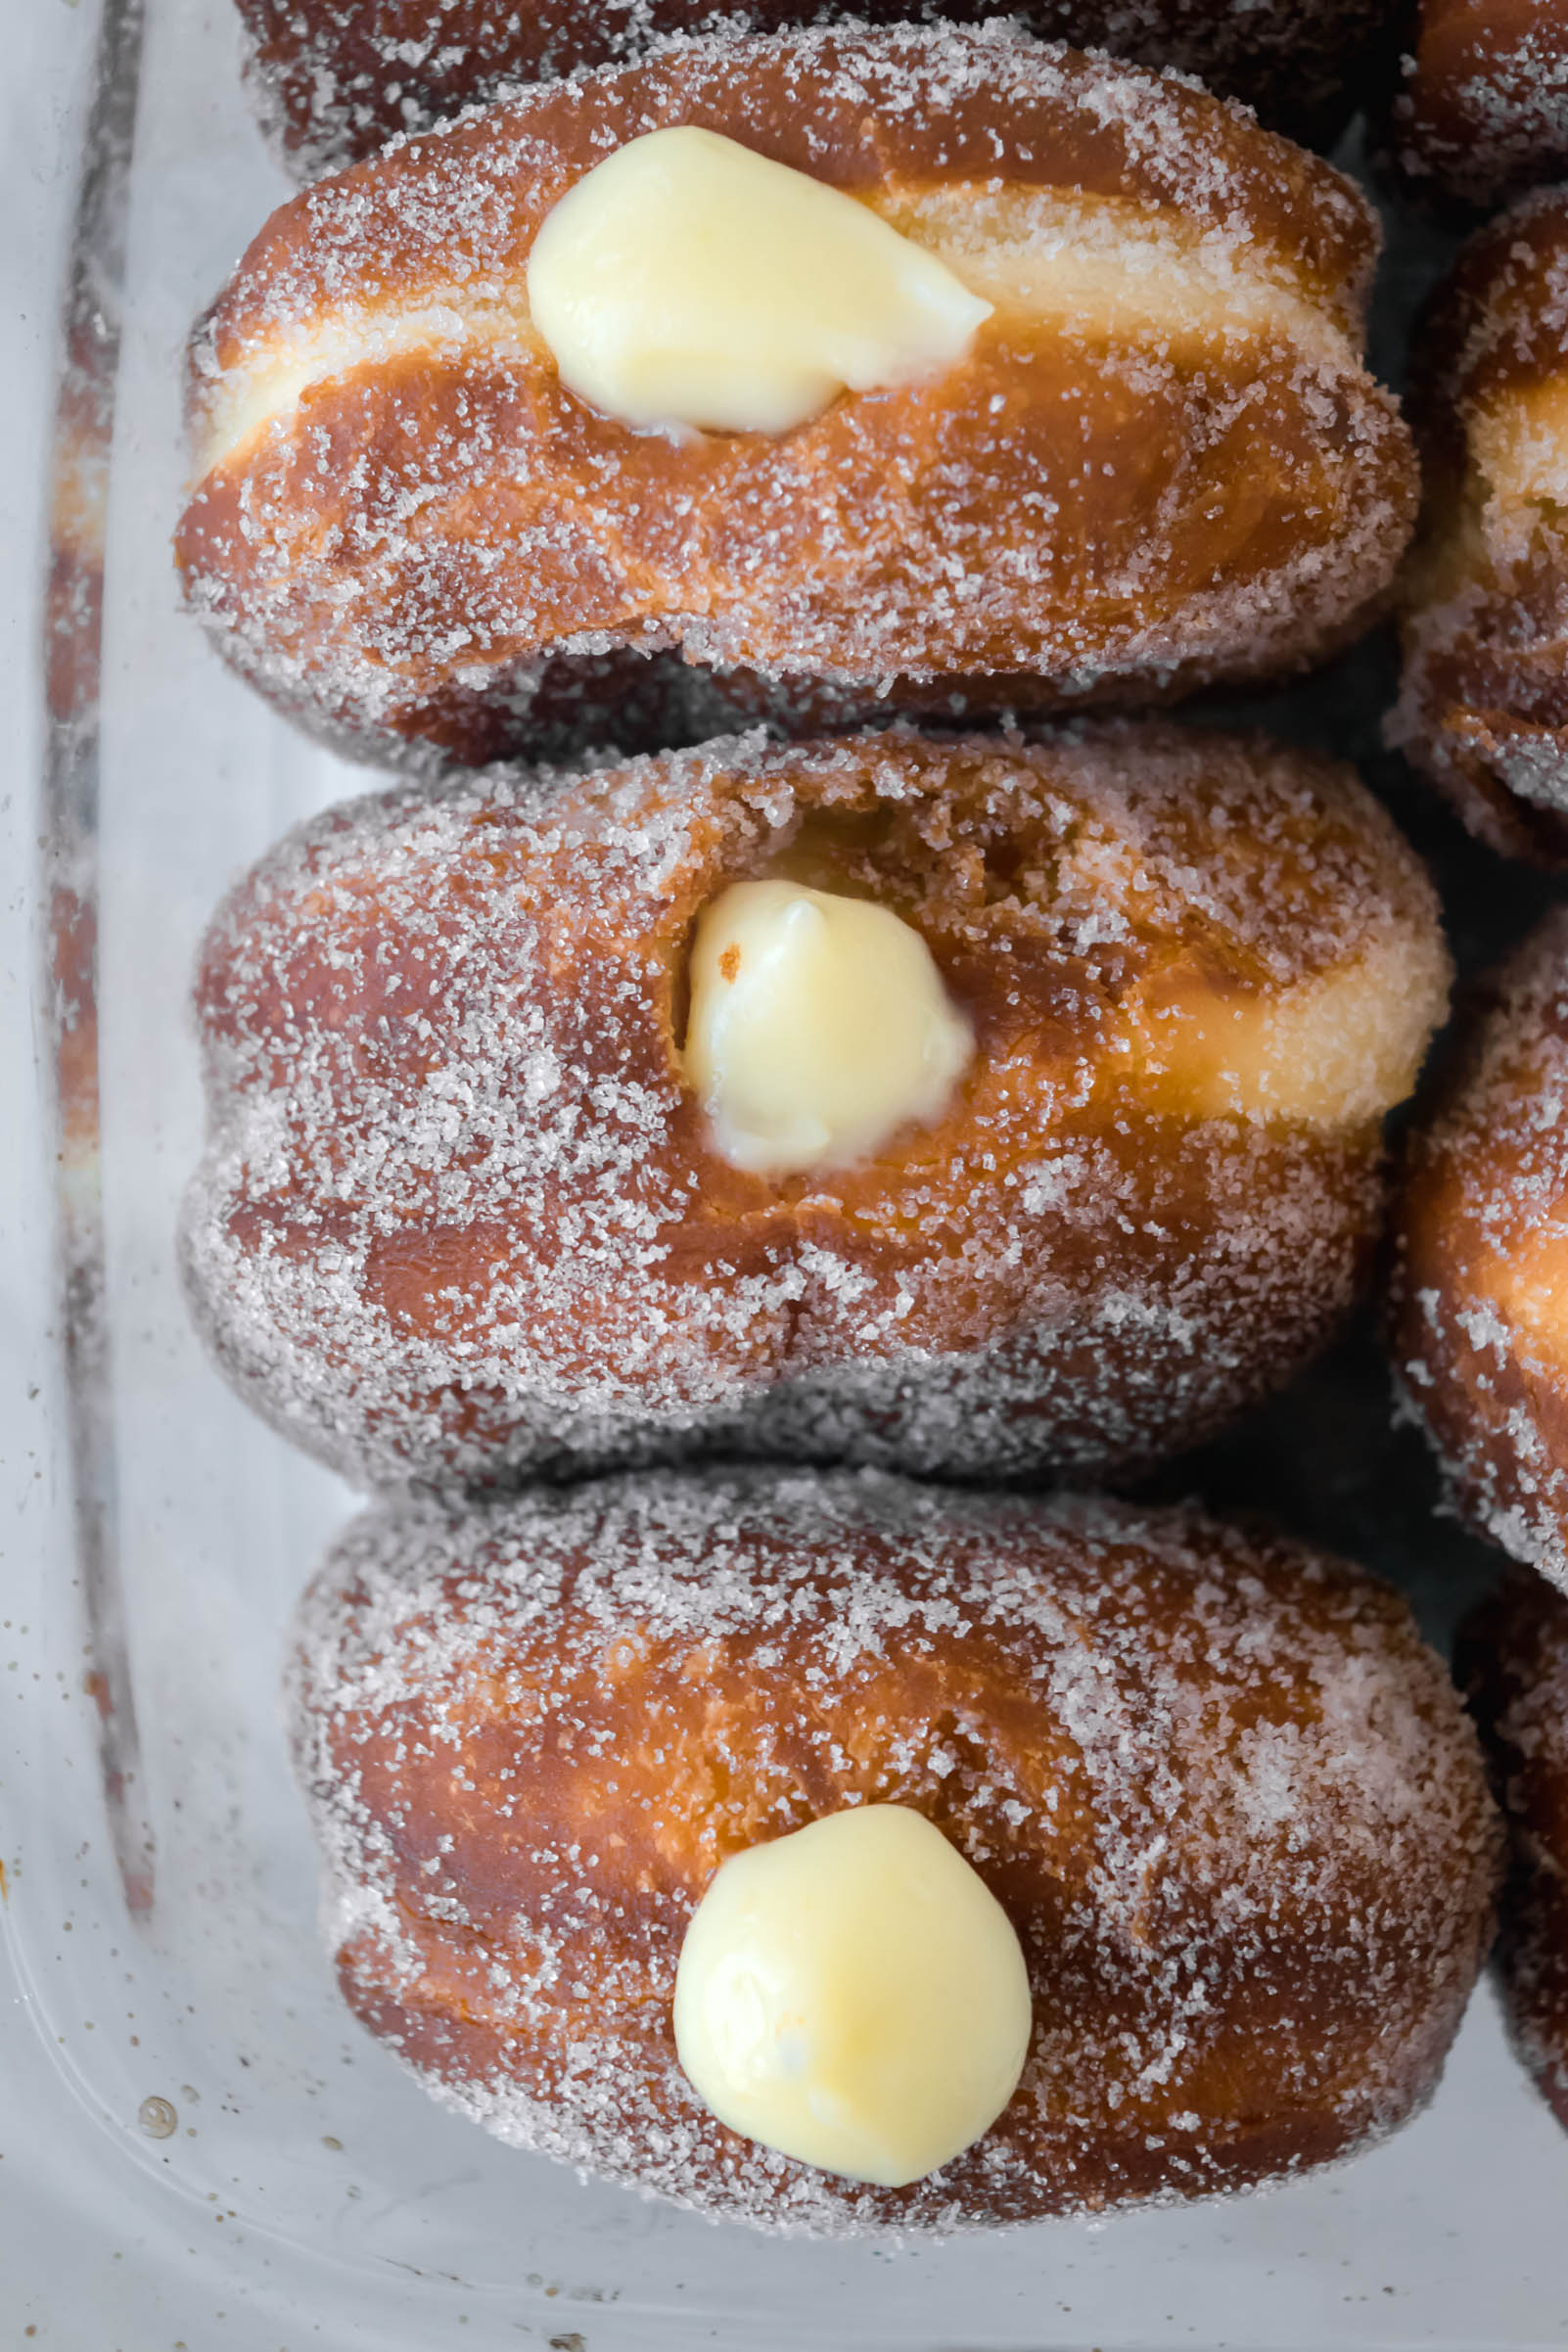
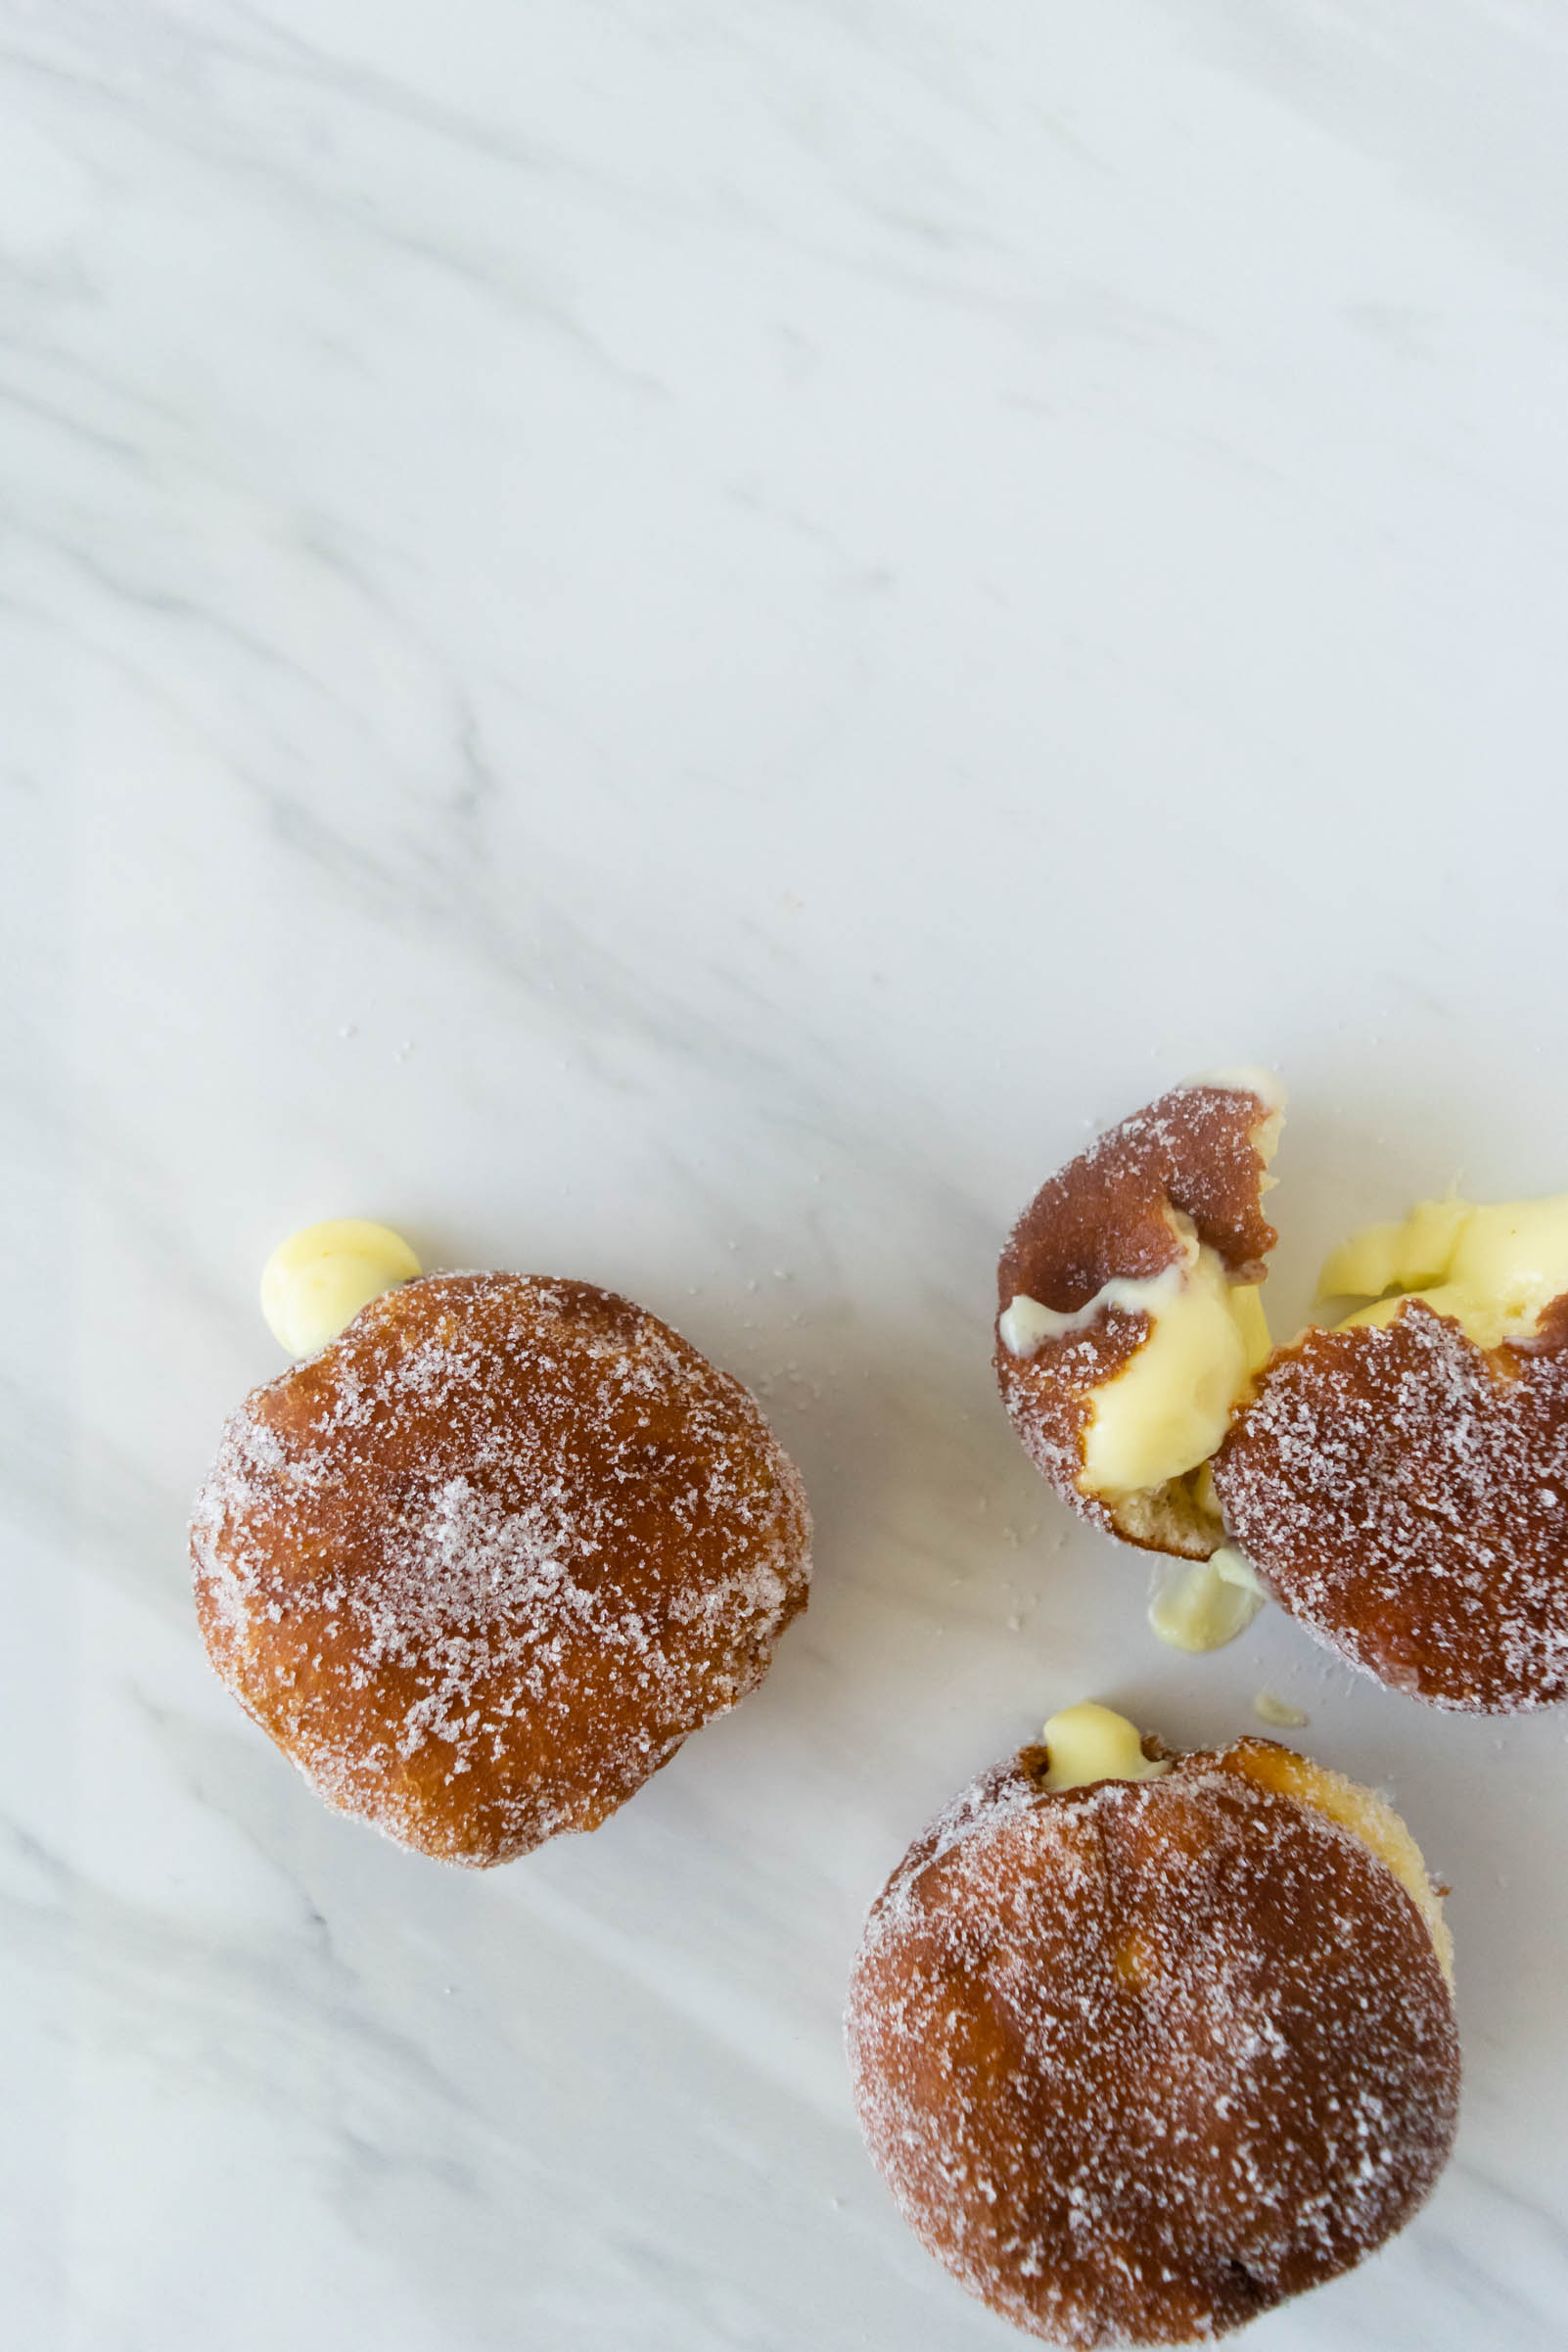
A fluffy brioche dough is the base for this recipe for Italian-style bombolonis. They are soft and buttery, filled with a limoncello pastry cream and tossed in sugar.

Have you ever had a meal that sticks with you for years to follow? Mine includes bombolonis, an Italian-style brioche donut, filled with silky cream, and I’ve been dreaming of making them at home ever since I tasted them.

About 4 1/2 years ago, we had just moved to Nashville and my cousin and his wife were visiting. We had heard endless recommendations about a new restaurant in an up-and-coming neighborhood called Rolf and Daughters. We waited outside in very cold weather until a table opened up in the dreamy, brick-walled, dimly lit restaurant and we were seated in a table just close enough to the kitchen to be warmed by the heat emanating from the stoves and to take a peek at every dish coming into the dining area. I remember the meal in snapshots- vibrant green cocktails peppered with jalapeño, dark, tannic red wine, two or three dishes with pork and whatever vegetable was popping up on Tennessee farms that week (all of which tasted completely differently, but all exceptional). As we were eating, we kept seeing roasted chicken after roasted chicken, balanced on the shoulder’s of servers coming out of the kitchen. We wondered amongst ourselves about the kind of person who orders roasted chicken at a restaurant with so many more diverse options on the menu, but our curiosity finally got the best of us and we asked our waiter, “What’s with all the roasted chicken?”. “It’s unlike any other roasted chicken,” he replied, “It’s the best I’ve ever had”. We were sold and even though our stomachs didn’t really need chicken, our mouths did. Our waiter was right, it was the best chicken I’d ever eaten. Happy that we didn’t miss out on the chicken, we finished the meal with bombolonis, tennis ball sized rounds of brioche, fried and filled with the perfect pastry cream.

A few years, and two cities later, Bon Appetite published the recipe for the Rolf and Daughters Garlic Confit Chicken in the now-retired R.S.V.P section of their magazine and the splattered, torn sheet of magazine paper still hangs from my refrigerator, a daily reminder of that night, that chicken, and those little bombolonis.

When I started doing research for the brioche dough for the donuts, I stumbled on a recipe from Thalia Ho at Butter and Brioche. I intended to use it as my starting point, testing and tweaking as I went, but after making them once, I couldn’t find anything that needed changing. For this recipe, I simply adapted her recipe to reflect both metric and U.S. measurements and rounded out a few ingredients to make it a little easier for a home baker without a scale. (And if you haven’t already, check out Thalia’s blog and Instagram. Her work is whimsical and unique and her photography is stunning!)

Yield: 13 donuts
Author: Anna Ramiz
Bombolonis with Limoncello Cream

Bombolonis with Limoncello Cream

Prep time: 45 MinCook time: 30 MinInactive time: 12 HourTotal time: 13 H & 15 M
These Italian donuts are pillowy soft and filled with a slightly tart limoncello cream.

Ingredients

for the brioche dough
  • 200 ml (1 3/4 cup) whole milk
  • 14 g (3 tsp) active dry yeast
  • 530 g (3 3/4 cup) all purpose flour
  • 60 g (1/4 cup) sugar
  • 1 1/4 tsp salt
  • 3 eggs, at room temperature
  • 113 g (1 stick) butter, at room temperature
for frying
  • 1 L vegetable oil, for frying
  • Granulated sugar for coating donuts
for the limoncello cream
  • 3 cups whole milk
  • 1 cup heavy cream
  • 5 whole eggs
  • 2 egg yolks
  • 1 1/4 cup sugar
  • 7 tbsp cornstarch
  • 1/2 tsp salt
  • 3 tbsp butter, cubed
  • 1 tbsp limoncello
  • 1 lemon, juiced and zested

Instructions

to make the limoncello cream
  1. Combine milk, cream, and lemon zest in a medium saucepan and heat until it begins to simmer and small bubbles form around the outer edge of the pan.
  2. In a large bowl, whisk together sugar, cornstarch, and salt. Add eggs and egg yolks and whisk to form a paste.
  3. Temper (slowly stream) hot milk into the egg paste, stirring continually. Add egg/milk mixture back to the saucepan and return to heat- keep stirring!
  4. Cook over low-medium heat until the mixture begins to boil. Continue to cook for one minute longer. Remove from heat and strain into a clean bowl.
  5. Add butter, limoncello, and lemon juice, whisking to combine. Press a piece of plastic wrap directly on top of pastry cream and chill.
to make the brioche dough
  1. Heat milk in a medium saucepan until warmed to 110 degrees. Remove from heat and transfer to a glass measuring cup. Add yeast and stir to combine. Let proof for 5 minutes, until yeast is frothy.
  2. While the yeast is proofing, combine flour, sugar, and salt in the bowl of a stand mixer fitted with the dough hook. Mix on lowest setting, just until combined.
  3. With the mixture on medium-low speed, stream milk into the mixer and continue mixing until a shaggy mass forms. With the mixer running, add eggs, one at a time, making sure each is incorporated before adding the next. Set the mixer to medium speed and let the dough knead for 5 minutes.
  4. When the dough has formed a smooth ball, begin adding the butter, a tablespoon at a time until completely incorporated. Increase the mixer speed to medium-high and knead for another 5-6 minutes until the dough is smooth and elastic. (This is maybe the prettiest dough I’ve ever made!)
  5. Place the dough in a lightly greased bowl and cover with a towel. Let proof in a warm place for about an hour, until doubled in size. After the dough has doubled, punch the dough dough and cover the bowl with plastic wrap. Transfer to the refrigerator and chill overnight.
to fry and assemble the donuts
  1. Turn the chilled brioche dough out onto a floured surface. Roll the dough into a circle about 1 inch in thickness. Use a circular cutter to cut out as many donuts as possible from the dough. Press the scraps together and re-roll one more time to the same thickness and repeat the donut cutting.
  2. Place donuts on a parchment lined baking sheet, cover with a towel and proof for 20 minutes while you heat the oil.
  3. In a large, heavy-bottomed pan heat oil to 350 ℉. Place sugar in a medium bowl and place a cooling rack over a sheet pan lined with paper towels.
  4. Fry off the donuts, 2-3 at a time by placing the donuts in the oil using a mesh strainer or slotted spoon. Fry to 1 1/2-2 minutes, until golden brown and then use chopsticks to gently flip donuts. Fry for another 1-2 minutes, remove from the oil and place on cooling rack. Repeat until all donuts are fried.
  5. When cooled enough to handle, but still warm, toss donuts in the sugar.
  6. To fill the donuts, use a sharp knife to cut a small hole in one side of each donut. Place the limoncello cream in a piping bag or large ziploc bag with a hole cut in the corner and pipe cream into donuts. Enjoy immediately!

Notes:

This pastry cream can keep up to a week in a sealed container in the refrigerator. You won’t use all of the cream to fill the donuts and you can use the leftovers to fill a cake, make the base of a souffle, or experiment with tarts or Gateau Basque. 

Did you make this recipe?
Tag @gatheredatmytable on instagram and hashtag it #gatheredatmytable