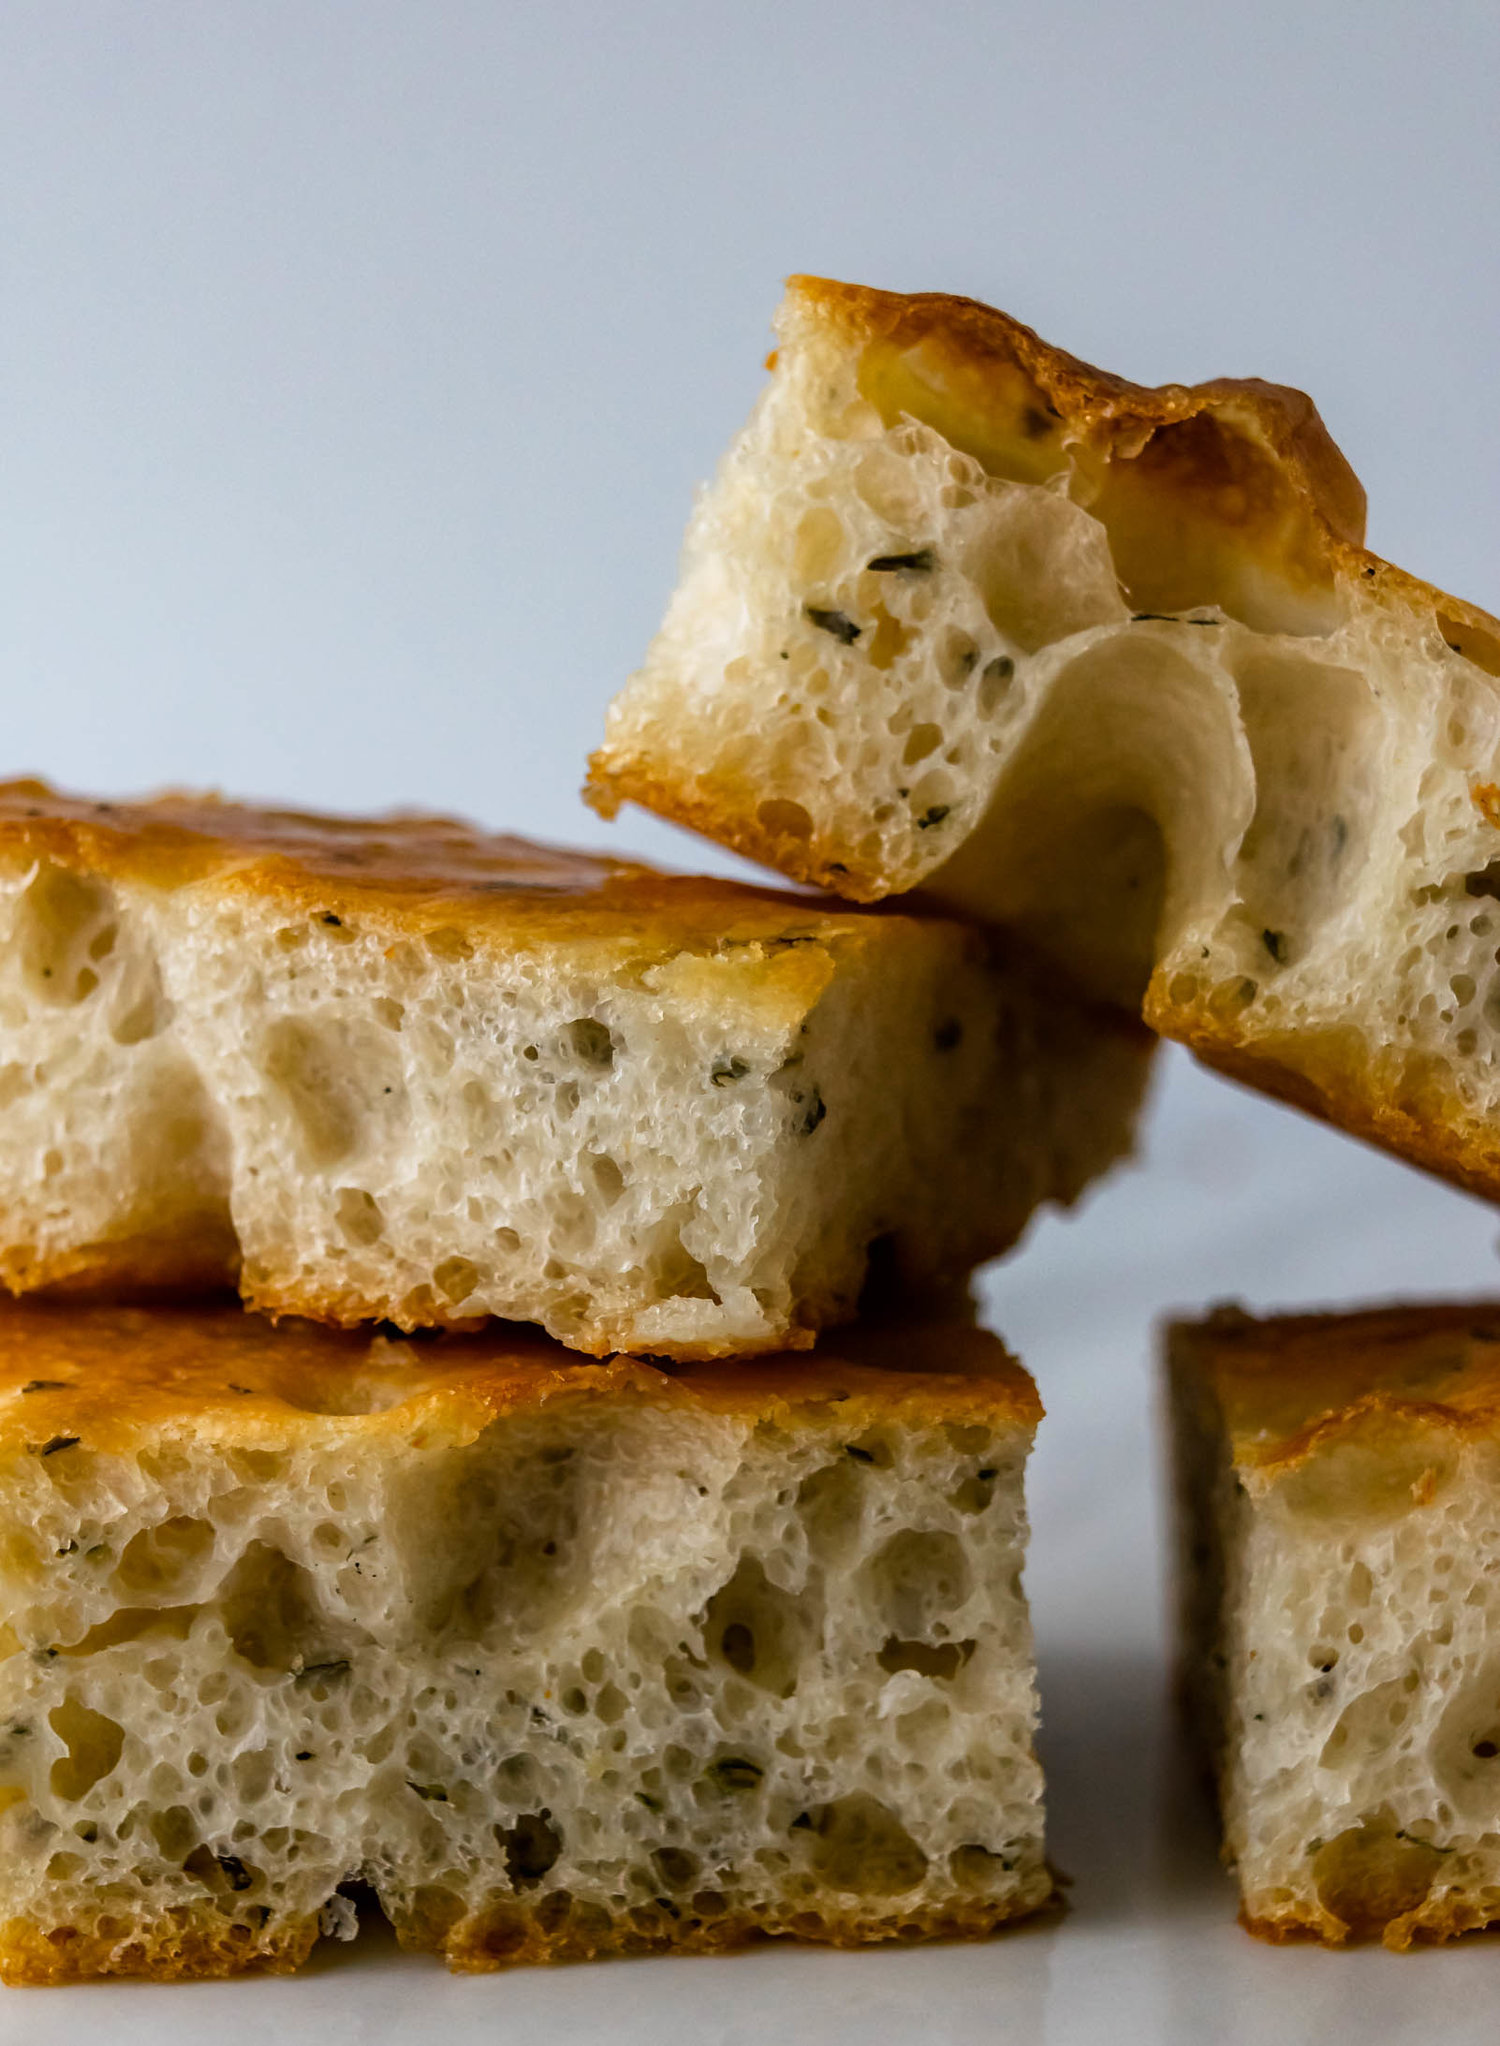
Garlic Bread Focaccia
/Thick and soft, Ligurian-style focaccia is the base for this simple, homemade garlic bread focaccia recipe. My favorite homemade focaccia bread gets drenched in flavorful garlic butter and dotted with lots of fresh herbs.
If I’ve said it once, I’ve said it a million times, garlic bread is my favorite food. I will gladly forgo a slice of cake or spoonful of tiramisu for dessert in order to eat more garlic bread. I especially like it leftover for breakfast with fried eggs, but honestly, I cannot think of a time when I don’t want to be eating garlic bread.
I also feel this way about focaccia. Last week, I read about a little restaurant in St. Paul called Due Focacceria, an Italian cafe that serves Capalleti Spritzs and focaccia a bunch of different ways. The night after I read about this restaurant, I dreamt about it and that doesn’t feel weird at all. Focaccia is one of the best breads for many reasons, but it’s my favorite because it’s the simplest. It takes almost no effort to mix together a batch of focaccia dough and then you go to sleep while it does its thing and when you wake up, you are two hours and a dimpling away from snacking on freshly baked bread. The marriage of these two things just feels right.
how to make focaccia
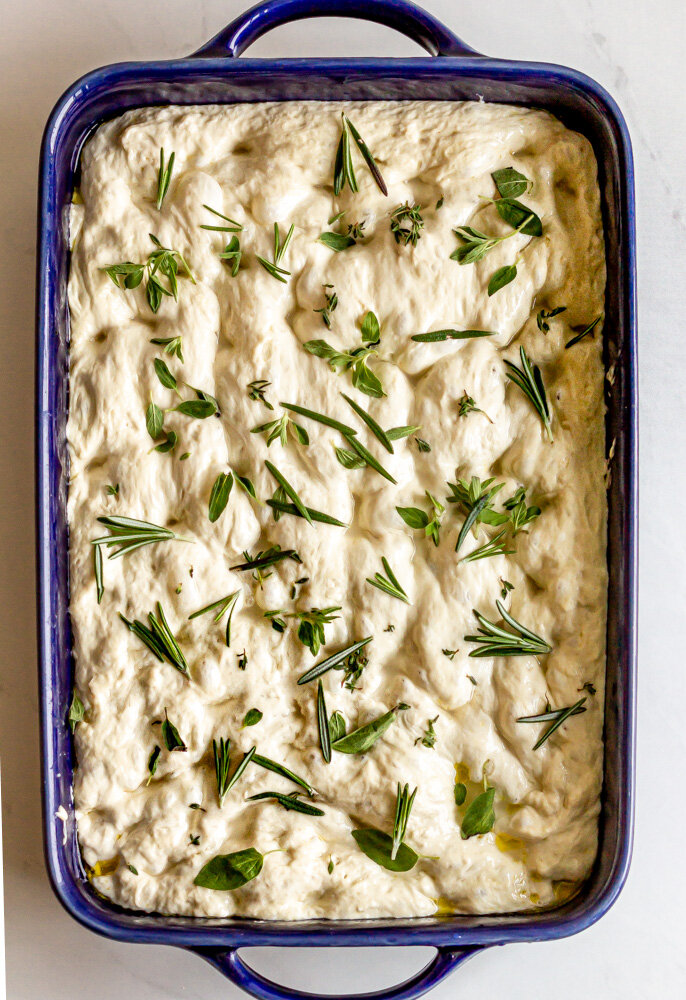
Focaccia is a high-hydration, Italian-style bread. My basic recipe is very lightly adapted from Samin Nosrat and you can find it here. I also highly recommend hopping on Netflix and watching Samin make a batch of focaccia in Liguria in the “Fat” episode of Salt, Fat, Acid, Heat. I’ve played around with a lot of dough recipes and the thing that I love about Samin’s recipe is the brining step. After mixing together the dough and letting it rest overnight, we dump the dough into a well-oiled pan and stretch it for another proof. After giving it about 30 minutes for the gluten strands to relax, we’ll stretch it again into its final shape, dimple it, and brine it in a little bit of salt water. This extra little step adds so much moisture and flavor to the dough, you don’t want to skip it! Even if you already have a favorite focaccia recipe, I recommend you add brining as a step—you won’t be disappointed.
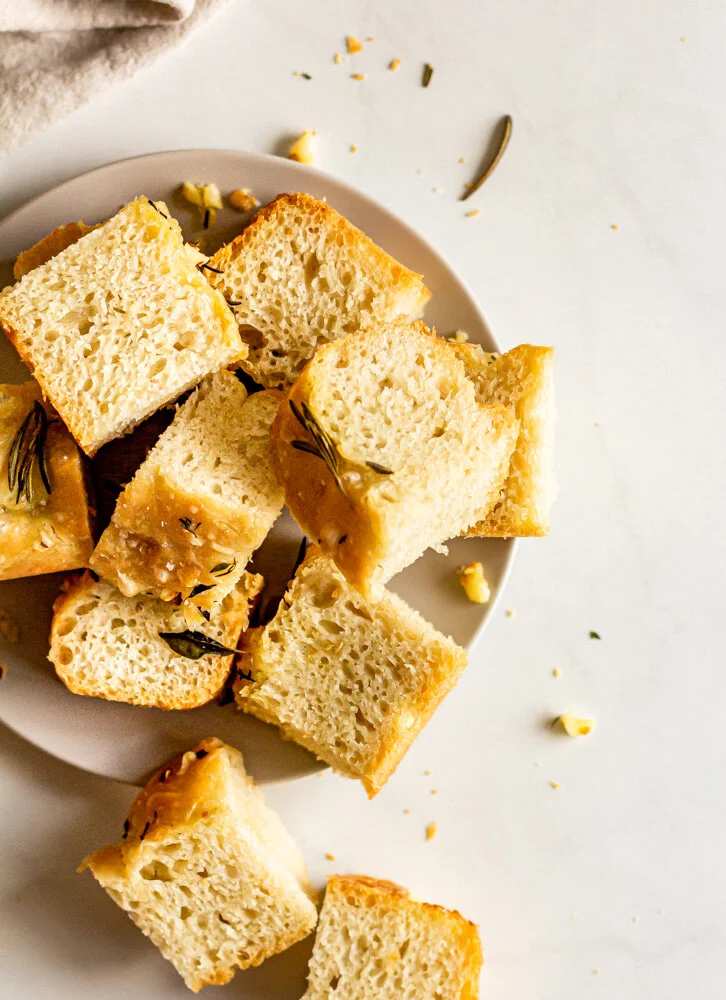
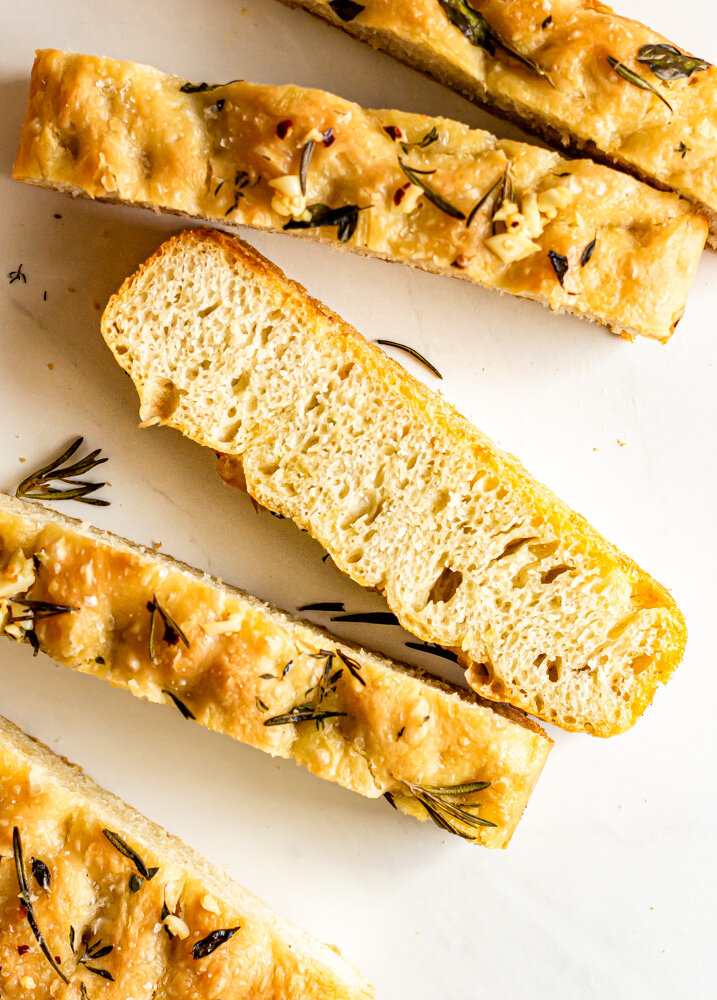
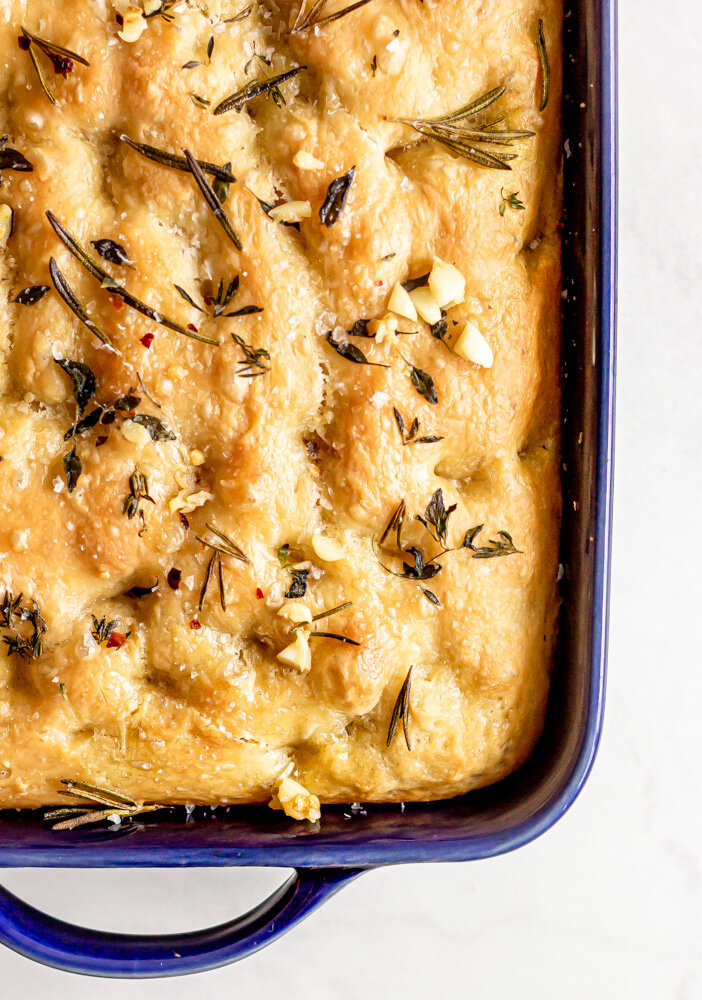
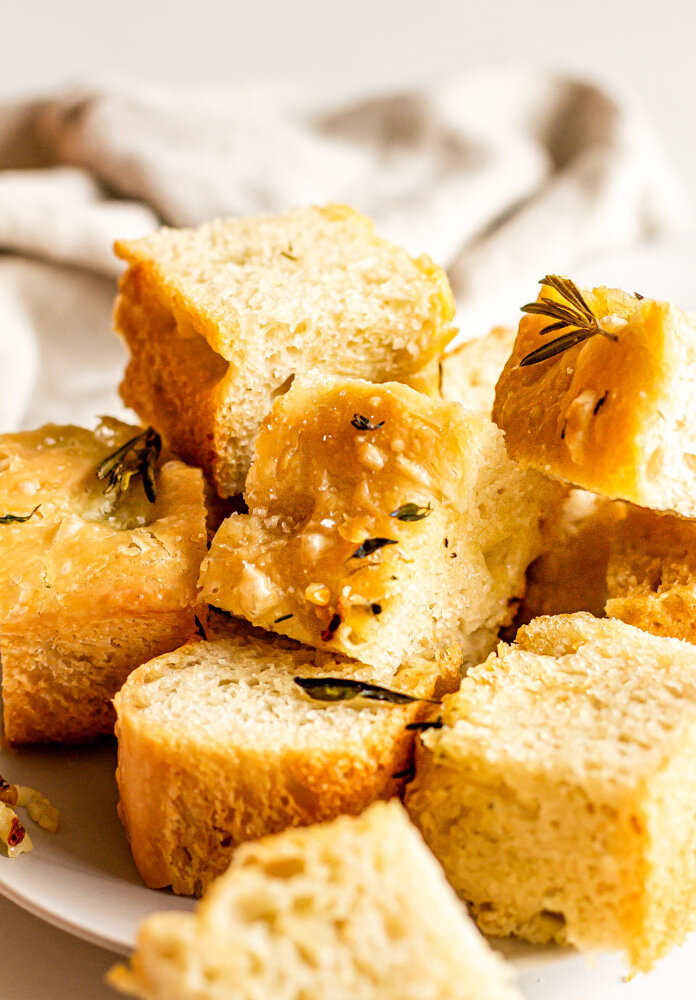
After the second proof, the dough is dimpled again and drizzled with olive oil. For this garlic bread focaccia, we’ll sprinkle the top with a bunch of fresh herbs. I used rosemary, thyme, and oregano, but you can use any of your favorites. The focaccia is baked until golden brown and crispy.
While the focaccia is baking, we make the garlic butter by heating a bunch of garlic, butter, red pepper flakes, and salt over low heat until fragrant and the garlic is softened. Smash the garlic into small pieces and return it to the butter and the drench the focaccia with the garlic butter right when it comes out of the oven.

Garlic Bread Focaccia
Ingredients
- 600g (2 1/2 cups) water
- 1/2 tsp active dry yeast
- 15g (2 1/2 tsp) honey
- 800g (5 1/3 cups) all purpose flour
- 18g (2 tbsp) kosher salt
- 50g (1/4 cup) extra virgin olive oil, plus more for pan and drizzling
- 1/3 cup warm water
- 1 1/2 tsp kosher salt
- 3 sprigs fresh rosemary
- 3 sprigs fresh oregano
- 3 sprigs fresh thyme
- 4 tbsp unsalted butter
- 2 large cloves of garlic, smashed
- 1/4 tsp red pepper flakes
- Flaky salt
Instructions
- In a large bowl, stir together water, yeast, olive oil, and honey. Let rest for 5 minutes. Add flour and salt and stir with a rubber spatula or wooden spoon until completely combined and no flour streaks remain. Cover bowl with plastic wrap and let rest on your countertop for 12-14 hours, until doubled in volume. (I like to mix this together before bed and let it rest overnight.)
- Spread 2-3 tablespoons of olive oil over the surface of a 9x13” baking dish. Turn dough out onto the baking sheet and gently stretch the dough towards to the edges of the pan. To do this without tearing the dough, I like to reach my hands underneath and gently pulling it towards the outside. At this point, it will probably shrink back a bit, but that’s okay. Drizzle the whole thing with olive oil and cover with plastic wrap. Let it rest for 30 minutes.
- After 30 minutes, use your fingers to dimple the entire surface of the dough. Stir together warm water and salt and then pour brine over the top of the dimpled dough. Cover again and proof for another 45 minutes.
- About 30 minutes into your final proof, preheat your oven to 425° F. When the oven is hot and the dough is proofed, remove cover, sprinkle with fresh herbs. Drizzle with olive oil and bake for 30-35 minutes, until deeply golden brown.
- While the focaccia is baking, combine butter, garlic cloves, and red pepper flakes in a small saucepan. Set over low heat and cook until butter is melted and garlic cloves have softened. Remove garlic cloves, roughly chop, and return them to the butter.
- Pour garlic butter over hot focaccia and sprinkle with flaky salt. Let cool in the pan for 5-10 minutes, and then use a spatula to loosen the edges from the side of the pan.