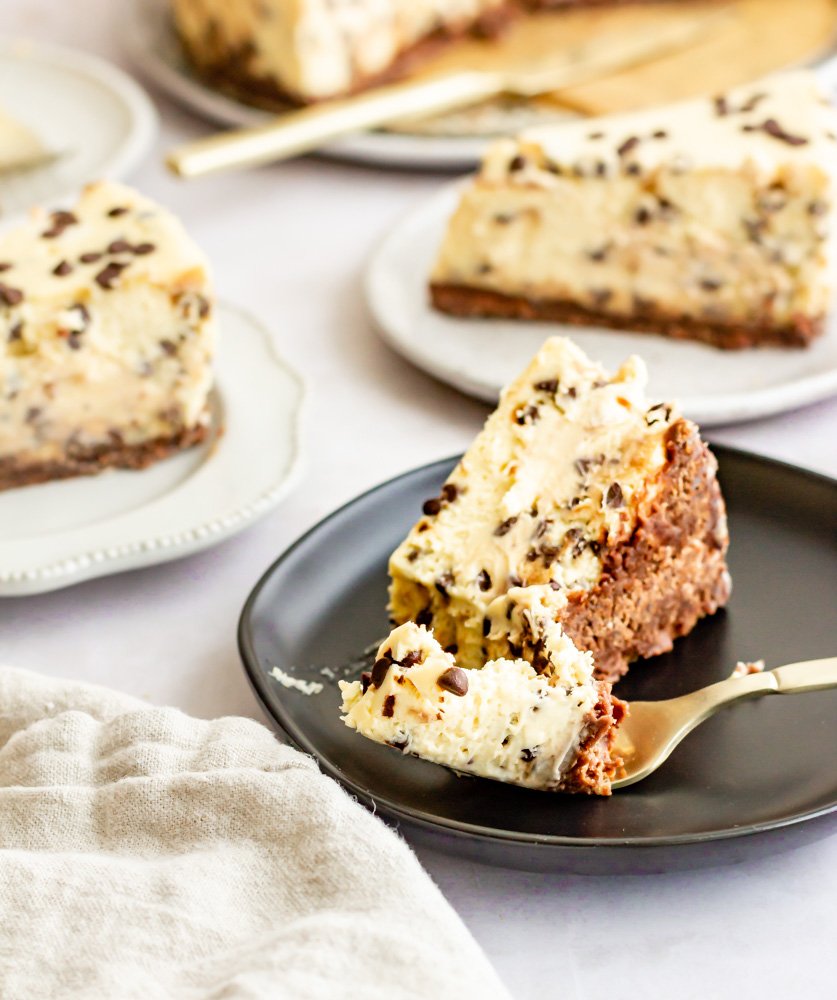
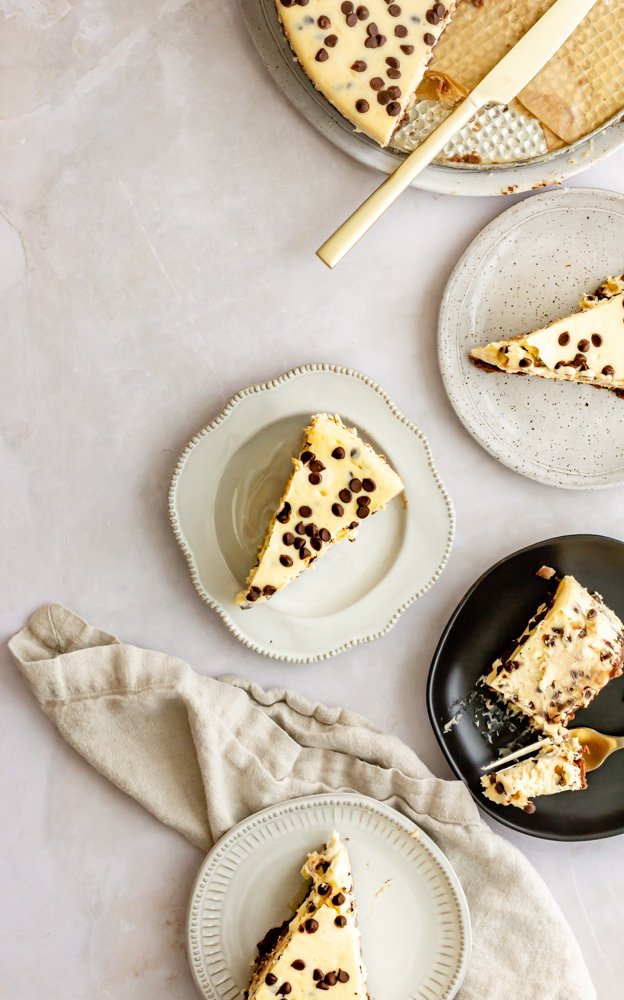
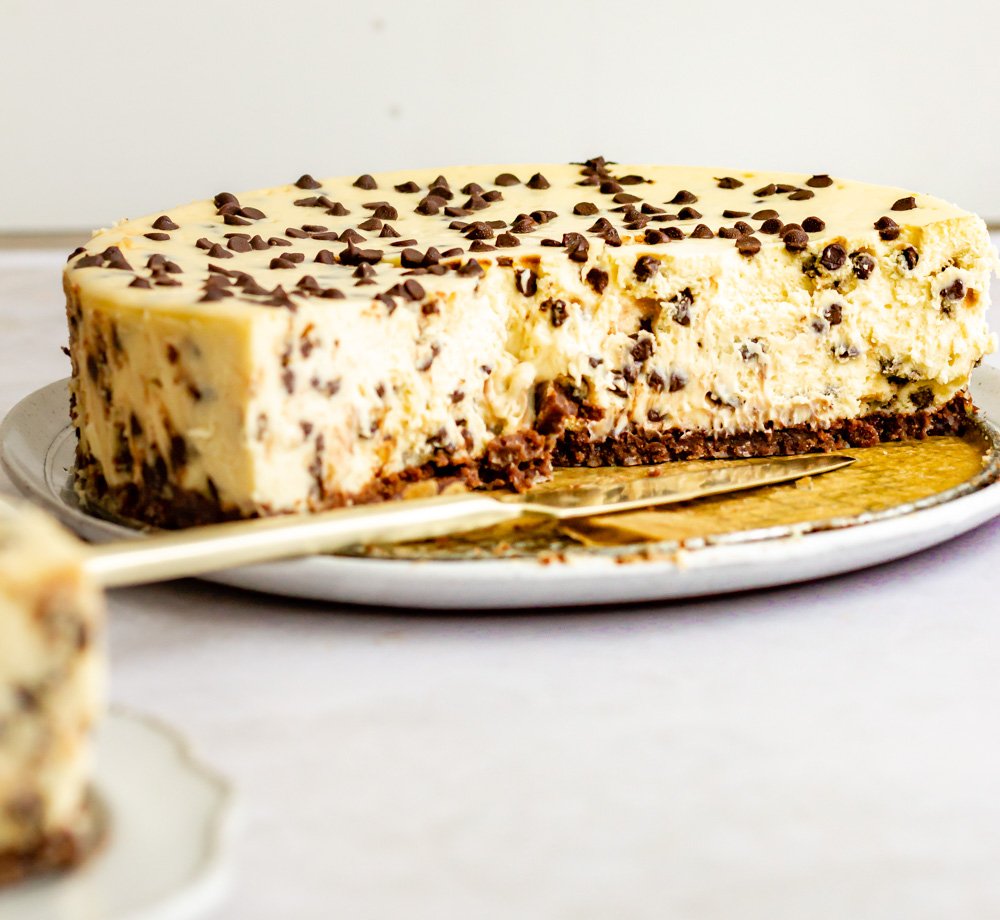
Chocolate Chip Cheesecake
/A thick and creamy New York style cheesecake with a buttery chocolate cookie crust and studded with miniature chocolate chips.
I lived in Durham, NC until I was 8 and let me tell you, I think the highlight of my first 8 years of life might have been Elmo’s Diner. Elmo’s is a quirky little diner off of 9th Street, just down the road from the Duke University Campus. It was quaint and cozy and we went for just about every occasion. Brunch with my aunts and uncles? We were at Elmo’s. Dinner with my grandparents, obviously Elmo’s. I even had a birthday party there I loved it so much. And rightfully so, because according to my memory, everything at Elmo’s was perfect and delicious. (Also, you could color pictures of ducks and they’d hang them on the wall, which made me feel a bit like a celebrity.)
Elmo’s had a lot going for it. They had little cups of the best tomato basil soup my 8 year old self had ever had. They had really great cheeseburgers, omelettes, pancakes—you know, all the best diner food. But the chocolate chip cheesecake was the star. My cousin Joey and I were a little bit obsessed with Elmo’s chocolate chip cheesecake. We shared a slice every time we went and even now, 20 years later, we still catch ourselves dreaming of the Elmo’s chocolate chip cheesecake.
Looking back, I don’t know that it was anything fancy. I remember it was tall and thick, definitely a NY style cheesecake, with a graham cracker crust and miniature chocolate chips suspended inside. There were no fancy garnishes or sauces, and it was definitely a diner-style cheesecake. But as a kid, it was perfect. Even now, I can close my eyes and picture myself back in that diner, all of my family shoved around a big table. The adults are drinking coffee and chatting and Joey and I are down at the end of the table, mixing all the remaining dips and sauces and seasonings in the bottom of a sticky plastic cup (you know, like 8 year olds in the 90s did), waiting for our perfect slice of chocolate chip cheesecake. It’s cool how food imprints itself in your memories that way.

a really great chocolate chip cheesecake
Let’s talk cheesecake. There is a whole world of cheesecakes out there—ricotta, basque, Japanese, the kind you get at cheesecake factory…the list goes on. Because cheesecake can be pretty heavy, my go-to recipe is usually a creamy, cheesecake base lightened up by incorporating whipped egg whites. Not so, for this recipe. From my memory, the Elmo’s cheesecake was tall and dense, so that’s what we’re doing here. This is not a cheesecake for the faint of heart.
Traditionally, New York style cheesecakes are thick and hefty, incorporating lots of cream cheese and then usually sour cream and/or heavy cream to help smooth things out a bit. For this recipe, we’re using a full 2 pounds of cream cheese plus sour cream AND heavy cream for an extra smooth, tangy bite.
If you notice, the recipe incorporates a bit of flour to help bind everything together and stiffen the cheesecake slightly. Because we’re using the flour for it’s starch and not it’s gluten, you should be able to easily substitute a gluten-free flour blend in it’s place. (I have not tested this, but the science says it should work fine). You can also use cornstarch or just leave the flour out for a still very delicious, yet slightly less hefty slice of cheesecake.
For the crust, all of my fancy ideas went straight out the window. This is a classic. I went with Annie’s chocolate Teddy Grahams, which were an excellent choice, but you can choose any cookie your heart desires. A traditional graham cracker crust would be great, as would Oreos. Get wild with it.

Chocolate Chip Cheesecake
Ingredients
- 7.5 ounces Chocolate Teddy Grahams, or other cookie
- 3 tbsp sugar
- 1/4 tsp cinnamon
- 1/4 tsp kosher salt
- 1/3 cup melted butter
- 2 lbs cream cheese, softened
- 1 cup (200 g) granulated sugar
- 1/4 cup (56 g) sour cream, at room temperature
- 1/4 cup (56 g) heavy cream, at room temperature
- 1 tsp vanilla extract
- 1/2 tsp kosher salt
- 4 eggs
- 1/4 cup flour, divided
- 8 oz miniature chocolate chips
Instructions
- Preheat the oven to 325° F and line the bottom of a 9" springform pan with a circle of parchment paper.
- Place cookies in the bowl of a food processor fitted with the blade attachment. Pulse for about 30 seconds, until finely ground. Transfer them to a bowl.
- Add the sugar, cinnamon, salt, and melted butter, and stir until everything is moistened.
- Pour the cookie crumb mixture into the prepared pan and use your hands to firmly press it into an even layer in the bottom of the pan. Bake for 15-20 minutes, until browned and set. Let cool completely while you make the filling.
- Lower the oven temperature to 300° F.
- Place cream cheese in the bowl of a stand mixer fitted with the paddle attachment. Beat on medium speed for about a minute, until smooth and fluffy.
- Add the granulated sugar and mix again until evenly dispersed.
- Scrape down the sides of the bowl and add the sour cream, heavy cream, vanilla and salt and beat on medium speed until very smooth.
- With the mixer on low speed, at the eggs one at a time, mixing thoroughly after each addition. Scrape down the sides of the bowl again.
- Place 1 tbsp of the flour in a medium bowl with all but 2 tbsp of the chocolate chips. Toss to coat.
- Add the remainder of the flour to the cheesecake filling and beat one last time, until well-combined and very smooth. Scrape down the sides of the bowl and fold a few times with a rubber spatula to ensure even distribution.
- Add the flour-coated chocolate chips to the batter and fold to mix in. Pour the batter into the cooled crust and sprinkle the remaining 2 tbsp of chocolate chips over the top.
- Bake, without opening the door to the oven for 1 hour to 1 hour and 15 minutes, until the cheesecake is set and there is only a slight wobble on the top. Turn the oven off and let the cheesecake cool in the oven for 30 minutes. Remove and let cool on the counter for another 30 minutes.
- Wrap the cheesecake tightly in plastic wrap and transfer to the refrigerator. Chill for at least 6 hours and up to overnight.
- When you’re ready to serve, remove the cheesecake from the springform pan and slice using a sharp knife.