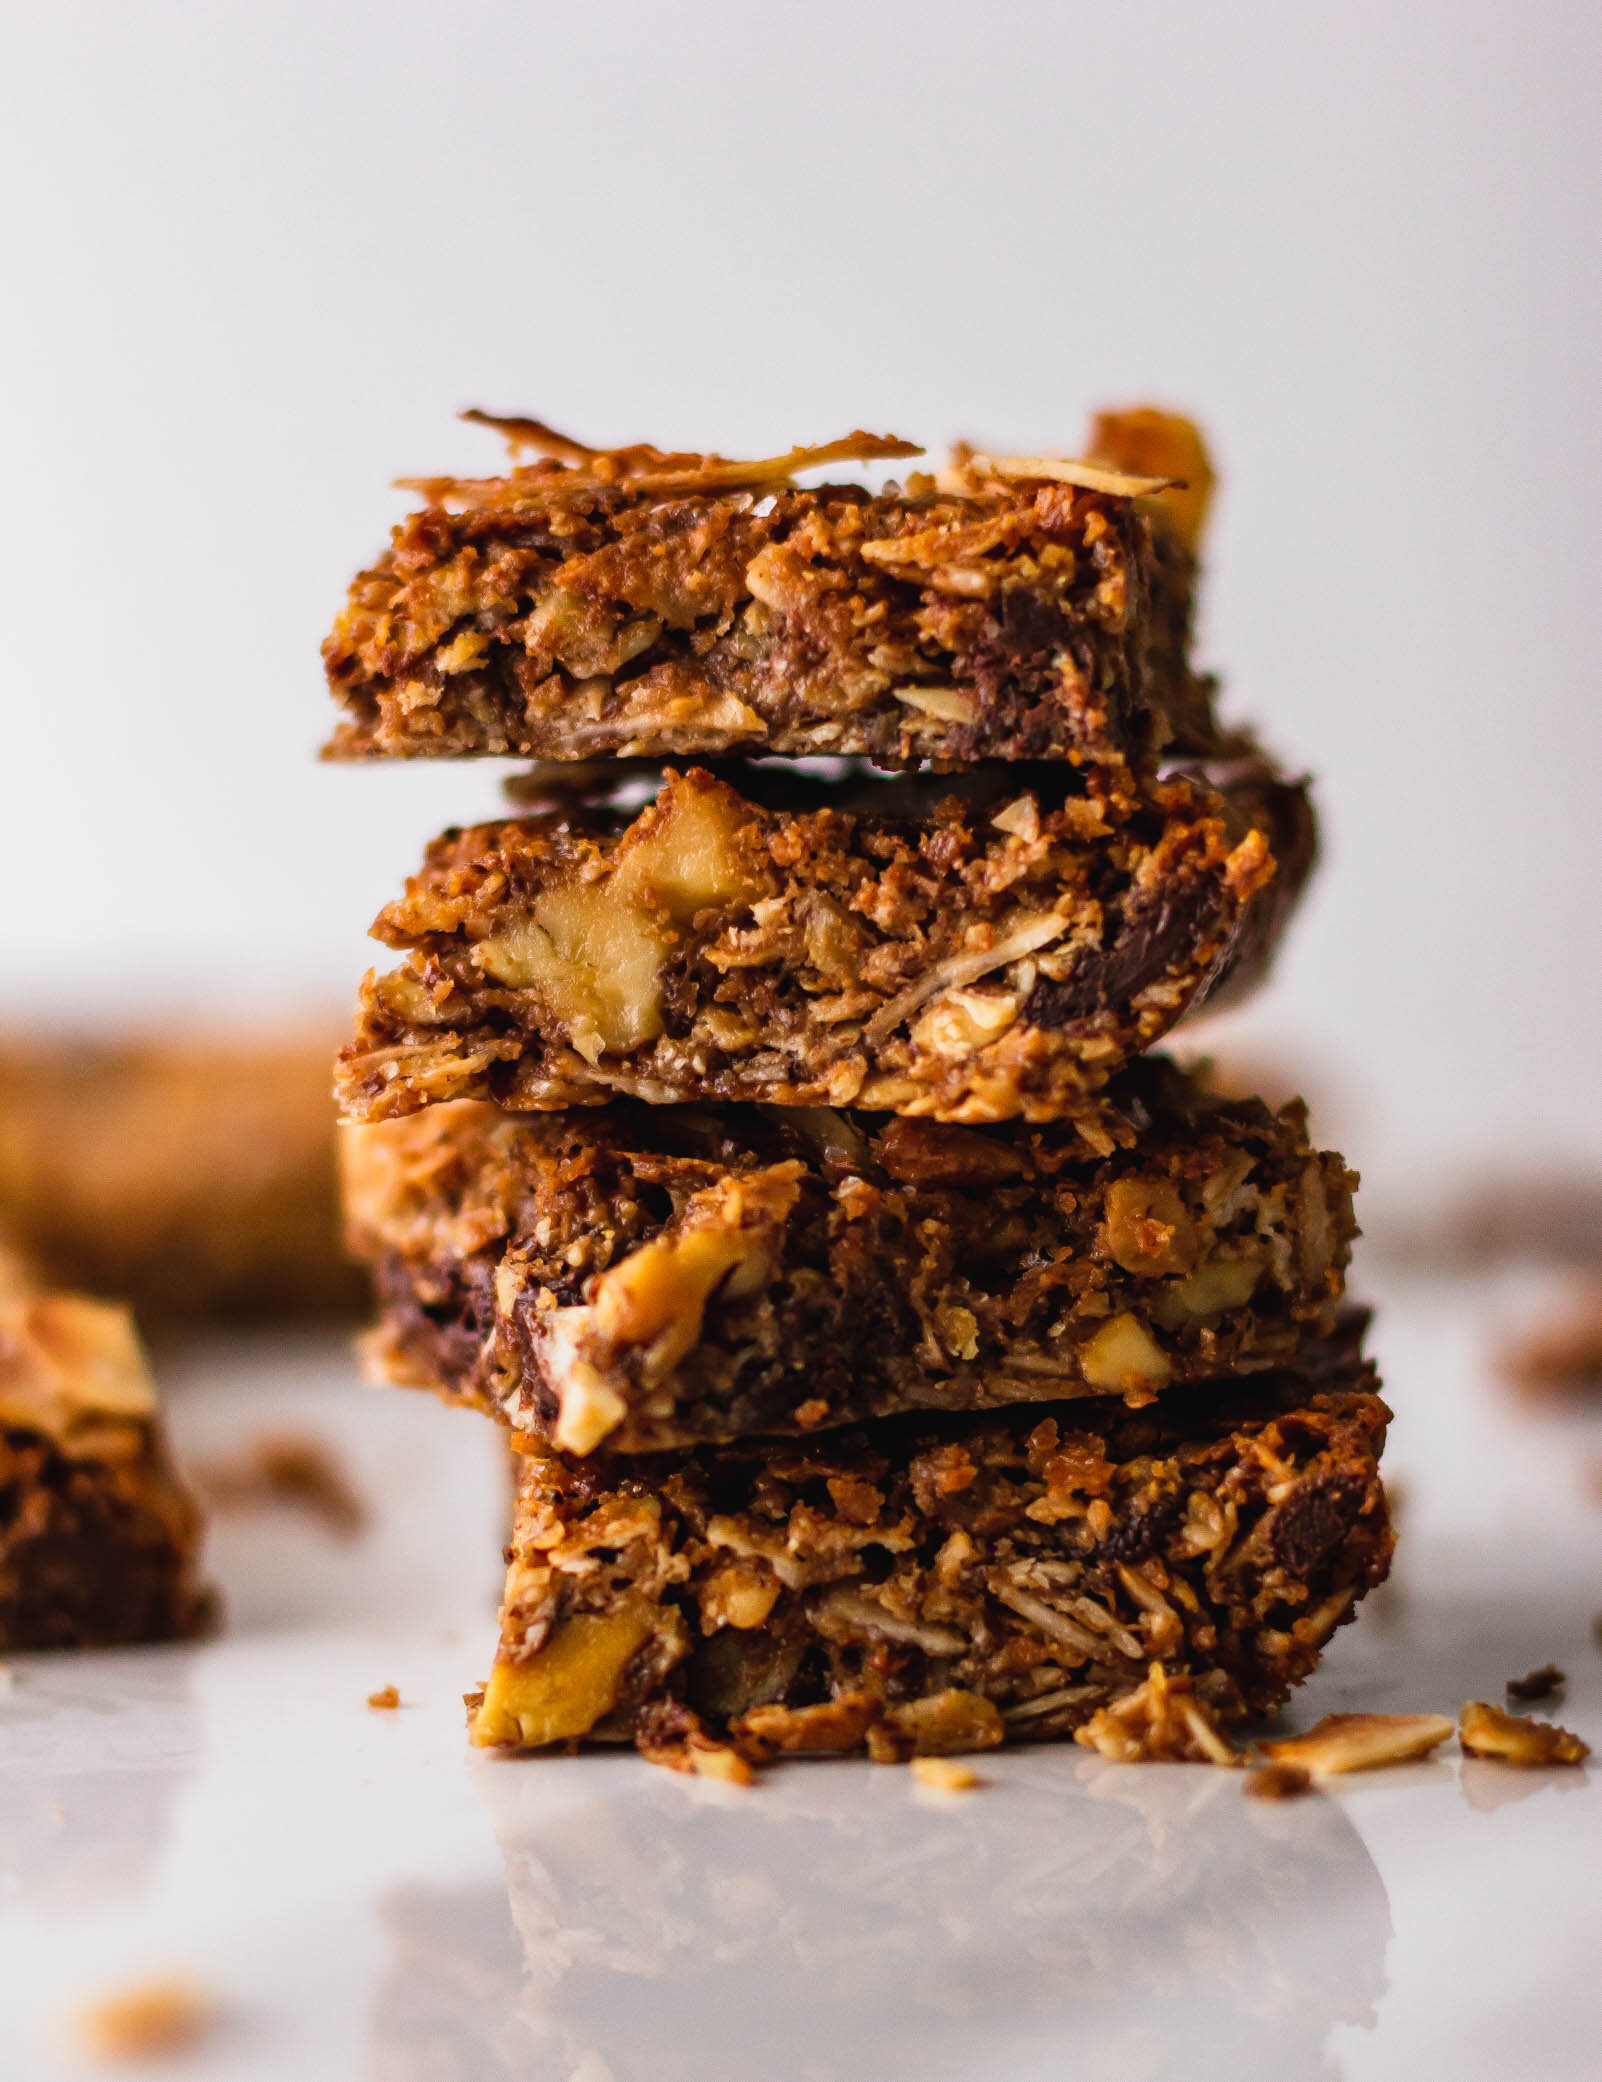
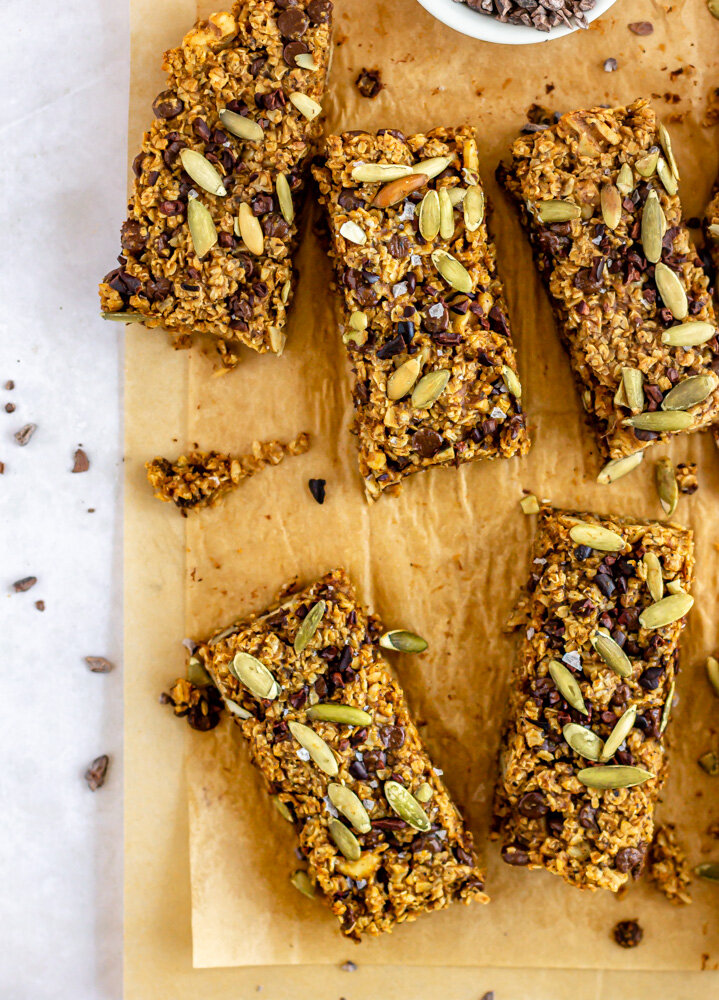
Pumpkin Granola Bars
/These simple, homemade pumpkin granola bars are the perfect fall snack. They are vegan and gluten-free, filled with warming spices, nuts, and chocolate chunks.

Are we still in pumpkin season? I feel like there is really no clear beginning and end to the whole pumpkin craze. Is it whenever Starbucks tells us? Pumpkin season starts in August when they begin serving PSLs and ends when they switch to Peppermint Mocha? How are we supposed to know these things? I have no Christmas tree up, so I think it’s fair to continue eating pumpkin over here. At least through Thanksgiving, then we can re-assess.
I have been making some rendition of these pumpkin granola bars for at least five years. My first recipe notebook is a big hardcover one, filled with mostly other people’s recipes I found on the internet and wrote down as I tried them has the date I started it written in the front cover- 1/27/15. We were living in Nashville, I was still teaching full-time, and my business was going to be called “That Baking Lady” (there are little pencil-drawn illustrations of my logo scratched into that first page). These granola bars are the sixth recipe in that book the page has collected its fair amount of chocolate smudges and oil stains over the years. I have no idea where I got this recipe, it’s not really my own, I’ve just adapted and streamlined it over the years, but we’ve been making some version of them in our house every year since.
Filled with pumpkin, chocolate chunks, oats, and pumpkin seeds, these granola bars feel really healthy, while also satiating your dessert cravings. You can easily substitute mix-ins, add extra nuts or dried fruit, and they hold in the fridge, wrapped tightly in plastic wrap for up to a week. These granola bars can also be made vegan if you use maple syrup and dairy-free chocolate, so they make a great holiday baking treat for all of your vegan friends.


Pumpkin Granola Bars
Ingredients
- 2 cups rolled oats
- 2 tbsp ground flaxseed, optional
- 1 tsp ground cinnamon
- 1/2 tsp ground ginger
- 1/2 tsp ground cardamom
- 1/4 tsp ground nutmeg
- 1/4 tsp ground allspice
- 1/4 tsp kosher salt
- 1/2 cup canned pumpkin
- 1/4 cup loose almond butter
- 1/4 cup maple syrup or honey*
- 2 tbsp coconut sugar
- 1 tbsp vanilla extract
- 1/2 cup dark chocolate, chopped*
- 1/3 cup pumpkin seeds, plus more for sprinkling on top
- flaky salt
Instructions
- Preheat oven to 350° F and line a rectangular baking pan (8x8” or 9x9”) with parchment paper. Set aside
- In a large bowl, whisk together oats, flaxseed, spices, salt, pumpkin seeds, and chopped chocolate.
- In a large measuring cup or another bowl, whisk together pumpkin, almond butter, maple syrup/honey, coconut sugar, and vanilla until smooth and homogenous.
- Pour the wet ingredients into the bowl with the dry ingredients and stir together with a rubber spatula until all of the dry ingredients are well-coated.
- Pour batter into your prepared pan and use your hands to press into an even layer. Sprinkle with more pumpkin seeds. Bake for 20-22 minutes, until set and the edges are beginning to brown. Sprinkle the bars with flaky salt, and let them cool completely in the pan.
- Slice into 8 equal-sized bars, wrap individually, and store in the refrigerator for up to a week.
Notes:
- If making these vegan, be sure to use dairy-free chocolate. I really like the Endangered Species Baking Chips with Oat Milk.