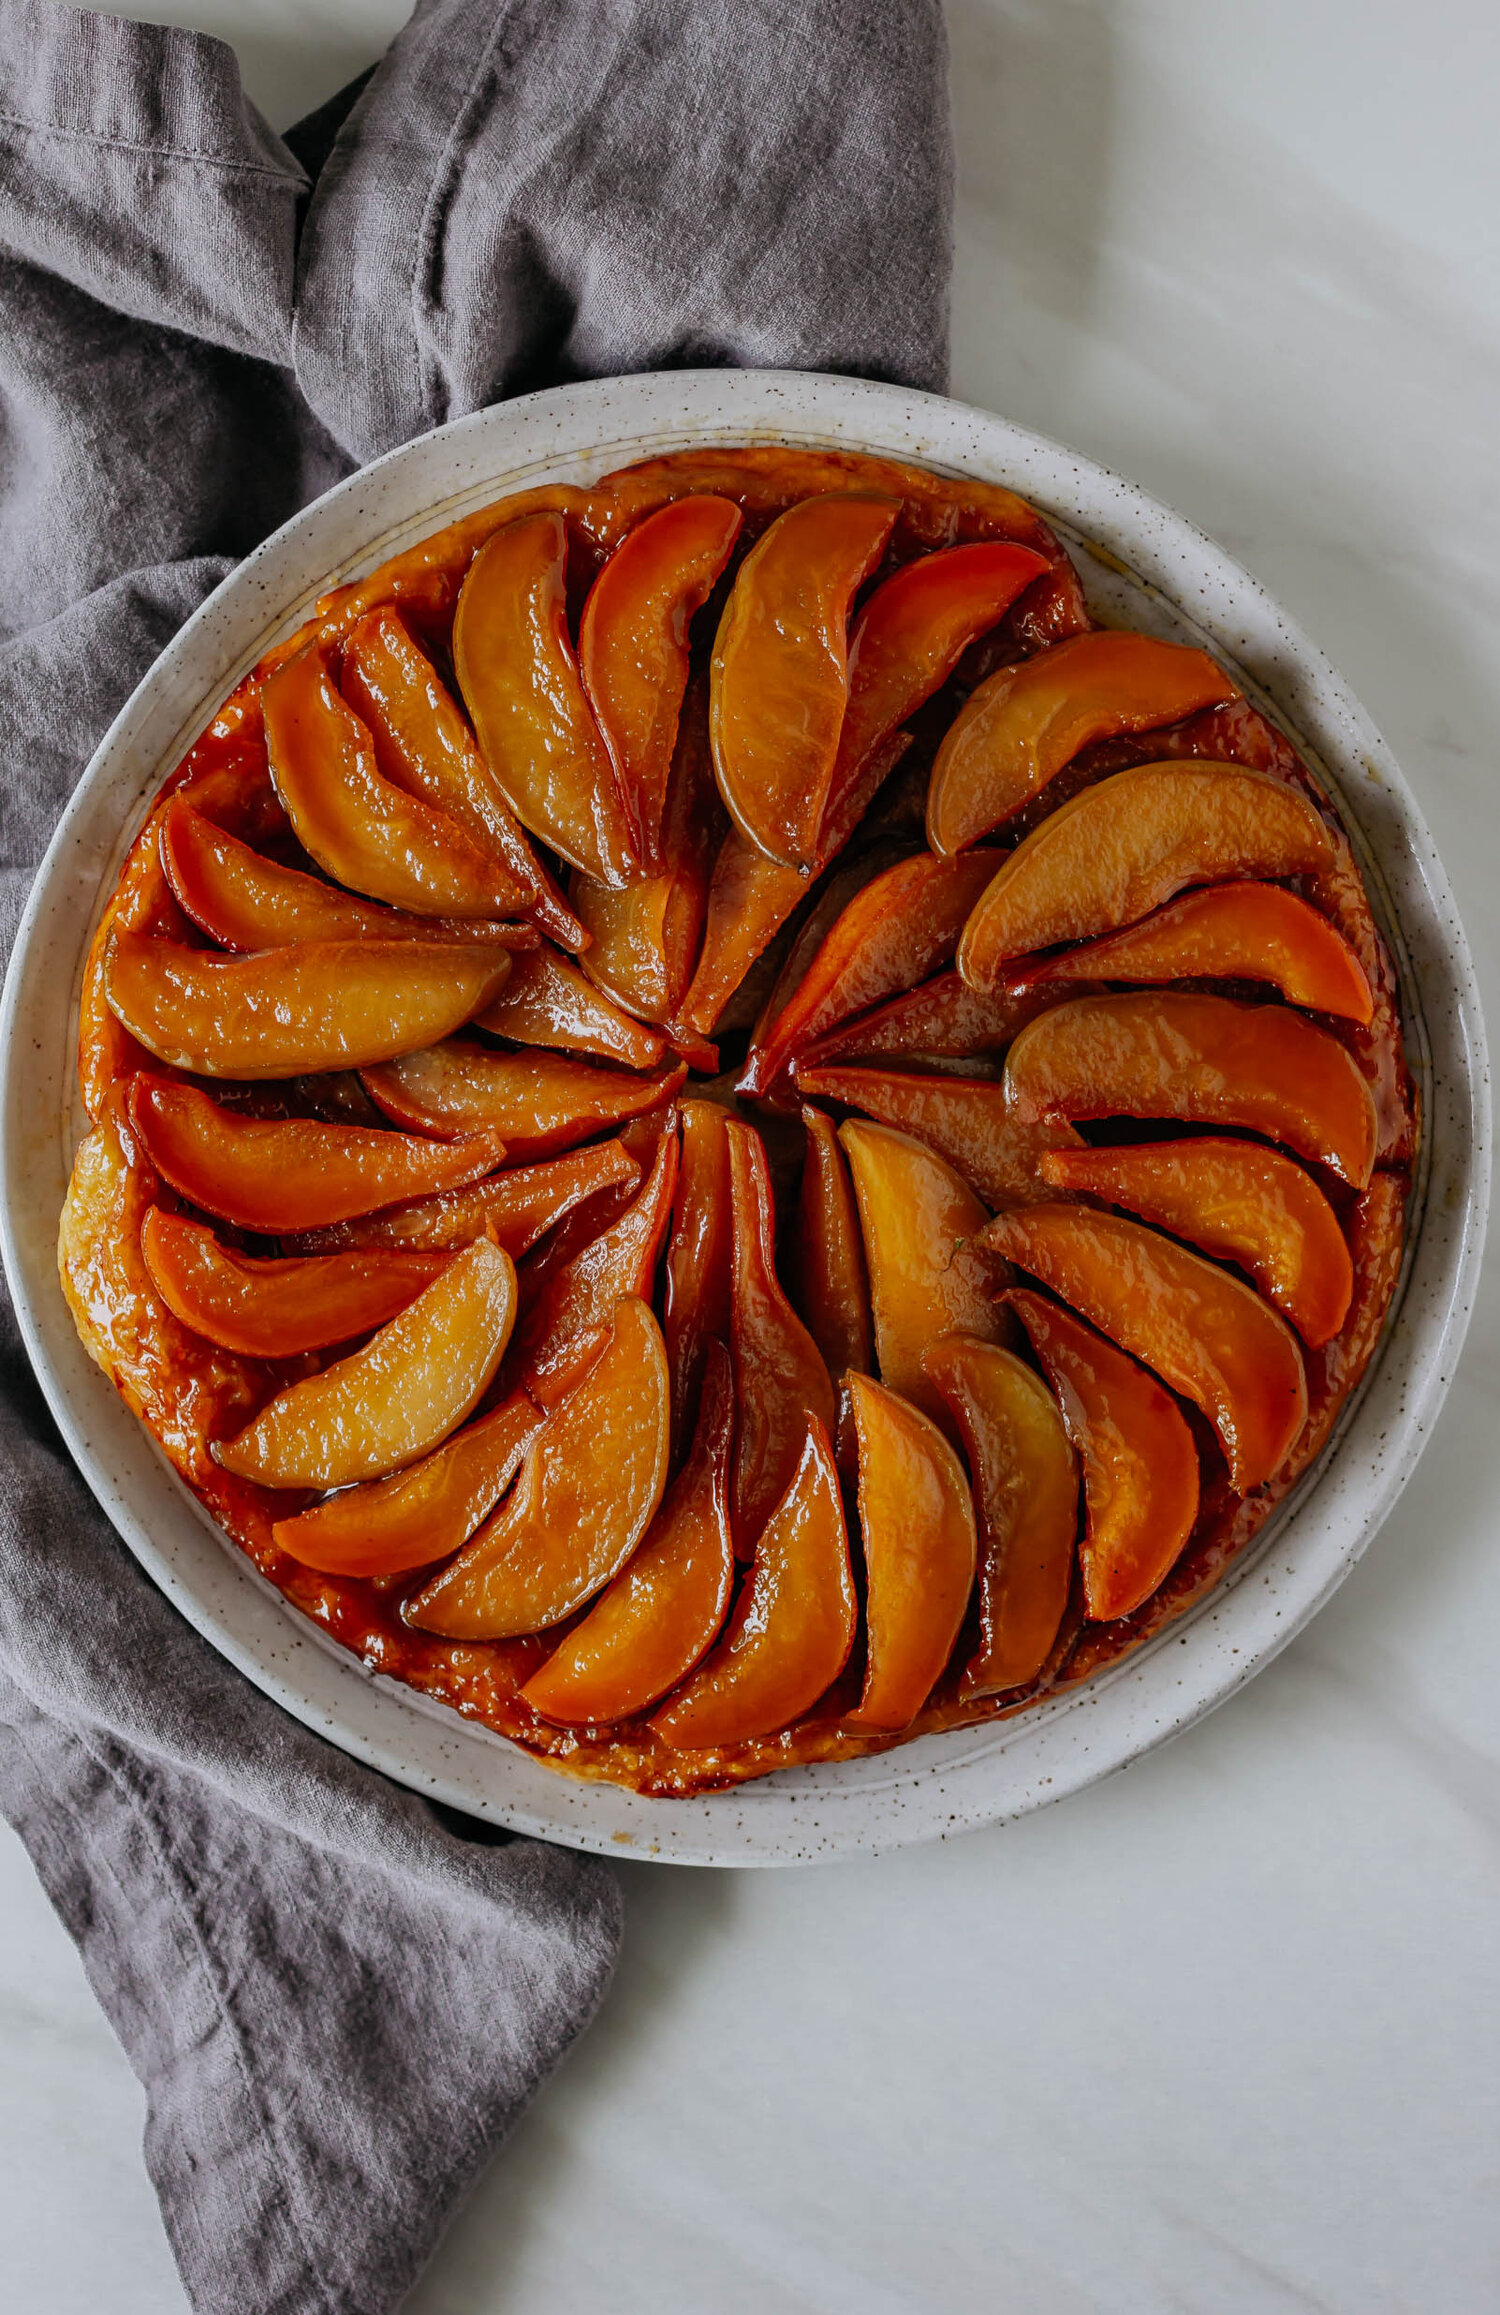
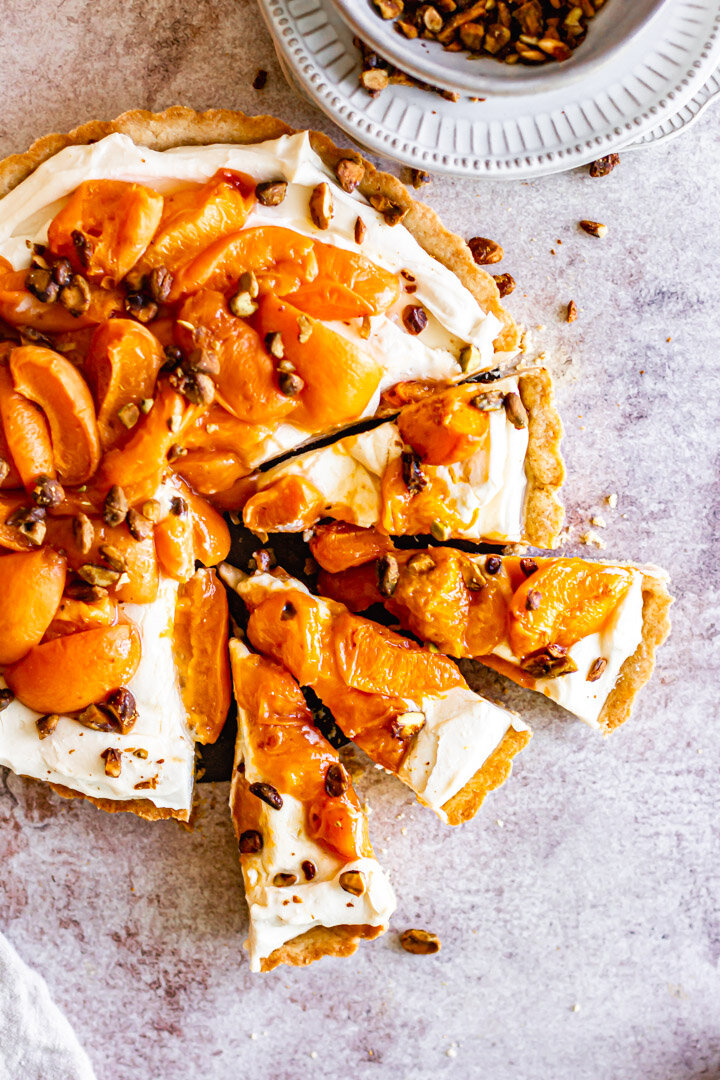
Pumpkin Ricotta Tart
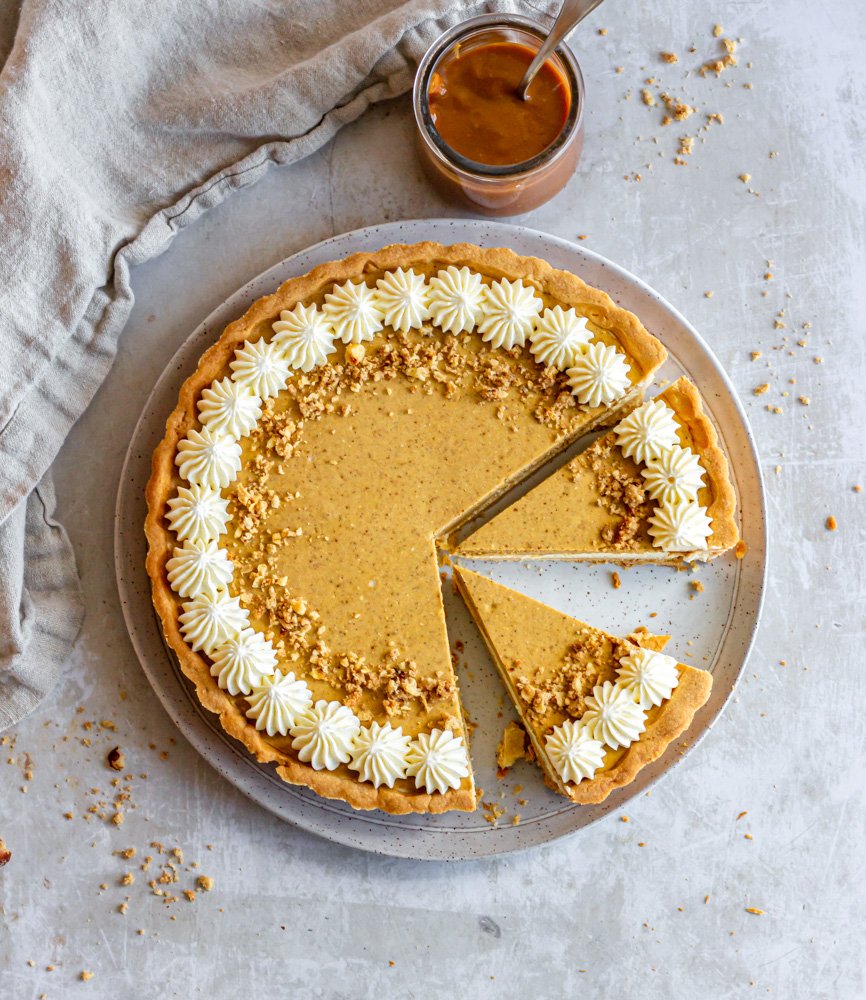
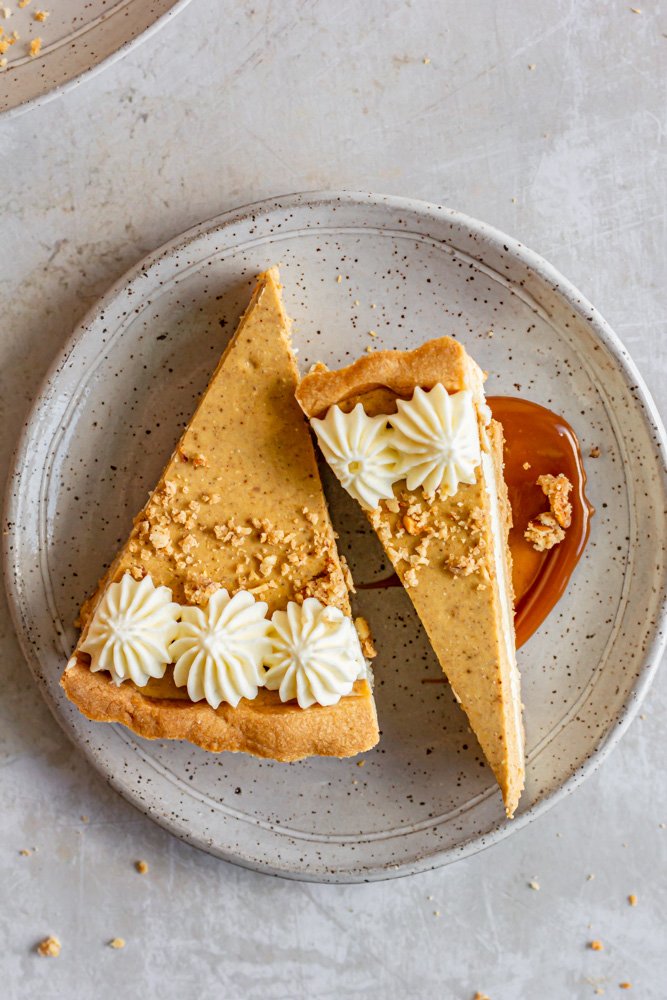
/A step up from the traditional pumpkin pie, this pumpkin ricotta tart deserves a place at your Thanksgiving table. It has a crisp, sweet crust, layers of light and creamy pumpkin ricotta filling and is topped with an olive oil caramel, a handful of cookie crumbs, and whipped crème fraîche.
When it comes to developing recipes for the blog and creating a brand with a clear culinary point of view, I have a very niche perspective. I feel very strongly that home desserts (and honestly, lots of restaurant desserts but that’s a whole other sermon) should be better. As much as I love the classic chocolate chip cookie from the back of the Nestle Toll House bag or can eat my weight in a package of Double Stuf Oreos, it occasionally seems like, when it comes to baking, we lose the sense of adventure that we find in cooking and settle for the same old stuff time and time again. I think that there is space in this little baking world for both—we can enjoy the classics while also challenging ourselves with new and different ideas and flavors.
I’ve had some very fun opportunities to work in fancy schmancy restaurant kitchens alongside some truly genius chefs, who have taught me that there is something special about a great dessert. And I believe we can create that at home. I have two big goals on this blog:
1) to challenge you, home bakers of the inter-webs, to play around with unique and creative flavors that go beyond the familiar chocolate, peanut butter, sugar flavor palette
2) to teach you basic, foundational pastry and baking skills so that you are empowered to create desserts with your very own stamp.
With all of that in mind, when developing recipes, I ask myself a few different questions—
Is this recipe familiar enough to draw someone in, yet unique enough to pique their interest?
How can I take the multiple texture, multiple components of fancy plated desserts and incorporate them in a way that doesn’t feel overwhelming and labor intensive to a home a kitchen?
What flavors can we create using ingredients that are fairly accessible to a home baker? (aka—no fermenting summer flowers to reduce and use all through winter)

about this pumpkin ricotta tart recipe
All of that to say that this recipe ticks all the boxes. This was a fairly quick recipe to develop—one day, the idea just popped into my head and from conception to completion, the recipe development process only took two days. It just works.
I wanted to create a dessert for your Thanksgiving table that felt grown-up and elegant, while also familiar and comfortable. I wanted to create a dessert that could be made ahead of time, used very few dishes and only a little hands-on time, but that would look like you poured days into it. Et voila-a perfect pumpkin ricotta tart was born.
For this tart there are really two basic components: (plus a few optional extras to really wow everyone)
a tart crust: For this recipe, and most tart recipes, we are using a basic pate sucreé or sweet crust dough. The difference between a sweet crust (sometimes called shortcrust) and a pie crust is simply the addition of eggs and sugar. The final result falls somewhere between a pie crust and a cookie. The tart crust itself takes maybe 10 minutes to make, but does need a little chill time. You can make it a few days ahead, chill it overnight, roll it out and line your tart pan and then just store your lined tart pan in the freezer until you’re ready to bake.
a ricotta filling: We love a creamy ricotta filling. It feels a little like cheesecake but without being a giant slice of dairy, it’s light and fluffy and really quite dreamy. This ricotta filling is made in the food processor for maximum fluffiness and minimal effort. There’s a bit of citrus zest, sugar, cream cheese, eggs and yolks, and good ricotta (more on that later). Then, a portion of the filling is separated out doctored up with pumpkin and lots of festive spices. Once baked, the ricotta filling needs an overnight chill so again, you can make this whole dessert the day before.
extras: In my humble opinion, there are two things that take a dessert from good to great: 1) contrasting flavors and 2) contrasting textures. For this tart, a very simple whipped crème fraîche takes the place of whipped cream and the cultured, tart flavor helps cut through some of the sweetness. I also made an olive oil caramel for plating and drizzling (again, you can make this lots of days ahead and keep it in your fridge) and I sprinkled some cookie crumbs on top. I used a bit of hazelnut streusel that I had in the freezer from another recipe, but you can use any crunchy cookie you’d like, store-bought or homemade (gingersnaps would be my number one recommendation)


picking good ricotta cheese
At risk of sounding bougie or a little too much like Ina Garten, good ricotta cheese is worth it. Often in Italy, ricotta is a sheep’s milk cheese, but most of what you see in American grocery stores is made from cow’s milk. High quality ricotta cheese has a richer (more cheese-like) flavor and larger curds. If you think about the tubs of ricotta cheese that you find in the refrigerated aisle of the grocery store, you’ll notice that the curds are very small, almost grain-like because of the fact that they make it in large-scale production. Fresher, smaller batch ricotta has larger curds and is a bit fluffier.
At my grocery store, they have small batch ricotta by the deli in the fancier cheese section (you can probably find this at markets like Whole Foods or Fresh Market). It’s a bit more expensive, but not outrageous. I think I spent $5 on the amount I used in this recipe. If you can’t find the artisan ricotta, a tub will work in this recipe—just be sure to buy the one labeled “whole milk”, you want all the richness and creaminess you can get!


Pumpkin Ricotta Tart
Ingredients
- 90 g (just shy of 1 cup) sifted powdered sugar
- 113 g (1/2 cup) unsalted butter
- 1 egg yolk
- 30 g (1/3 cup) almond flour
- 230 g all purpose flour
- Pinch (about 1/8 tsp) kosher salt
- 1-2 tbsp ice water
- 10 oz whole milk ricotta cheese
- 4 oz cream cheese, softened
- 1 egg
- 1 egg yolk
- 1/2 cup (100 g) granulated sugar
- 1 tsp orange zest
- Pinch of salt
- 1/2 cup (113 g) pumpkin puree
- 1/2 tsp ground cinnamon
- 1/4 tsp ground nutmeg
- 1/4 tsp ground cloves
- 1/4 tsp ground all spice
- 1/2 cup (100 g) granulated sugar
- 1/4 cup (56 g) heavy cream
- 1 1/2 tbsp olive oil
- Pinch of flaky salt
Instructions
- In the bowl of a stand mixer fitted with the paddle attachment, combine sifted powdered sugar and cubed cold butter. Mix on low speed until all of the sugar has been hydrated, mixture is creamy, and no dry spots remain.
- Add the egg yolk and mix again for about 20 seconds to combine.
- Add the dry ingredients and continue mixing on medium-low speed until all of the dry ingredients have been incorporated and the mixture looks like coarse breadcrumbs.
- Add one tablespoon of ice water and continue mixing until the dough begins to form large clumps and can be pressed together in your hand. Add the remaining tablespoon of water if needed or dough seems very dry.
- Turn the dough onto a lightly-floured work surface and press into a disc. Wrap in plastic wrap and chill for at least 30 minutes.
- When the dough has chilled, turn it back out onto the surface and roll it into a large circle, approximately 1/4” thick. Carefully transfer it to a tart pan with a removable bottom and gently press the dough into the pan. Trim the edges and transfer to the freezer for 15-20 minutes before baking.
- Preheat the oven 325° F. Line the tart dough with a piece of parchment paper and fill it with rice or baking beans. Place the tart on a baking sheet and bake for 20 minutes until the edges are lightly golden brown. Remove the rice/baking beans and return to the oven for another 15-20 minutes until very golden. Let cool completely.
- Preheat the oven to 300°F.
- In the bowl of a food processor, combine ricotta, cream cheese, egg, egg yolk, sugar, orange zest, and salt. Pulse for about 30 seconds, until mixture is very well combined and smooth.
- Spoon about one 1/3 of the ricotta mixture into a bowl and whisk in pumpkin puree, cinnamon, nutmeg, cloves, and all spice.
- Pour the remaining 2/3 of the ricotta mixture into your prepared tart shell and then top it with the pumpkin filling. Smooth into an even layer.
- Place the tart pan on a baking sheet and bake for 50-55 minutes, until the center is set and only slightly wobbly in the middle. Let cool completely, and then wrap and transfer to the refrigerator to chill overnight (or at least 4 hours).
- Place the sugar in a medium saucepan and set it over medium heat. Cook, without stirring, until the sugar begins to liquify. At this point, you can gently swirl the pot to ensure even coking. Continue to cook, watching closely until all of the sugar has dissolved and the caramel is a deep amber color.
- Gradually whisk in the heavy cream and cook for 1-2 minutes more, until caramel is smooth and golden. Remove from the heat and whisk in the olive oil until emulsified. Transfer the caramel to a bowl and let cool completely. Store in the refrigerator for up to 2 weeks.
- **Take care, after adding the heavy cream, not to cook the caramel for too long- just a minute or two until smooth. Cooking the caramel too long will take it to the “soft ball stage” of sugar cooking and your finished sauce will be thick and chewy, more like caramel candies than a silky smooth sauce.**
Notes:
To make whipped crème fraîche: You can totally go for classic whipped cream on top of this tart if that’s your preference, but I really love the contrasting tang that a whipped crème fraîche provides. Simply combine 2 parts crème fraîche (I love the Vermont Creamery brand), 1 part heavy cream, and a couple of spoonfuls of powdered sugar (how sweet you like your whipped cream is up to you) in a large bowl. Whisk vigorously until the cream is thick and soft peaks form when you lift the whisk out of the bowl.