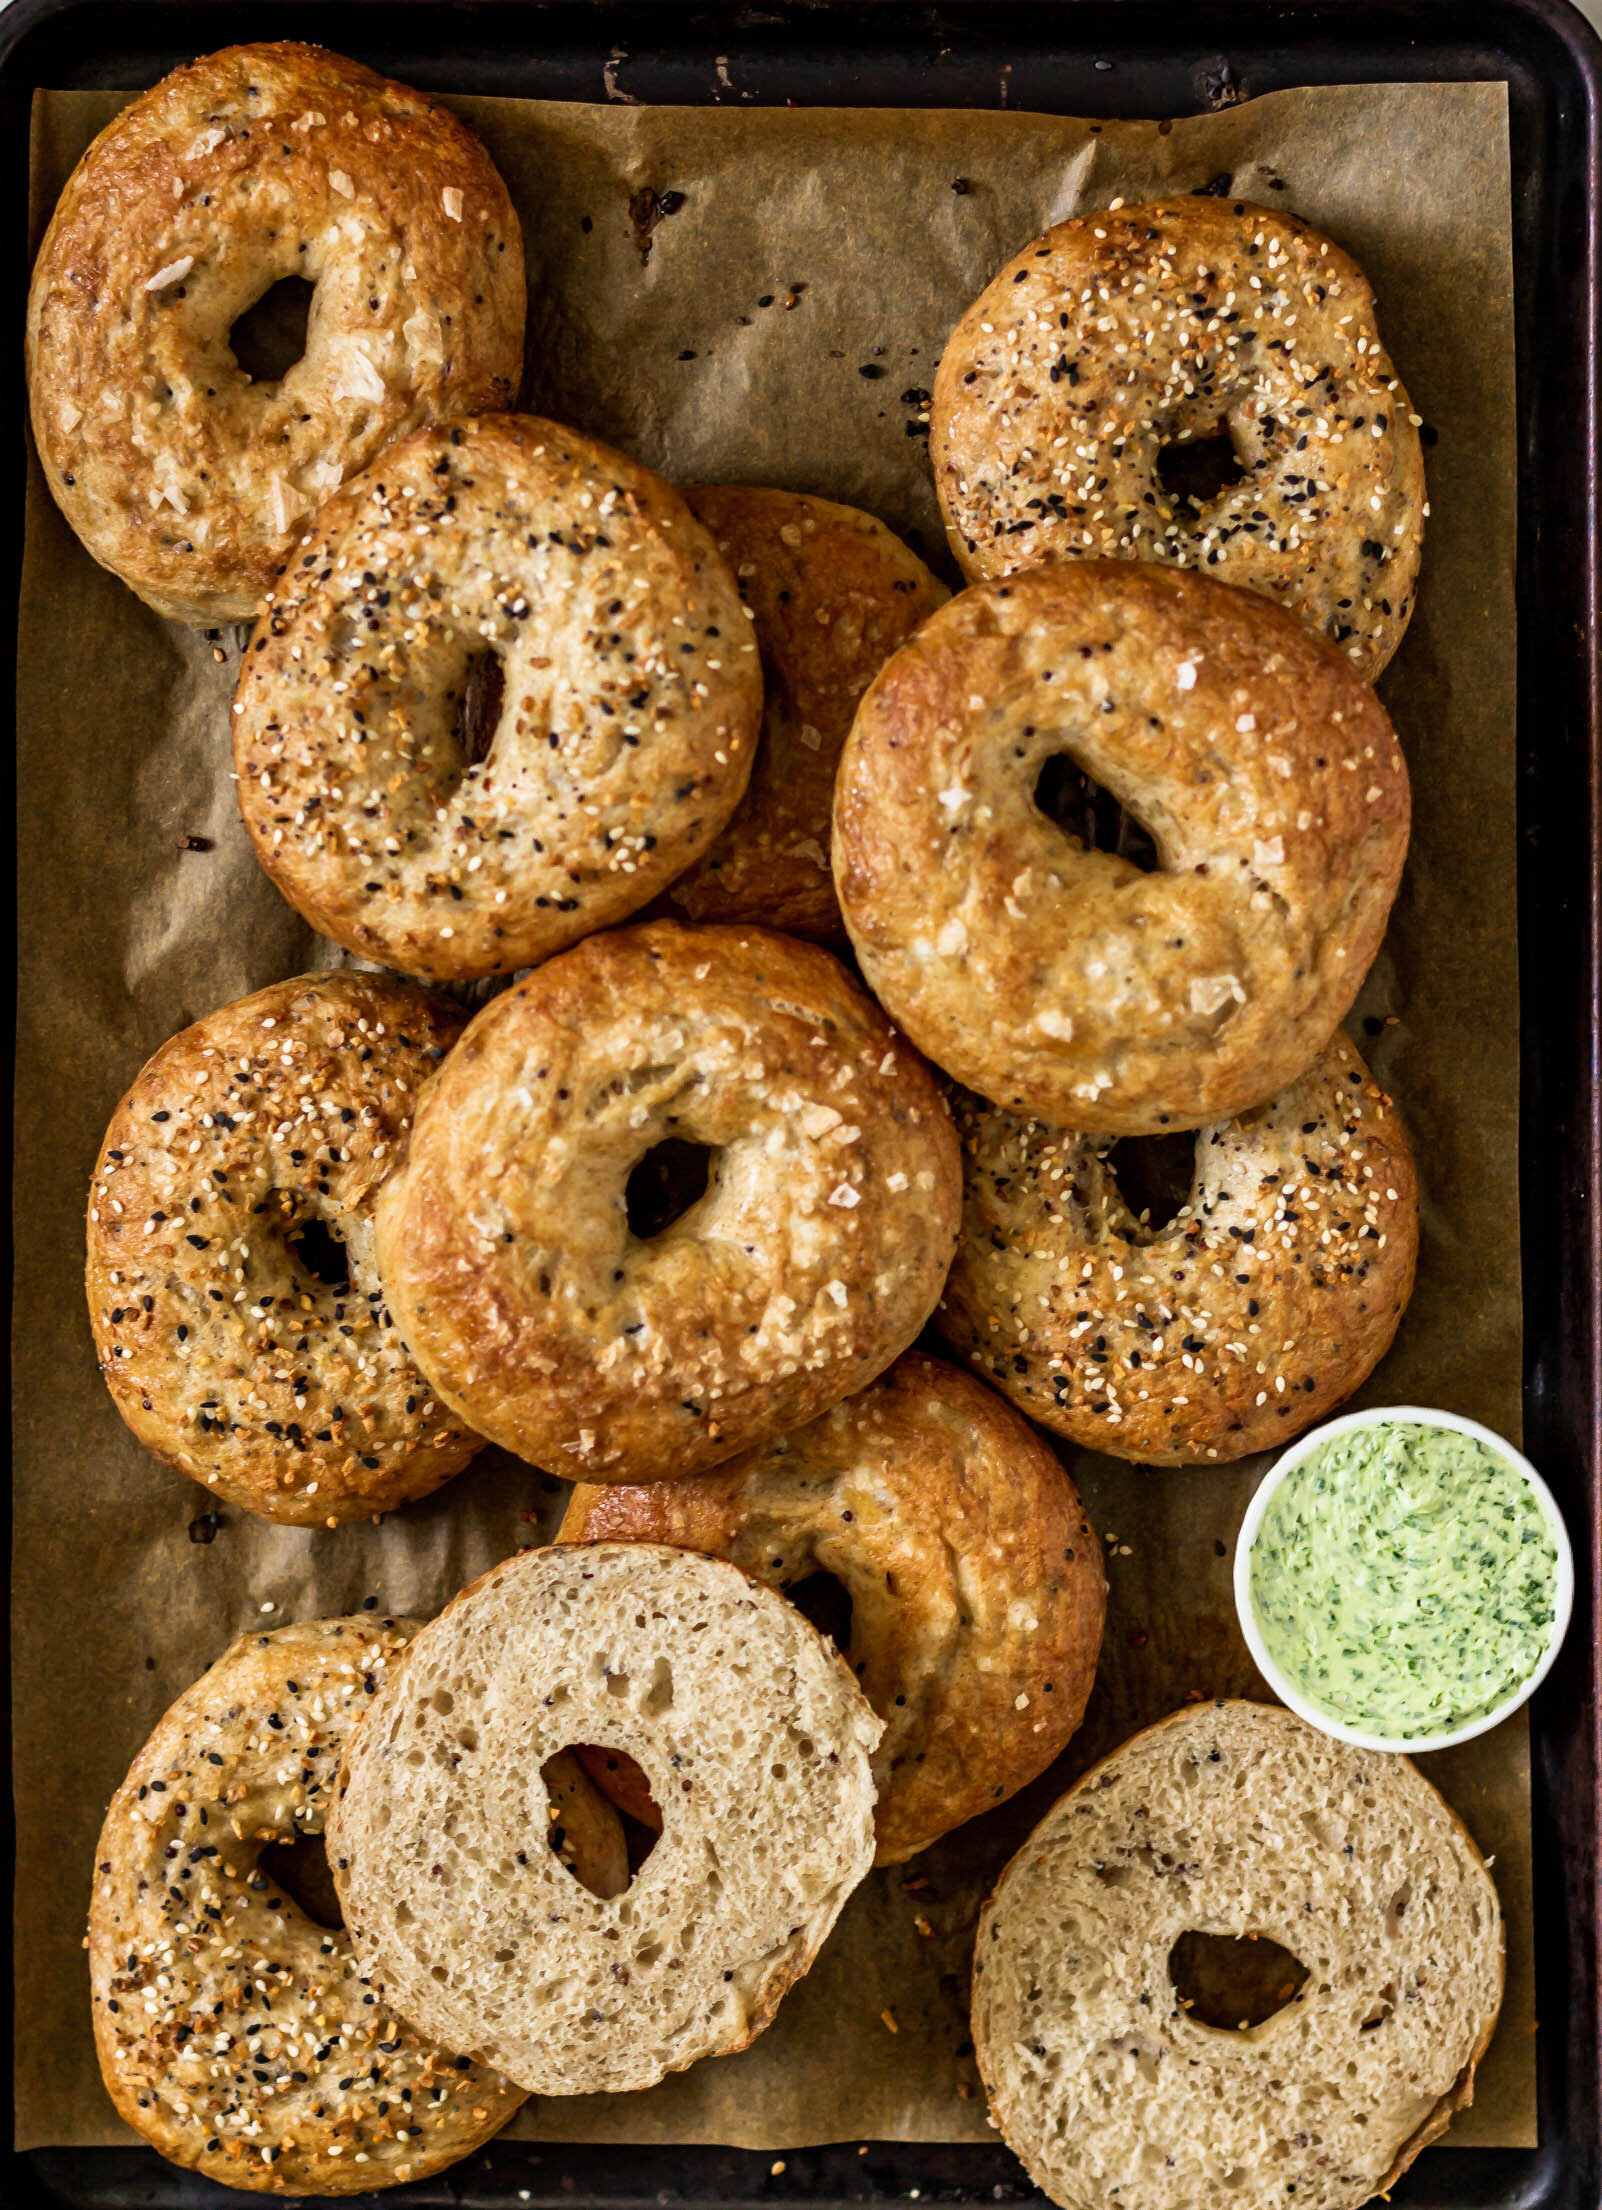
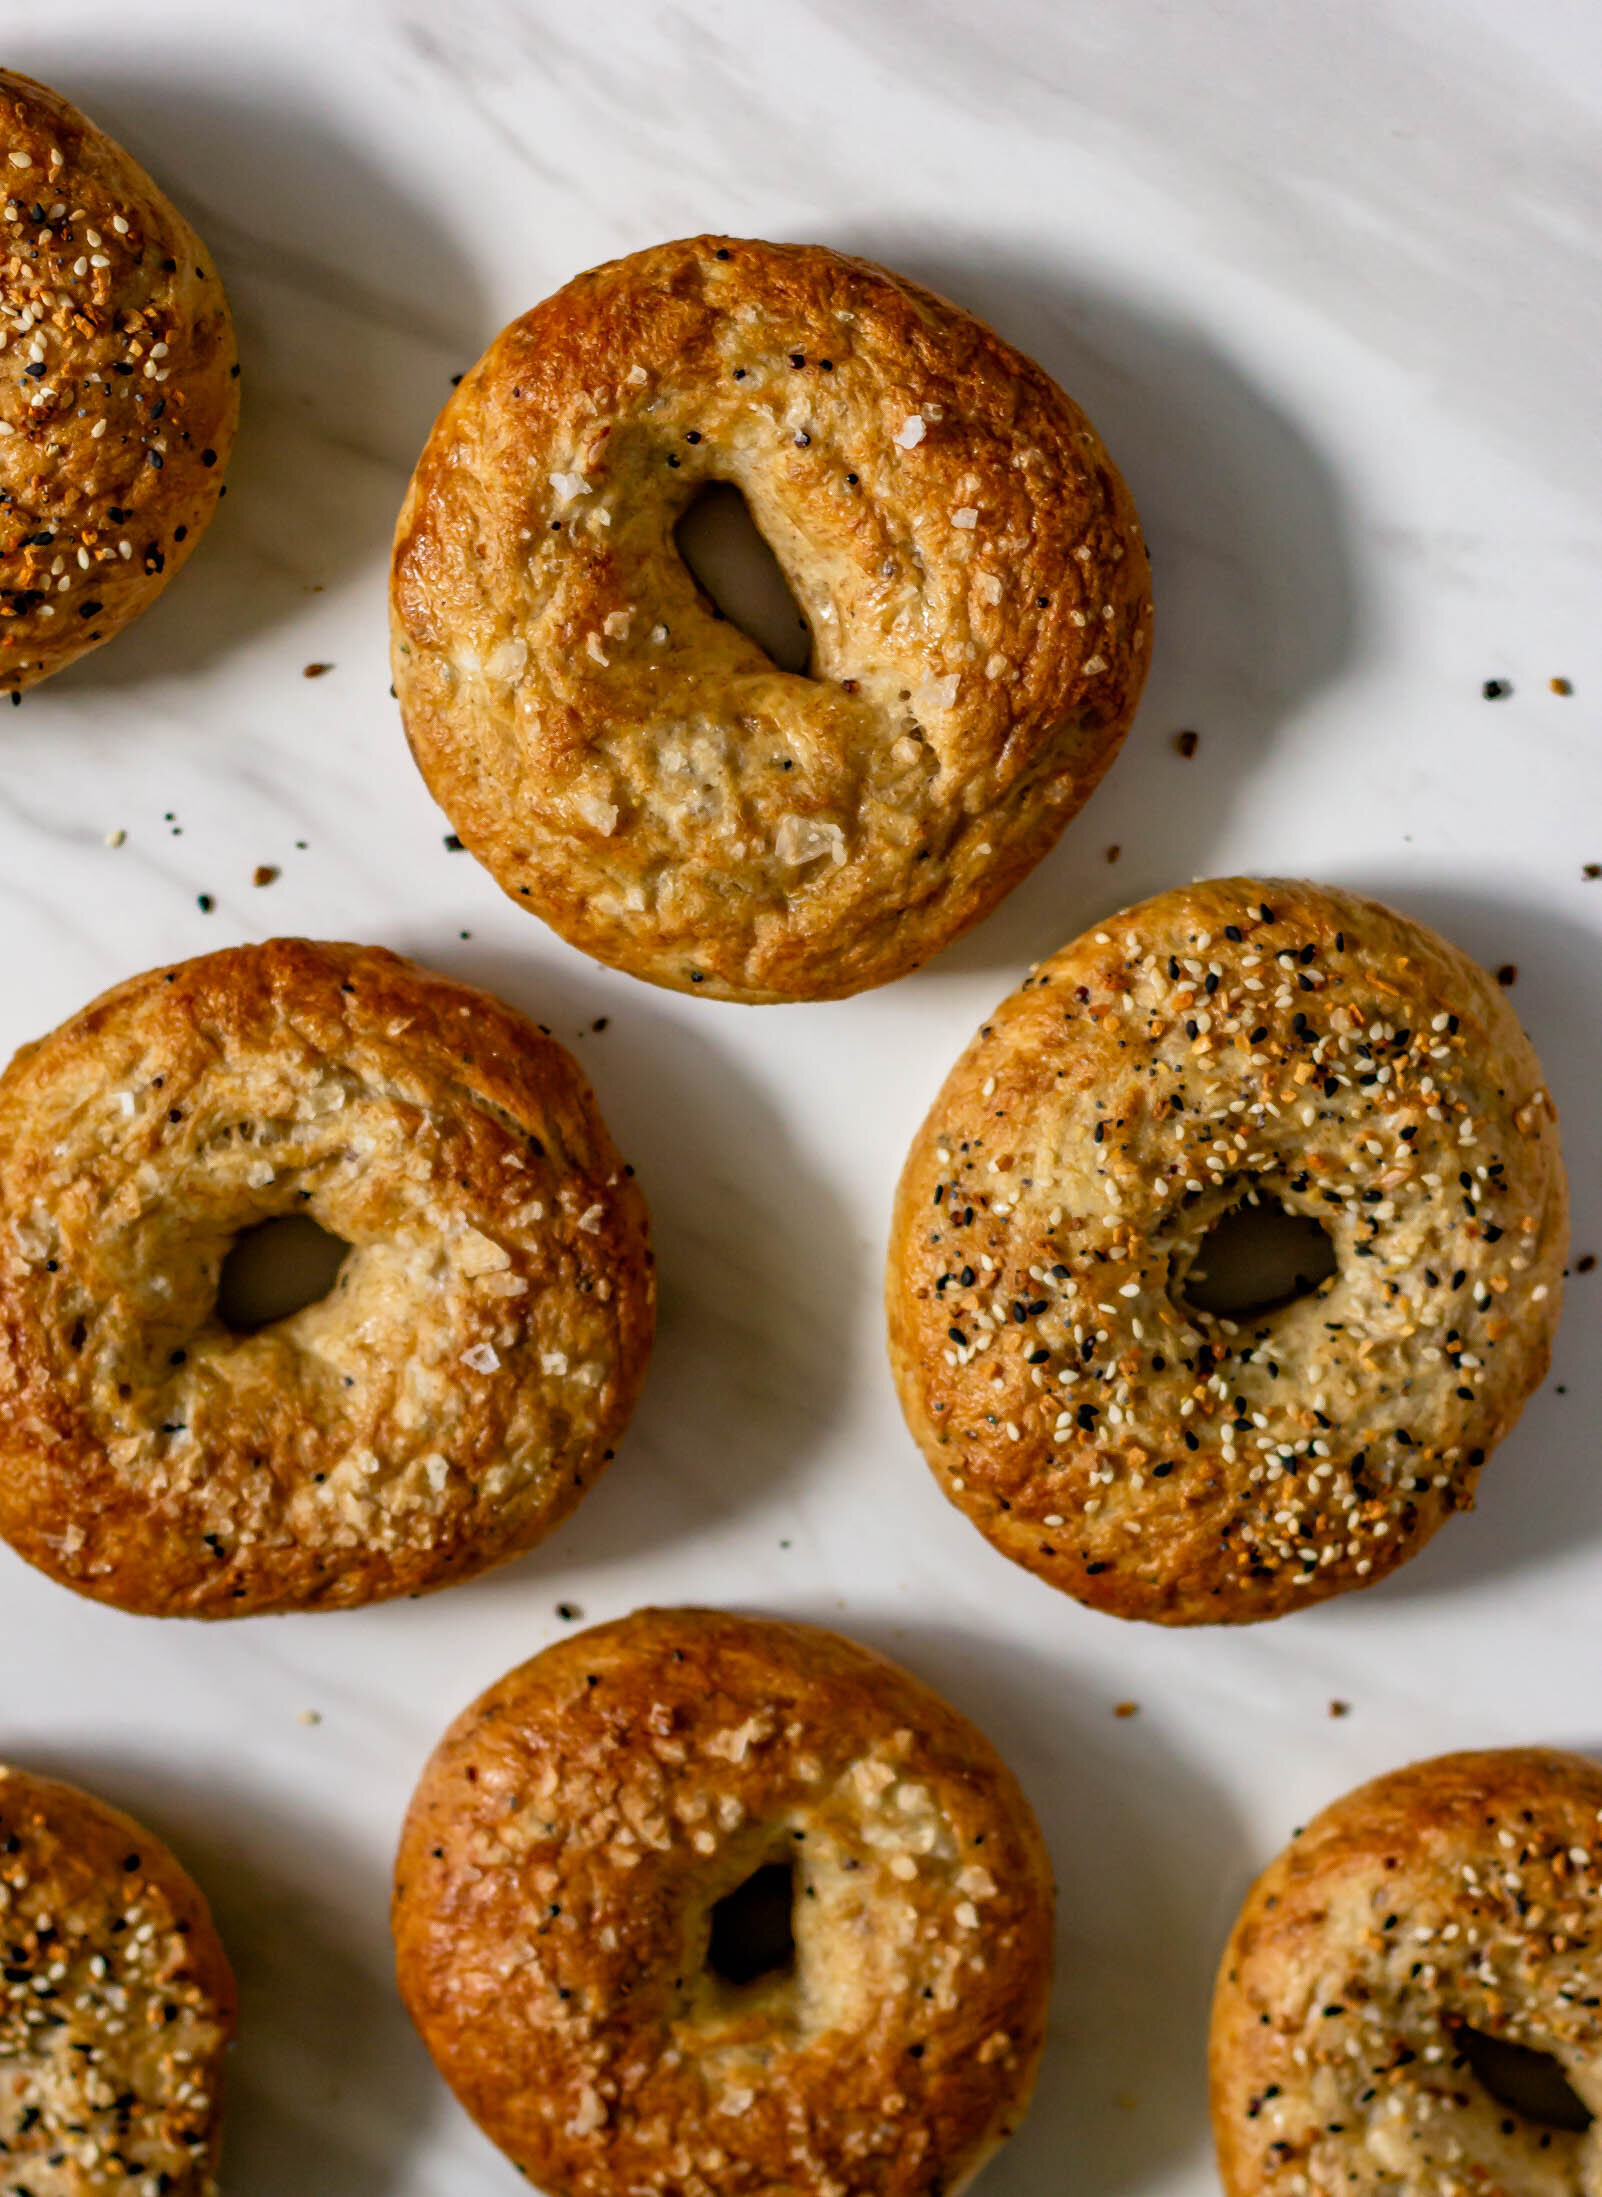
Multigrain Quinoa Bagels with Wild Arugula Cream Cheese

bagelscc4.jpg

How’s everyone feeling in this weird time? Working from home has afforded me a small sense of normalcy, but I have felt my anxiety has heightened in the past few days with every news update or social media post about the virus. I don’t know if this is true for you, but staying calm is a bit difficult for me. I’m naturally predisposed towards stress and I often feel my body tense or my heart rate increase before my brain even has a chance to catch up and process the reason for my nervousness. For me, the temptation is to allow fear to take root, hinging on the words of every doctor, journalist, world leader, etc, until suddenly, I’m enveloped in this suffocating vine of anxiety, without a clue as to the primary fear in the first place. I’m learning to exercise control over my wild thoughts, practice deep breathing regularly, and I’m making efforts to spend time in prayer before I get out of bed each day. I’m also making a lot of bread.

One of the positives to this whole social distancing ordeal is the opportunity to explore new things. We’ve been gifted a little extra time with our spouses and loved ones, a few more minutes for long walks in the sunshine, an hour or two to reorganize the closet, or the chance to test out a new recipe. I’m slowly reminding myself that though we may not know what the next few days or weeks or months hold, my cup still overflows.

bagels7.jpg

Making bagels at home is quite a feat. Home bagels are a hotly-debated issue and I’m not going to tell you that these are as perfect as those famed circles of dough, bathed in that magical Brooklyn water, that you find on the streets of New York. But they are a very good home bagel. There are a few different breads that I firmly believe need the tools available in a production bakery to be successful. For example, I have made baguettes at home multiple times only to be met with utter disappointment. Those long, crispy batons need a high-heat deck oven in order to develop that crispy outer layer. You’ll never convince me otherwise.

Bagels, though, you can make at home. These are made without the use of barley malt because honestly, I was too lazy to try and source it. They use a blend of all purpose and whole wheat flour and have cooked quinoa folded in for a little boost of protein. I had a bounty of wild arugula that I used in the cream cheese, but feel free to use spinach, kale, or even a handful of whatever herbs you have on hand. So this week, take a breath, be kind to yourself and those around you, and make some bagels. (And if for some reason you aren’t into bagels, check out this list of project baking ideas I put together earlier this week.)

Multigrain Quinoa Bagels with Arugula Cream Cheese

Yield: 13 medium sized bagels

Ingredients

for the preferment

2/3 cups (128 g) warm water

2 cups (225 g) bread flour

a pinch of active dry yeast

for the bagels

1 1/3 cup (304 g) warm water

3 cups (385 g) bread flour

1 cup (127 g) whole wheat flour

2 tsp active dry yeast

1 T kosher salt

2 T brown sugar

1 T honey 

preferment, recipe above

1/2 cup (80 g) cooked quinoa 

for boiling and baking:

1 T baking soda 

1 T honey 

1 egg white

for the herbed arugula cream cheese 

8 oz cream cheese, softened

1 cup arugula, spinach, or kale, packed 

1 sprig (6-8 leaves) basil

1/4 cup fresh parsley

1 small clove of garlic 

salt and pepper to taste

Procedure 

to make the preferment 

  1. In a medium bowl, stir together flour, water, and yeast until no flour streaks remain. Cover with plastic wrap and let rest at room temperature for about 2 hours, until preferment is bubbly and slightly risen. 

to make the bagel dough 

  1. In the bowl of a stand mixer fitted with the dough hook, combine warm water, honey, and yeast. Stir gently and let rest for about 5 minutes until yeast is foamy. 

  2. While the yeast is hydrating, combine flours, salt, and brown sugar in a medium bowl. 

  3. Add preferment to water/yeast mixture and mix on low speed for about 30 seconds, until combined. Add dry ingredients and quinoa and knead on medium speed for another 1-2 minutes, until a dough begins to form. 

  4. Turn dough onto a lightly-floured work surface and knead by hand for another 3-4 minutes until dough is smooth and elastic. Transfer dough to a lightly oiled bowl, cover with plastic wrap and let proof in the refrigerator overnight. 

to make the bagels 

  1. Remove dough from the refrigerator and let sit at room temperature for 1-1 1/2 hours. Turn dough onto a very lightly floured work surface and divide into 12-13 equal pieces, weighing about 100 grams each. Roll each piece into a small round. Cover the dough rounds with plastic wrap and let rest for 15-20 minutes. 

  2. After dough has rested, shape the bagels. Stick your thumb through the center of each bagel to create a hole in the center. Place your two index finger in the hole and stretch until the hole is about 2” in diameter. Cover the bagels again with plastic wrap or a clean towel and rest for another 15-20 minutes. 

  3. While the bagels are in their final rest, add baking soda and honey to a large pot of water and bring to a boil. Preheat the oven to 450°F and line two baking sheets with parchment paper. 

  4. Add bagels, two or three at a time to boiling water and boil for 1 minute, flip them, and then boil for 1 minute longer. Remove bagels with a slotted spoon, let drain onto a clean towel and transfer to parchment-lined baking sheets. 

  5. When all the bagels have been boiled, brush the tops of each bagel with beaten egg white and sprinkle with desired seasonings (poppy seeds, everything bagel seasoning, flaky salt, etc). 

  6. Bake bagels in preheated oven for 10 minutes, rotate pans, and bake for another 10 minutes. Let cool completely before slicing and eating. 

to make the cream cheese

  1. Combine arugula, basil, parsley, and garlic clove in the bowl of a food processor. Pulse until broken down into a rough paste. 

  2. Add cream cheese, salt, and pepper and continue to mix in the food processor until everything is evenly combined. Taste, and adjust seasoning as needed. 

  3. Store in an airtight container in the refrigerator. 

Print Friendly and PDF

Project Baking: 8 recipes for when you're stuck at home

It seems like most of us will be spending our days at home for the foreseeable future thanks to COVID-19. Martin works in professional soccer and MLS has suspended their season for the next 30 days, so things feel a little up in the air around here. Thankfully, since I work from home, I will still continue to develop and share recipes with you as normal for the next few weeks. I’ve decided, though, that all of this social distancing and self-quarantine is perfect for what I like to call ‘project baking’. These are recipes that you may not turn to for a weeknight dessert; they are little more labor-intensive and need a little more time (which is something we all have). So if you’re home, I encourage you to grab your kiddos or family or quarantine buddy, and hop in the kitchen. Knead some dough, decorate some cakes, and make something beautiful during this time.

BarnSour10.jpg

Classic Sourdough- Where better to start than a good ‘ole loaf of bread. Sourdough is one of my favorite things to make, and it’s made it’s way into my regular rotation. Here you’ll find a step by step guide to starting your very own sourdough journey—everything from creating a culture to the final loaf. I also have a video of the entire baking and shaping process saved to my Instagram highlights to make things a little easier for you.

Baklava2.jpg

Baklava- Sure there is a bit of layering involved in baklava-making, but it is worth it. If you’re looking for a nutty, buttery dessert to share with your loved ones, this is the one for you. Plus, there is nothing more delicious than pouring honey sauce on hot baklava and watching it bubble. As Lizzie McGuire says, “This is what dreams are made of.”

Babka5.jpg

Chocolate Tahini Brioche Babka- This might be my favorite recipe on the blog. It’s definitely in the top ten. Swirls of tahini and dark chocolate are tucked into fluffy brioche and the whole thing sort of melts in your month. Also, shaping babkas are fun and they’re very photogenic.

Bomboloni4.jpg

Bombolonis with Limoncello Cream- Bombolonis are Italian-style yeasted doughnuts. They are fried until they are golden brown, tossed in sugar while warm, and filled with a slightly citrus limoncello cream. Eat them for breakfast, brunch, dessert, lunch, really whenever. Also, if you tackle the Chocolate Tahini Brioche Babka (above), you can use the remaining half of the brioche dough for these doughnuts. See, you can multi-task project baking!

Chamomile Cake with Blood Orange Curd and Swiss Meringue Buttercream- Quarantine is the perfect time to dust up on your cake decorating skills. This chamomile cake feels like spring and it’s filled with a bright, citrusy blood orange curd. You can easily substitute whatever citrus you have on hand to make this cake your own.

HoneyCakeNewEdit.jpg

Russian Honey Cake- I first discovered Russian Honey Cake in pastry school. We made it as a project for one of my cake classes and I’ve since added it to my own kitchen repertoire. The cookie layers are similar to graham crackers and they’re sandwiched with a dulce de leche cream that softens the cookies just enough to be able to cut through them. It’s sweet and show-stopping at the same time.

CroissantsBrightEdit.jpg

Classic Croissants- Everyone should make croissants at least once in their lives. If nothing else, you will gain a new appreciation for your local bakery that makes those perfect croissants that flake into a million pieces the second you bite into them. These are classic, but feel free to fill them with chocolate or spinach or ham and cheese—really anything your heart desires!

bagelscc9.jpg

Multigrain Bagels with Quinoa and Arugula Cream Cheese- These bagels are filled with quinoa for a little extra protein and they freeze beautifully— a win-win in my book. Pair them with a bright, herby cream cheese and you’ve got a beautiful brunch pairing.

Grapefruit and Ricotta Flan

platedwithspoonsofter1.jpg

It was very shortly after moving to South Florida that my family discovered flan. There wasn’t much to be found in the way of Latin food in the late 90s in North Carolina, so after our move South, the Mexican/South American restaurant around the corner from our new house became a quick favorite of ours. El Mariachi was our spot. It was where we took out of town guests when we went out for dinner, it was where we spent Friday nights and birthdays, and it was our first choice for those random weeknights when cooking just wasn’t going to happen. We made friends with the waiters, discovered that my dad’s favorite steak sounded a little like “iguana” and giggled every time he ordered it, and consumed more Nachos Grandes than we could count. Here was where we had our first taste of flan, and we were hooked.

20 years later, I consider myself a bit of a flan connoisseur. In fact, when I was interning at the restaurant this past summer, a group made a special request for flan and since I was the only one on the pastry team who had ever made it before, I was charged with all flan duties. That first week, I was feeling a little overwhelmed, watching and learning a new system from very qualified chefs who had been doing this far longer than me. But flan, I could handle. It was quite the confidence booster.

There are generally two categories of flan—spongey and creamy. And if you can tell from my word choice in describing them, there is a correct type of flan. Some flans are deeply yellow, with Swiss cheese-like holes scattered throughout the custard. Others, are smooth and creamy, and your spoon cuts through the custard like butter. Creamy flan is what you want.

Lucky for me, my half-Cuban, half-Dominican husband has a long line of flan makers in his family. This recipe is an adaptation of his mom’s flan, which is an adaptation of her mom’s. The ricotta imparts a slight tang, balancing the sweetness of the caramel, while the grapefruit brightens up the whole dessert. And don’t tell my friends at El Mariachi, but I think this one is even better than that very first flan that stole my heart.

wholewithslice1.jpg

on caramel:

If making caramel makes you nervous, you are not alone. Sugar’s affinity for crystallization can make the whole caramel making process a little tricky, but it’s easy to master once you know the basics.

First, there are essentially two types of caramel—wet and dry. Wet caramel is sugar cooked with water, while dry caramel is just sugar cooked on it’s own. Wet caramel can be a little easier, the water makes the sugar less prone to crystallization, but it does take a little longer than dry. For this recipe, I used a dry caramel, but if you are more comfortable using a wet caramel, it will also work here.

To make dry caramel, all you need is a skillet with a wide surface area, a wooden spoon and sugar. Heat the skillet over medium heat and sprinkle some of the sugar in one layer on the bottom of the pan. DO NOT STIR! Let the sugar cook, undisturbed until some of it begins to liquify in puddles in the skillet. At this point, you can use your wooden spoon to gently nudge the sugar towards the center of the pan. Sprinkle another layer of sugar in the pan and repeat. Keep repeating this sprinkle, puddle, nudge method until you have added all of your sugar. Cook until the sugar is completely melted and the caramel is a deep amber color.

To make a wet caramel, combine 1 cup of sugar with about 1/3 cup water in a medium saucepan. Cook the sugar over medium high heat, without stirring until all of the sugar is completely melted. Stirring will cause the sugar to crystallize so it is important to let it do its thing without agitating it. When the sugar has completely melted, you can stir the caramel gently, every so often. Continue to cook until caramel is a deep amber color.

platedcloseup1.jpg

Grapefruit and Ricotta Flan

Yield: 1 8” round cake pan 

Ingredients: 

1 can (12 oz) evaporated milk

1 can (14 oz) sweetened condensed milk

4 large eggs

1 tsp vanilla extract

5 oz whole milk ricotta cheese

2 T grapefruit zest, from 1 large grapefruit

4 T grapefruit juice, from 1 large grapefruit

pinch of salt

1 cup (225 g) granulated sugar

Procedure: 

  1. Make the filling: Combine evaporated milk, sweetened condensed milk, eggs, vanilla extract, ricotta cheese, salt, grapefruit juice and zest in a blender. Blend until everything is combined and homogenized. *If you have time, transfer the filling to a reusable container and refrigerate overnight.*

  2. Make the caramel: Heat a wide-bottomed skillet over medium high heat and sprinkle some of the sugar in one layer on the bottom of the pan. DO NOT STIR! Let the sugar cook, undisturbed until some of it begins to liquify in puddles in the skillet. At this point, you can use your wooden spoon to gently nudge the sugar towards the center of the pan. Sprinkle another layer of sugar in the pan and repeat. Keep repeated this sprinkle, puddle, nudge method until you have added all of your sugar. Cook until the sugar is completely melted and the caramel is a deep amber color. 

  3. Carefully pour the hot caramel into the bottom of an 8” round glass pan. Pour filling ingredients into the pan over the caramel. 

  4. Very carefully put the flan pan inside another, large pan. Fill water to halfway up the sides of the larger pan to create a water bath. Place flan and water bath into a cold oven. Turn the oven to 325°F and let bake for 50 minutes, until custard is set. When custard is set and only has a slight jiggle when shaken, turn the oven off and leave the pan inside. Let cool in the oven for 1 hour. 

  5. Remove flan from oven and from water bath. Wrap tightly in plastic wrap and chill overnight. 

  6. When you are ready to serve, run a sharp knife around the edges and then invert onto a place. Slice and enjoy!

Note: You can make the filling and bake the flan in the same day, however I’ve found that if you have the time and refrigerate the custard overnight, the grapefruit flavors really meld together and the custard is a little more stable. Just make sure to stir the filling well before pouring it into the pan.

Another note: I recommend using a shallow, round glass dish (like Pyrex) with straight sides, if you have it. My mother-in-law has the perfect flan dish (she got it as a wedding present) and its the only dish that is allowed to be involved in the flan process in our family. Unfortunately, I don’t have my own of this magical dish, so I tested this recipe using a glass pie plate with slightly angled sides. This will work okay, but the edges won’t be as clean when you invert it. If you are worried about pretty presentation like me, you can always use a round cutter to punch out individual flans for serving and then keep the scraps for snacking.

Print Friendly and PDF