

Puff Pastry
/
If nothing else, this quarantine period has given us a bounty of time. People who have never had interest in baking before are suddenly churning out loaves of sourdough on a regular basis. We’re signing up for free photography/painting/writing classes online, and working on becoming gardeners or teaching ourselves how to give haircuts. The phrase “It’s a great day to learn something new” has never been truer, so in that ultra-motivated spirit, let’s learn to make puff pastry at home!
Puff pastry is a bit of an outsider in the pastry world. It’s like that person who is friends with everyone so they don’t fit squarely into a specific group (but their versatility makes us love them even more). Puff pastry is a laminated dough, like croissants and danishes, but because it doesn’t use yeast or natural leavening, it’s not technically considered a viennoiserie (the French word for leavened pastries with added sugar, butter, eggs, and usually laminated—its the bridge category between breads and pastries). There are four main types of puff pastry, and I would venture to say that three of them are best left up to professional bakers with sheeting machines in order to save a lot of headaches. Traditional puff pastry is sheeted similarly to croissant dough, with a detrempe (dough) that envelops a butter block that’s then rolled and folded to create lots of flaky layers. Italian puff pastry includes eggs and white wine in the dough and is mixed more intensively than other puffs. Inverted puff pastry laminates the butter on the outside of the dough, rather than the inside creating a flakier, crispier pastry (and really needs fancy equipment like a reversible dough sheeter, which I unfortunately do not have the space or money for in my tiny duplex kitchen). Finally, blitz (or rough) puff pastry is the most basic and quickest puff pastry and it’s what we are going to learn today.
To make blitz puff pastry, cold butter is worked into the dough into pea-sized chunks, as if you are making a pie or tart dough. The dough is then given a series of folds over the course of a couple hours to create those flaky layers before it’s tucked in for an overnight chill. Below, I’ve broken down two of the most common types of dough folds, used in any laminated dough, and added pictures to help you better understand exactly what each should look like.
P.S. I’ll be sharing a few different recipes later this week that use this blitz puff pastry so keep an eye out!
Double Fold

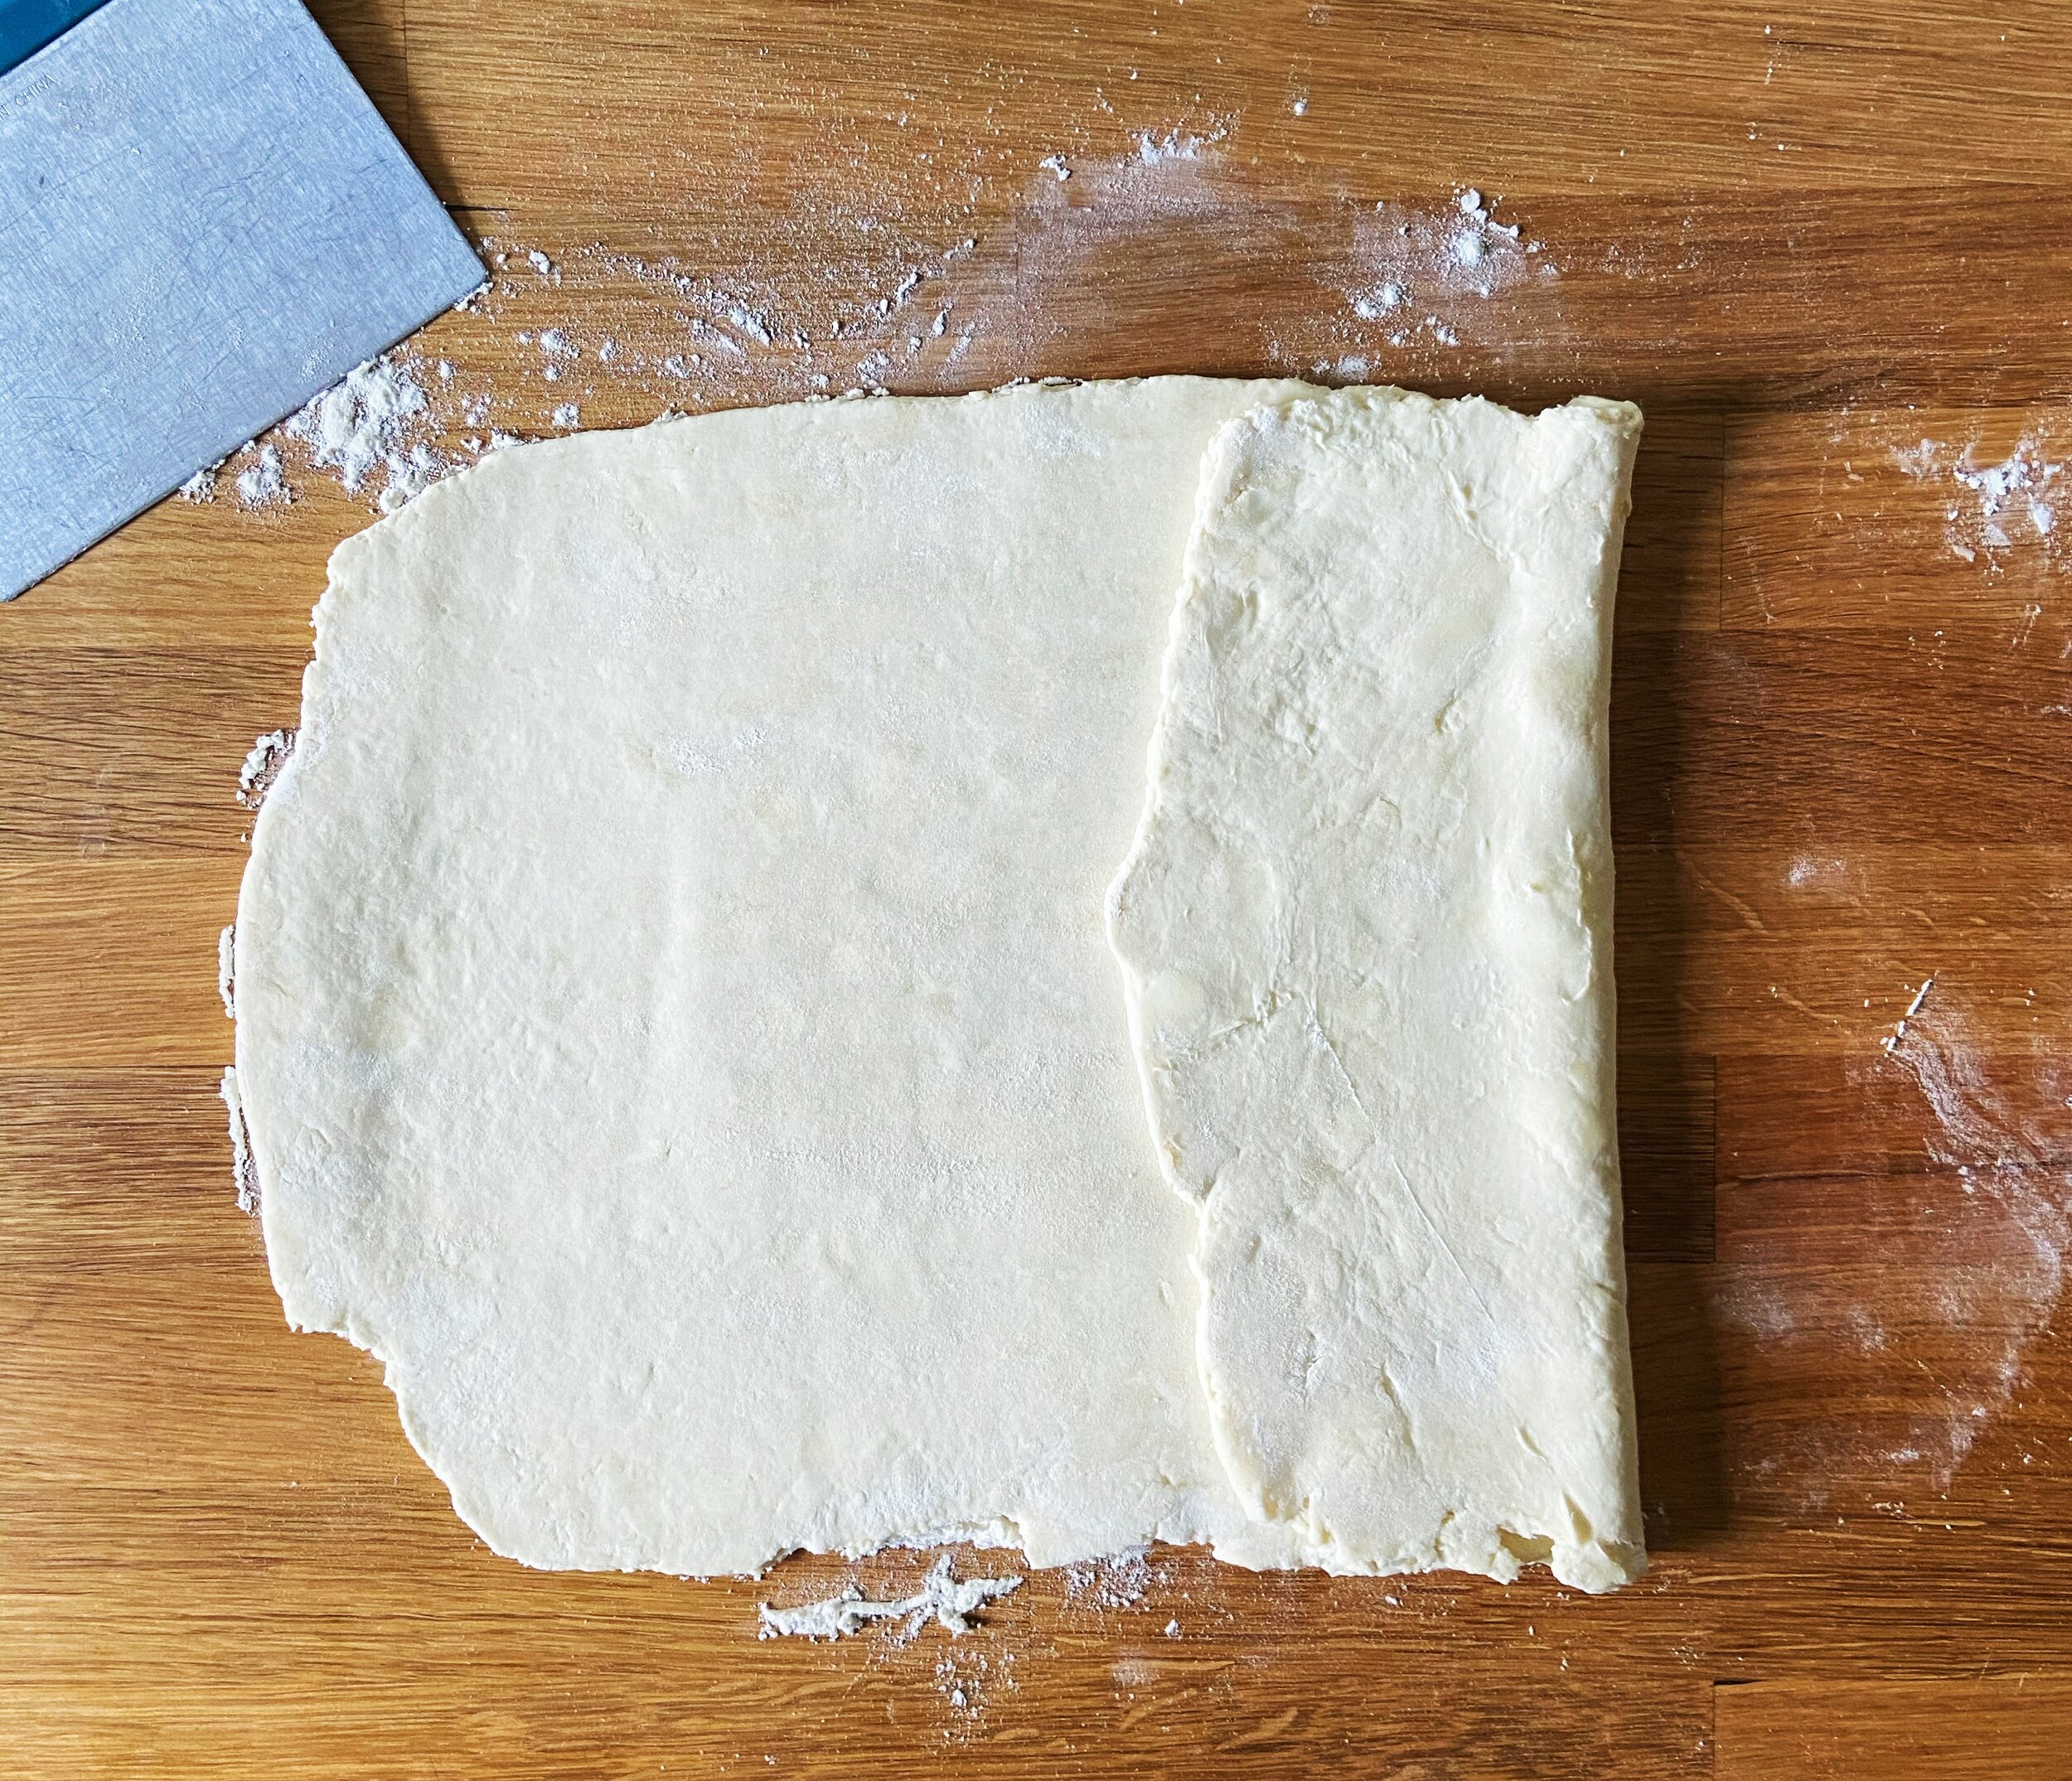
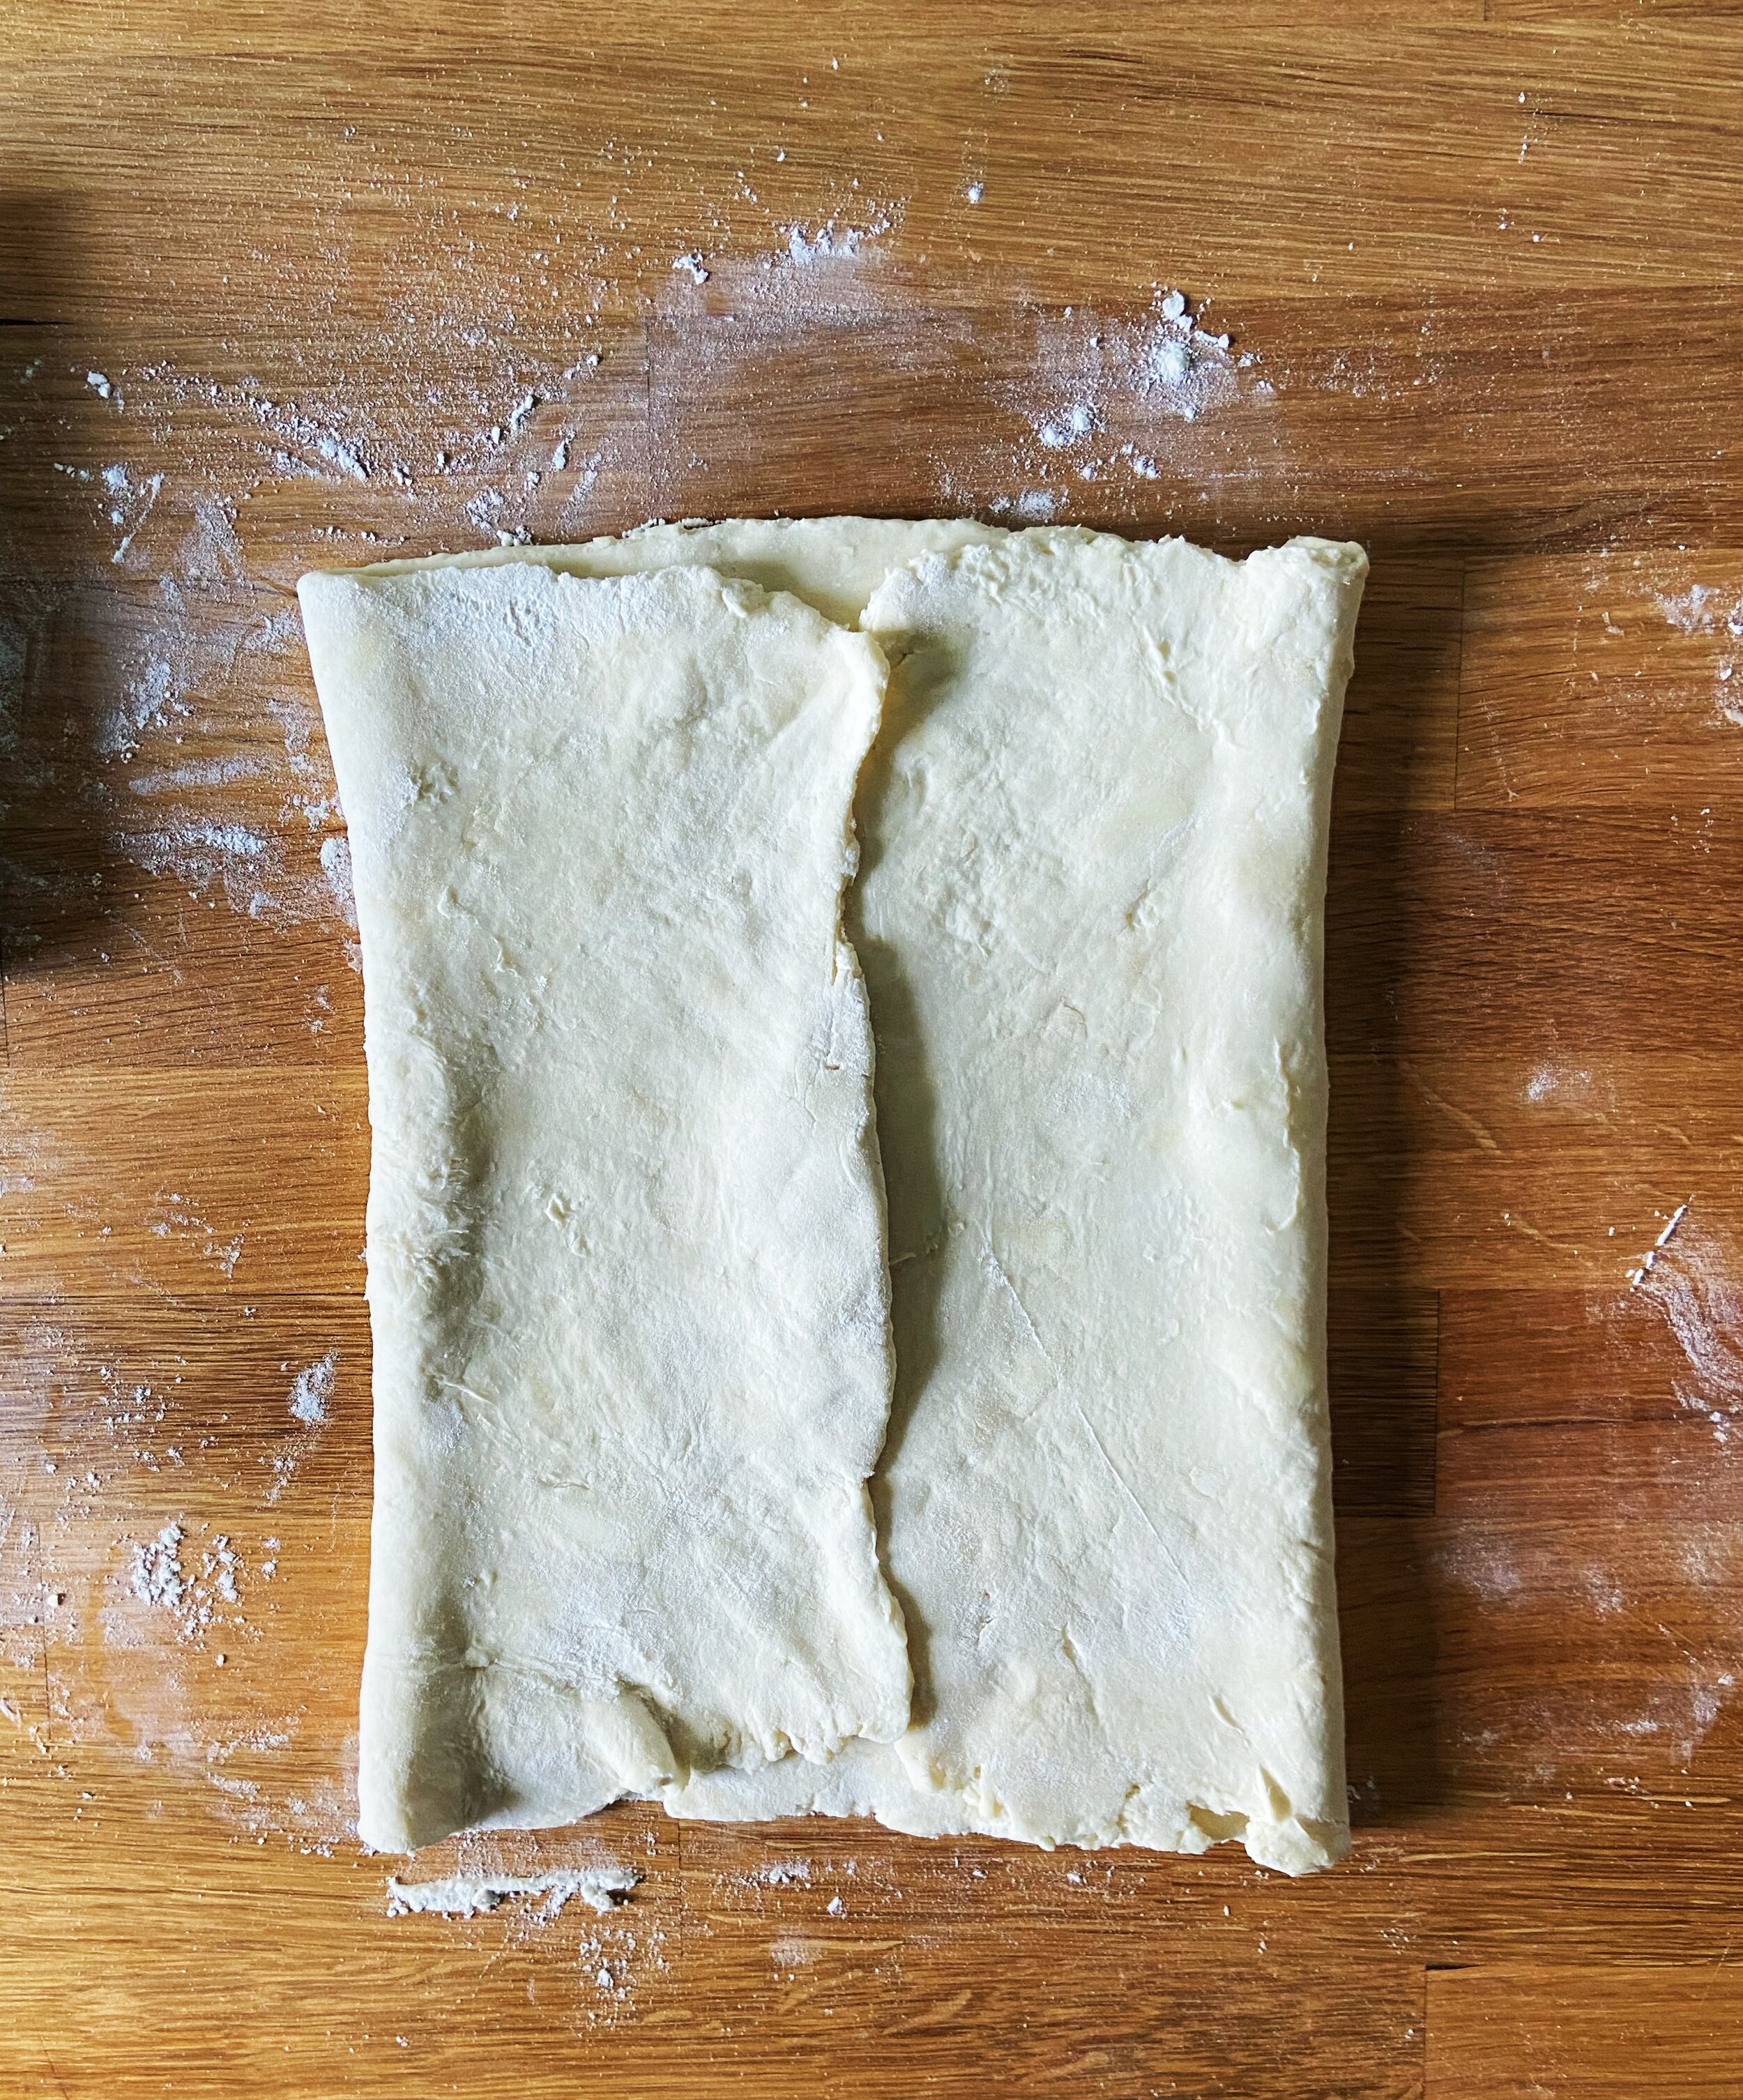

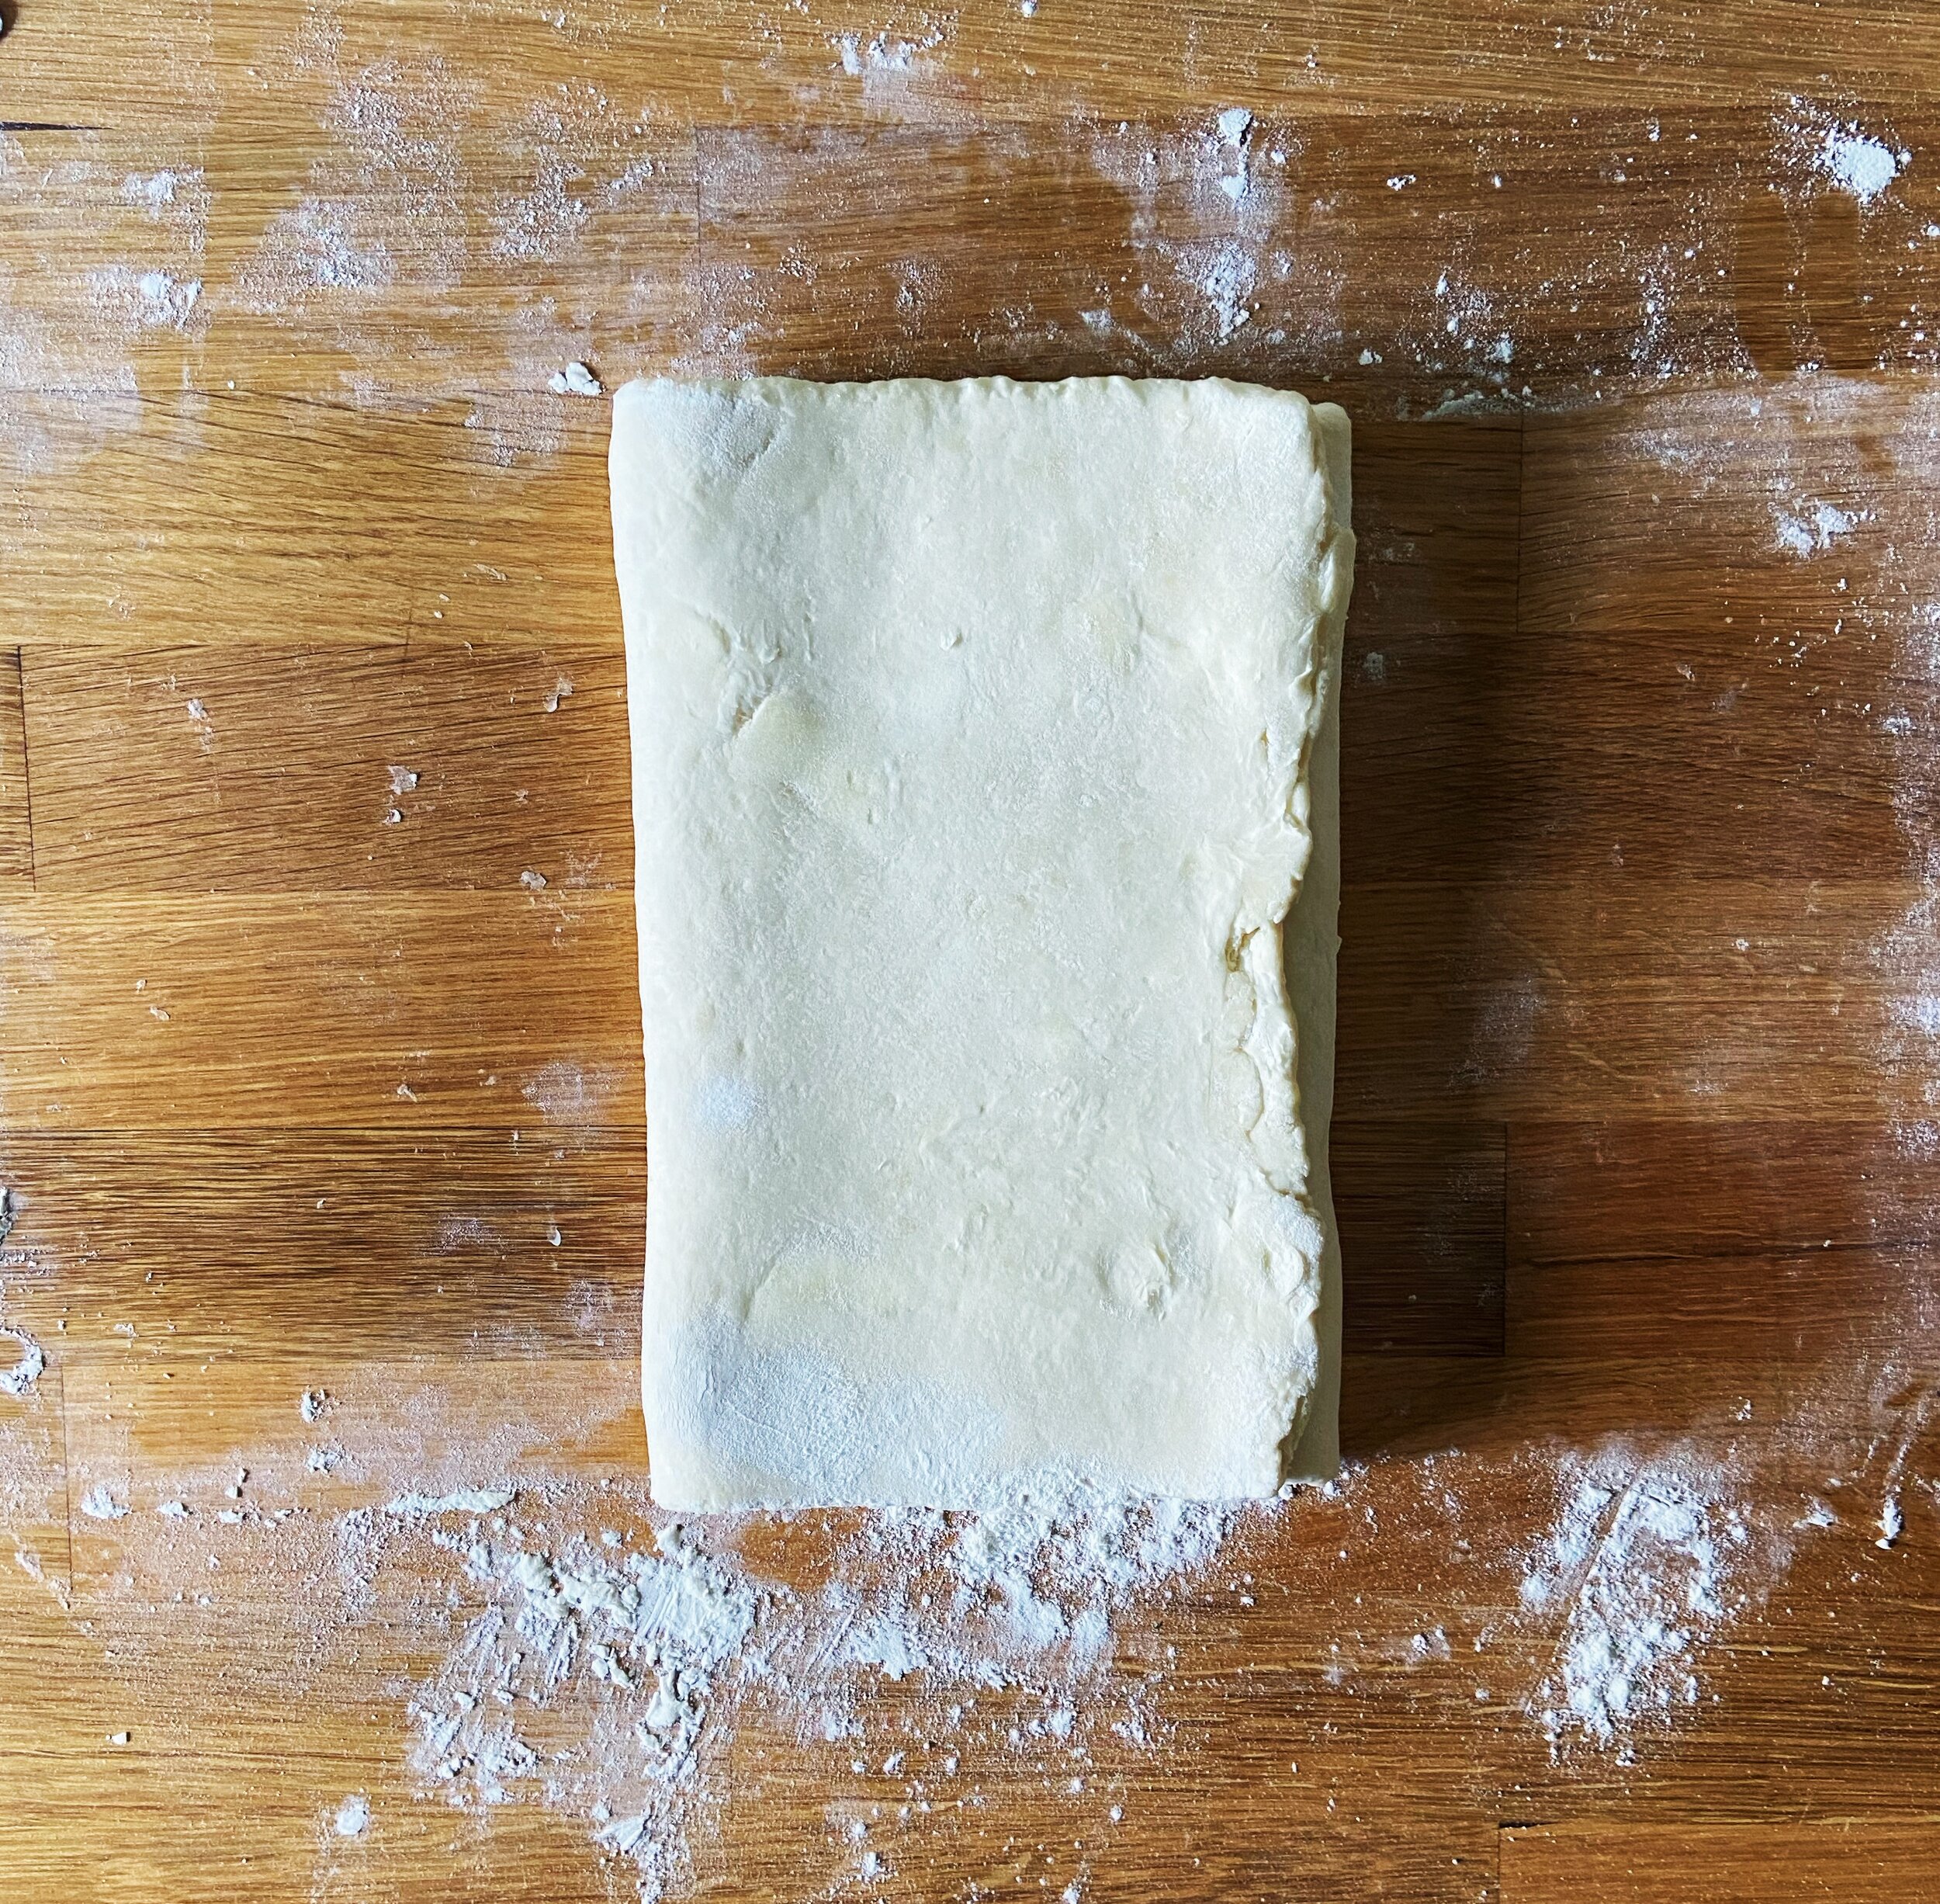
A double fold is usually the first fold completed in a laminated dough. One of my professors in pastry school referred to it as the “church door fold” and it’s very much like closing doors. The dough is rolled to a rectangle and then the edges are folded in to meet in the middle, like closing a double door. The dough is then folded in half, like closing a book.
Single Fold


A single fold, or letter fold, is the most common laminating fold. The dough is simply rolled to a rectangle shape and then folded in thirds like a letter.
Blitz Puff Pastry
Yield: 2 lbs puff pastry dough
Ingredients
14 oz (397 g) all purpose flour
10.5 oz (298 g) unsalted butter, cold and cubed
2 tsp kosher salt
1 tsp lemon juice
7 oz (198 g) cold water
Procedure
In the bowl of a stand mixer fitted with the paddle attachment, combine flour and salt. Mix on low speed for 30 seconds, just to combine.
Add the cold, cubed butter to the pie dough and mix on medium-low speed until butter is broken up into pea-sized cubes throughout the flour. This is should resemble pie dough and the butter should not be completely combined.
In a measuring cup, combine lemon juice and water. With the mixer running on low speed, gradually stream in water mixture and mix until just barely combined. Be careful here not to overmix!
Turn the dough onto a well-floured work surface and gently press into a rectangular shape. Wrap in plastic wrap and refrigerate for 30 minutes.
Lamination
For the lamination process, we will complete a series of five folds in total in three intervals. *refer to the photos above for a visual reference of the folds*.
Turn #1: Remove dough from refrigerator, unwrap and place onto your well-floured work surface. Roll the dough into a large rectangle, 18x12” and is about 1/4” in thickness. Make sure that the 18” length of the dough is the horizontal end. Take the far-edge of the dough and fold it in, about 1/3 of the length. Then take the far-left edge of the dough and fold it 2/3 of the way in, until it meets the edge of the first fold just off-center of your rectangle. Grab the left side of the dough and fold it in half like you are closing a book. You will have just completed what’s called a double fold. Wrap the dough in plastic wrap again and return to the refrigerator to chill for another 30-45 minutes.
Turn #2: Remove the dough from the refrigerator and bring back to your well-floured work surface. This time, you will complete two single-folds. Again, roll the dough back out into your 18x12” rectangle with 1/4” thickness. Bring the right edge of the dough in 1/3 of the way, like you are folding a letter. Then bring the left edge of the dough over the right all of the way over the folded right side. This is one single fold. Turn the dough 90° so that the open sides are now facing horizontally. Roll the dough back out to your 18x12” rectangle and fold like a letter one more time. Re-wrap the dough and return to the refrigerator for another 30-45 minute rest.
Turn #3: This last turn will consist of the exact same folds as turn #2. Roll the dough out to the 18x12” rectangle, fold like a letter, and then turn 90° and repeat the whole thing. Re-wrap the dough tightly and return to the refrigerator. Let the dough rest overnight and then use however you would like! You can also divide the dough into two, 1-lb squares, wrap them individually and then freeze them for later use. If freezing the dough, be sure to let them defrost in the refrigerator overnight before you plan to use them.
Note: When you are completing folds back to back, remember that the dough should always be turned 90° between folds so that the open edges are facing horizontally.
more recipes like this…

classic croissants

traditional baklava

chocolate tahini brioche babka

fig and blue cheese rugelach

